
5 Series E60 M5 (S85) SAL
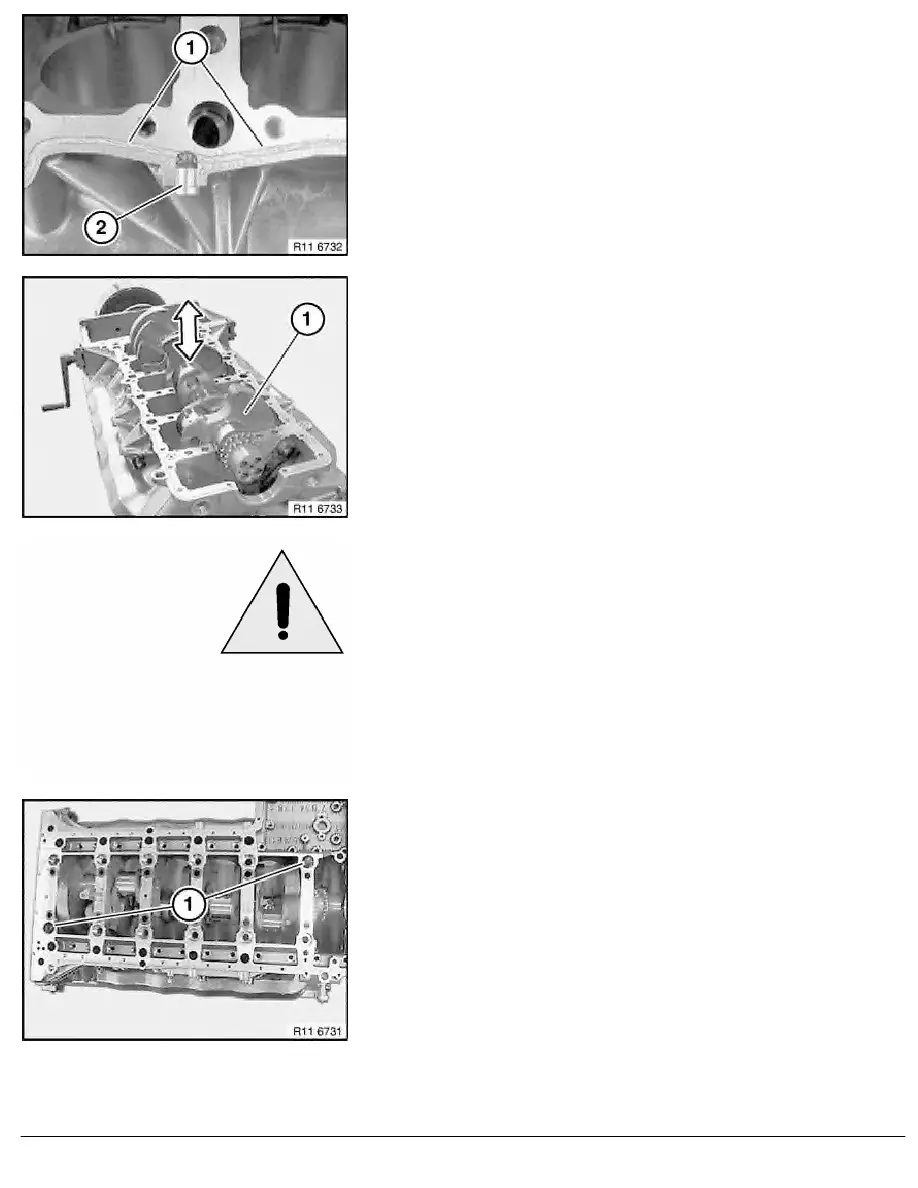
Remove sealing compound from joint (1).
Carefully clean threads and contact faces in upper and lower
sections of crankcase.
Installation:
Replace nozzles (2).
Installation:
Apply a light coating of engine oil to bearing shells.
Lay crankshaft (1) with a second person helping in direction of
arrow into crankcase.
Note:
Weight of crankshaft approx. 22 kg.
Important!
Adhere without fail to the specified sequence of bedplate bolt
connections.
Risk of damage to crankshaft.
Leaks at bedplate/crankcase.
Note:
There are no more dowel sleeves in the crankcase.
Position bedplate on crankcase.
Important!
Do not use new bolts.
If new bolts are used, observe special tightening/torque
specifications.
Position lower section diagonally on bearing blocks (1 and 6)
using two fit bolts (1).
Join fit bolts (1) to 8 Nm.
RA Replacing crankshaft (S85)
BMW AG - TIS
22.02.2013 16:18
Issue status (12/2007) Valid only until next DVD is issued
Copyright
Page - 3 -