
5 Series E60 M5 (S85) SAL
Note:
Measurement at central line (VANOS oil pressure).
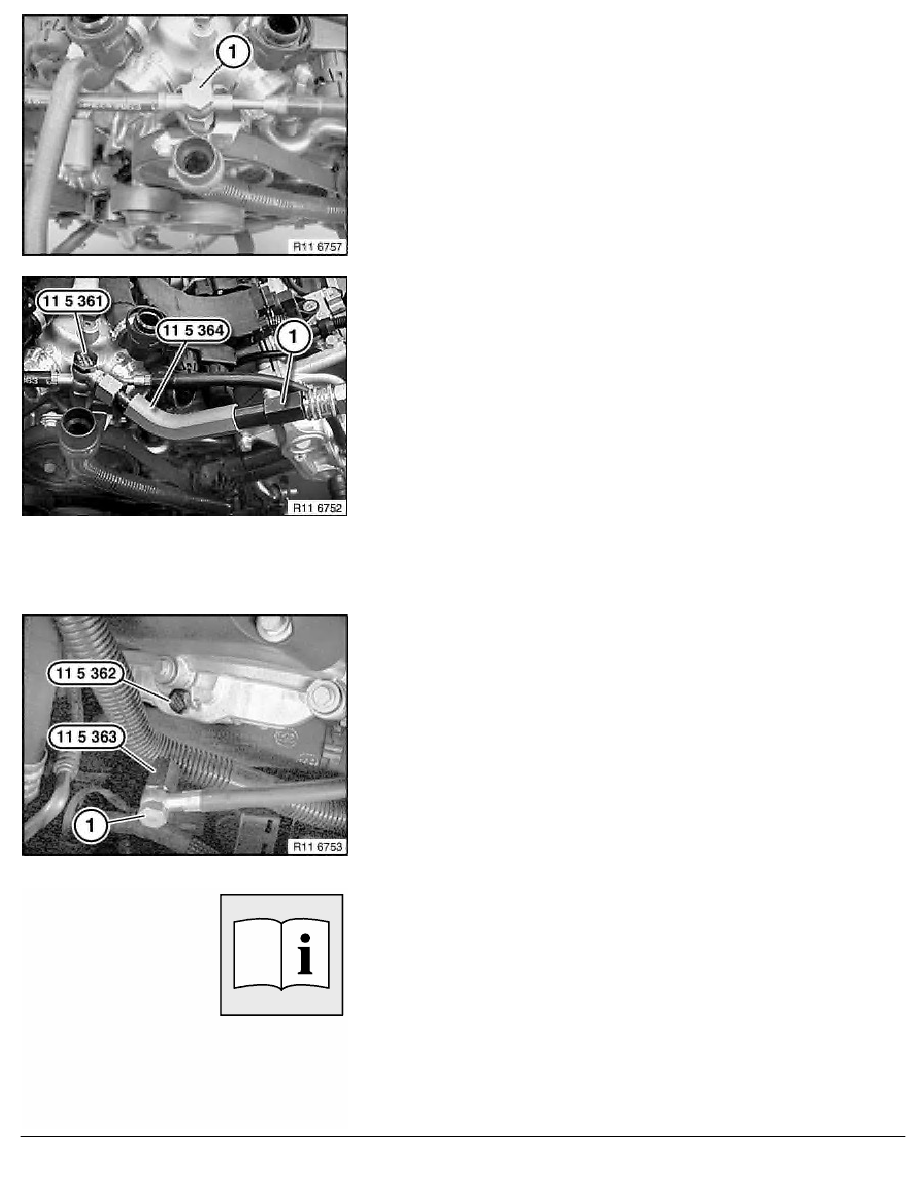
Release banjo bolt (1).
Tightening torque: 11 36 2AZ.
Installation:
Replace all sealing rings.
Screw in special tool 11 5 361 with ring connection.
Tightening torque: 11 36 2AZ.
Secure special tool 11 5 364 at ring connection to 25 Nm.
Screw down (400 bar) pressure sensor (1) at special tool
11 5 364 to 25 Nm.
Order number 400 bar sensor: 81 31 0 417 530.
Installation:
New sealing rings must be used between the pressure lines and
the ring connection.
Note:
Illustration shows intake air manifold removed.
Follow diagnosis instructions.
Note:
Selective bank (1 and 2) measurement:
Follow diagnosis instructions.
Disconnect VANOS high-pressure line from cylinder head.
Screw in special tool 11 5 362 with sealing ring on cylinder
head.
Tighten special tool 11 5 362 to 25 Nm.
Bolt banjo bolt (1) with VANOS high-pressure line to special tool
11 5 363 .
Tightening torque: 11 36 2AZ.
Assemble engine.
There is air in the VANOS system once it is opened.
In the first few seconds after startup this can result in a clearly
discernible "rattling noise".
This rattling noise does "not" indicate incorrect assembly.
The rattling noise will disappear as soon as the oil pressure has
built up and the system has vented.
Carry out venting procedure with diagnosis tester.
Perform VANOS test.
RA Checking oil pressure of VANOS adjustment unit (S85)
BMW AG - TIS
22.02.2013 16:43
Issue status (12/2007) Valid only until next DVD is issued
Copyright
Page - 2 -