
5 Series E60 M5 (S85) SAL
•
Call up test image via diagnosis for height adjustment
Switch on test image for max. 1/2 hour.
If test image is operated for a longer period, switch fan to
speed 3 to avoid overheating.
Important!
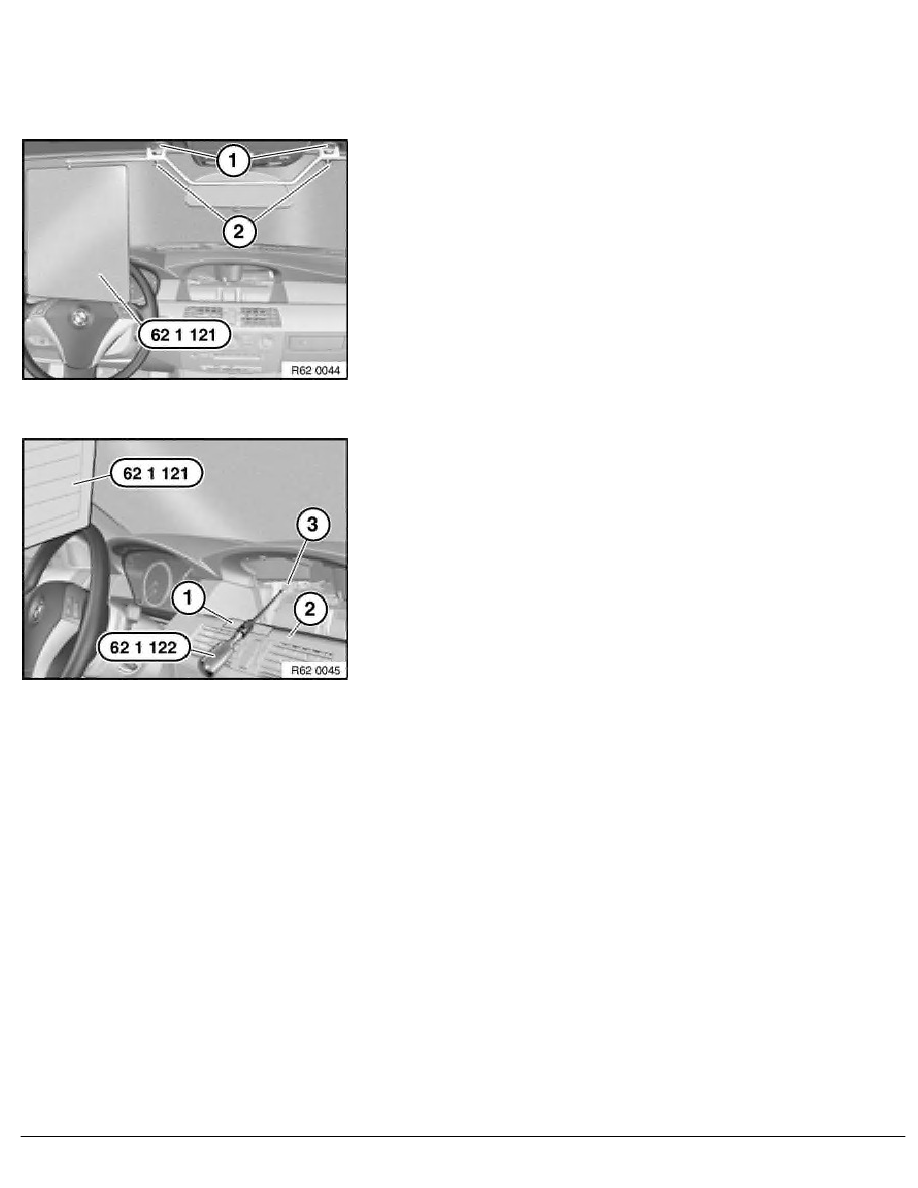
Do not scratch windscreen when installing and removing
special tool 62 1 121 .
Carefully engage special tool 62 1 121 in both counter-
supports (1) of sun visors.
Note:
If special tool 62 1 121 is difficult to engaged, if necessary
release its adjusting screws and turn/switch the associated
locators.
Center special tool 62 1 121 and secure with adjusting
screws (2).
Check height adjustment using scale on special tool 62 1 121 .
If height adjustment is not correct:
•
Remove on-board monitor
•
To avoid damage: apply fabric adhesive tape (1) in
area of on-board monitor to decorative strip on
instrument panel on right side (2).
•
Fit special tool 62 1 122 as illustrated on lock nut (3).
•
Release lock nut (3).
•
Correct height adjustment by turning eccentric.
•
Secure lock nut (3), tightening torque 62 30 1AZ
Switch off ignition.
RA Adjusting head-up display (height adjustment)
BMW AG - TIS
23.02.2013 06:19
Issue status (12/2007) Valid only until next DVD is issued
Copyright
Page - 2 -