
5 Series E61 520d (M47T2) TOUR
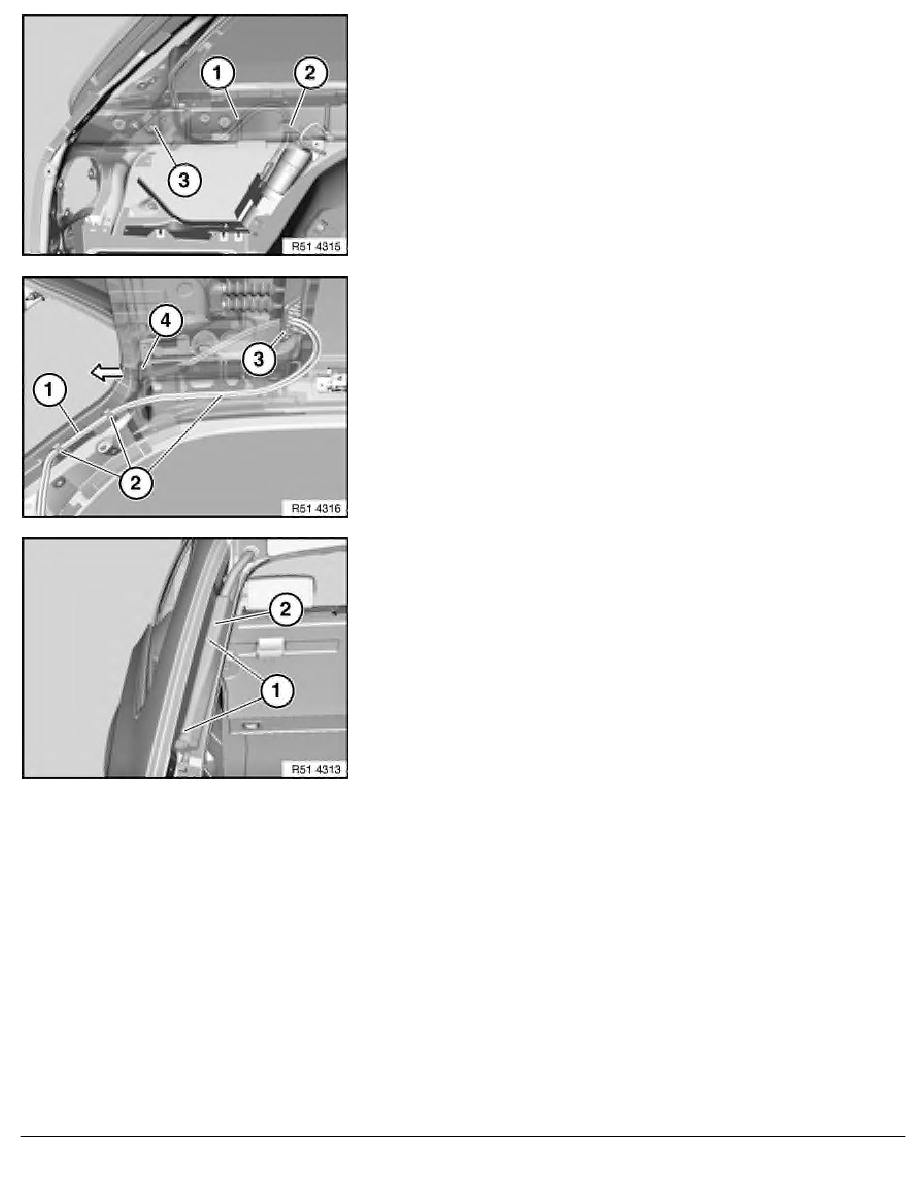
Unclip hydraulic lines (1) from bracket (2) and feed out through
side panel (3) on inside.
Note:
After removal, join hydraulic lines (1) together.
Unclip hydraulic lines (1) from brackets (2).
Feed hydraulic lines (1) out of grommets (3 and 4) in direction
of arrow.
Installation:
Check fluid level in hydraulic unit, correct if necessary.
Installation:
Cover (2) must be correctly connected with screws (1).
Replacement:
Only remove transportation guard of piston rod immediately before
attaching ball socket.
Once the new hydraulic cylinder (2) has been installed, the
system must detect the "Rear lid open" deactivation point.
-
Disconnect and connect battery.
-
Press button on rear lid.
-
Hydraulic unit runs for 13 seconds (regardless of rear lid
setting) in "Open" direction.
RA Removing and installing/replacing hydraulic cylinder for rear lid (electrohydrau
BMW AG - TIS
26.01.2013 04:19
Issue status (12/2007) Valid only until next DVD is issued
Copyright
Page - 2 -