
6 Series 645Ci (N62) Coupe
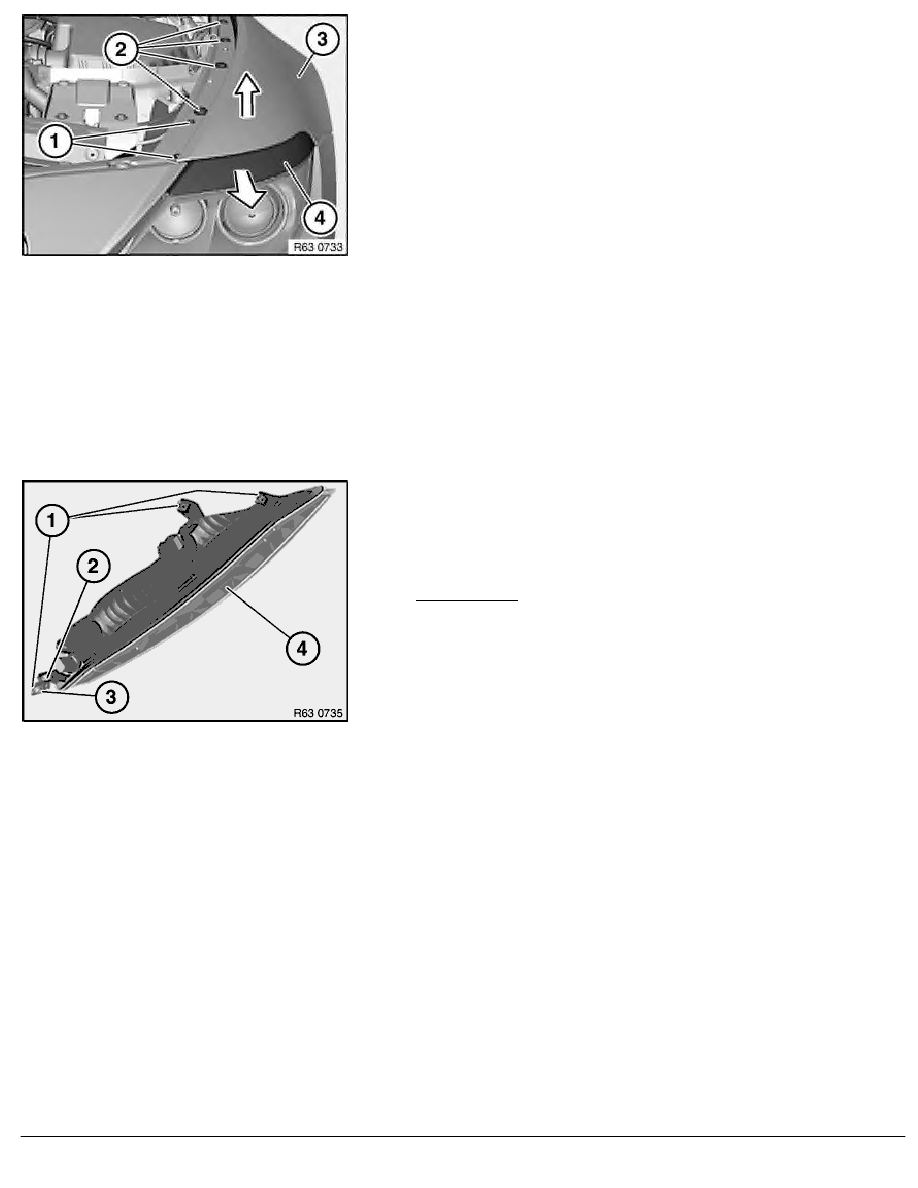
Note:
Spacers may be fitted between the front side panel (3) and the
front wheel arch. If necessary, remove spacers when releasing
screws (1) and (2).
Release screws (1). Tightening torque
63 13 2AZ
.
Release screws (2) and remove with plastic washers. Tightening
torque 41 35 1AZ
.
Raise front side panel (3) slightly and feed out front direction
indicator (4) in direction of travel.
Disconnect associated plug connection and remove front direction
indicator (4).
Installation:
Make sure the side panel reinforcement and the spacers are
correctly fitted between the front side panel (3) and front wheel
arch.
Observe gap dimensions.
Installation:
Make sure sheet nuts (1) are correctly seated on front direction
indicator (4).
Replacement:
If necessary, release screw (2) and remove holder (3) from front
turn signal lamp (4). Tightening torque 63 13 3AZ
.
Note:
Adjust direction indicator to fit by means of screw (2). Observe
gap dimensions.
If necessary, remove bulbs for direction indicator.
RA Removing and installing/replacing complete front left turn signal lamp
BMW AG - TIS
18.01.2013 11:27
Issue status (12/2007) Valid only until next DVD is issued
Copyright
Page - 2 -