
6 Series E64 635d (M57T2) CONVER
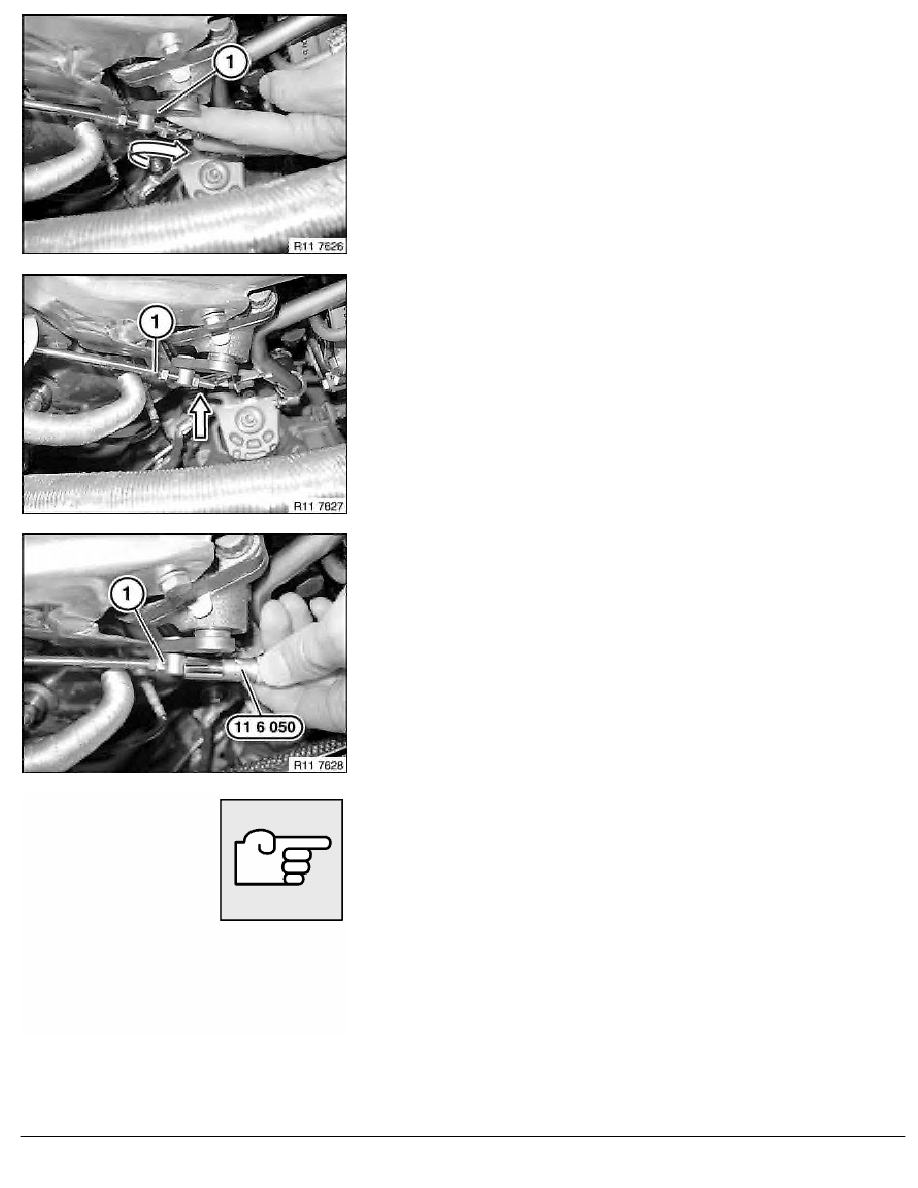
Turn flap control (1) of main control flap in direction of arrow
(clockwise) to closed.
Bring adjustment nut into contact with linkage (1), see arrow.
Pretension linkage on vacuum control unit.
Installation:
Mark special tool 11 6 050 with a coloured line.
Pretension adjustment nut on linkage with special tool 11 6 050
by 4 turns .
After adjusting linkage, secure with lock nut (1).
Function test of turbine control flap, refer to Test module, turbine
control flap.
Check function of DDE.
RA Removing and installing/replacing vacuum control unit for turbine control flap (
BMW AG - TIS
02.02.2013 20:45
Issue status (12/2007) Valid only until next DVD is issued
Copyright
Page - 4 -