
7 Series E38 750iL (M73) SAL
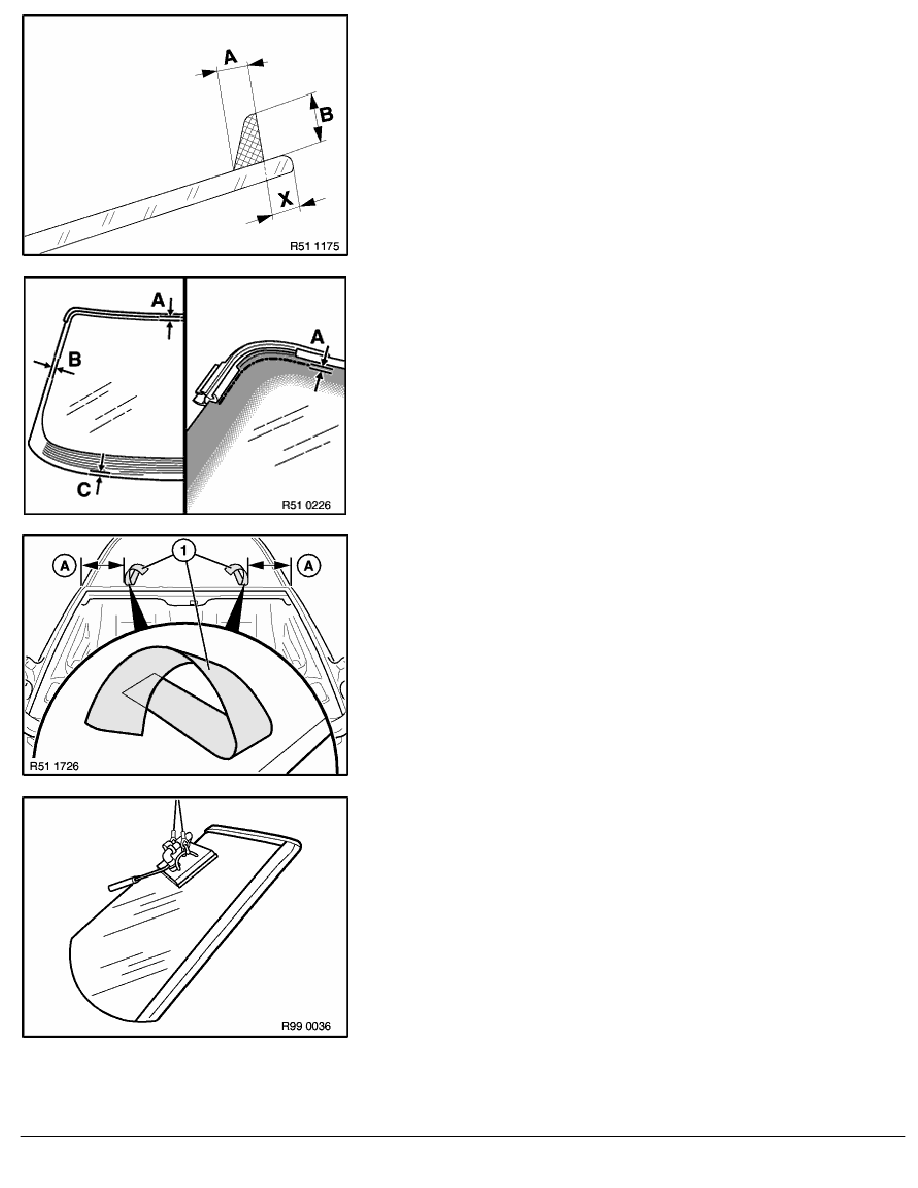
Shape of glue bead:
(A) 7
+1
mm
(B) 11
-2
mm
Caution!
Apply adhesive bead swiftly (and uniformly) and install
windshield. Maximum skin formation time of adhesive is
10 minutes.
Maintain distance (X) to edge of windshield,
refer to measurement (A) to (C) in next work step.
Maintain the distance (A) of the upper glue bead to the gasket,
(B) at side and (C) bottom along the windshield edge.
(A) 1 mm
(B) 2 mm
(C) 4 mm
Uniformly apply cement beads in corners of seal at top and at
break in sealing lip.
Note:
Adhesive area for plastic adhesive tapes (1) must be free of
grease and dust.
Attach two yellow plastic adhesive tapes (1) (Tesa)
to roof at a distance (A) from outer corners.
Length: 400 mm
Width: 50 mm
(A) 250 mm
Switch on vacuum pump.
Firmly attach special tool 51 9 002 to outside of windshield in
center in upper third.
RA Removing and installing windshield (Protection)
BMW AG - TIS
21.02.2013 01:49
Issue status (12/2007) Valid only until next DVD is issued
Copyright
Page - 14 -