7 Series E38 750iL (M73) SAL

Caution!
To ensure long-term corrosion protection, it is absolutely
essential to repair paintwork damage (scratches and large-
surface damage),
refer to 51 31 ...
Immediately before installing rear window:
Remove glue residue from body aperture to thickness of approx.
0.5 mm.
To avoid damaging paintwork in body cutout,
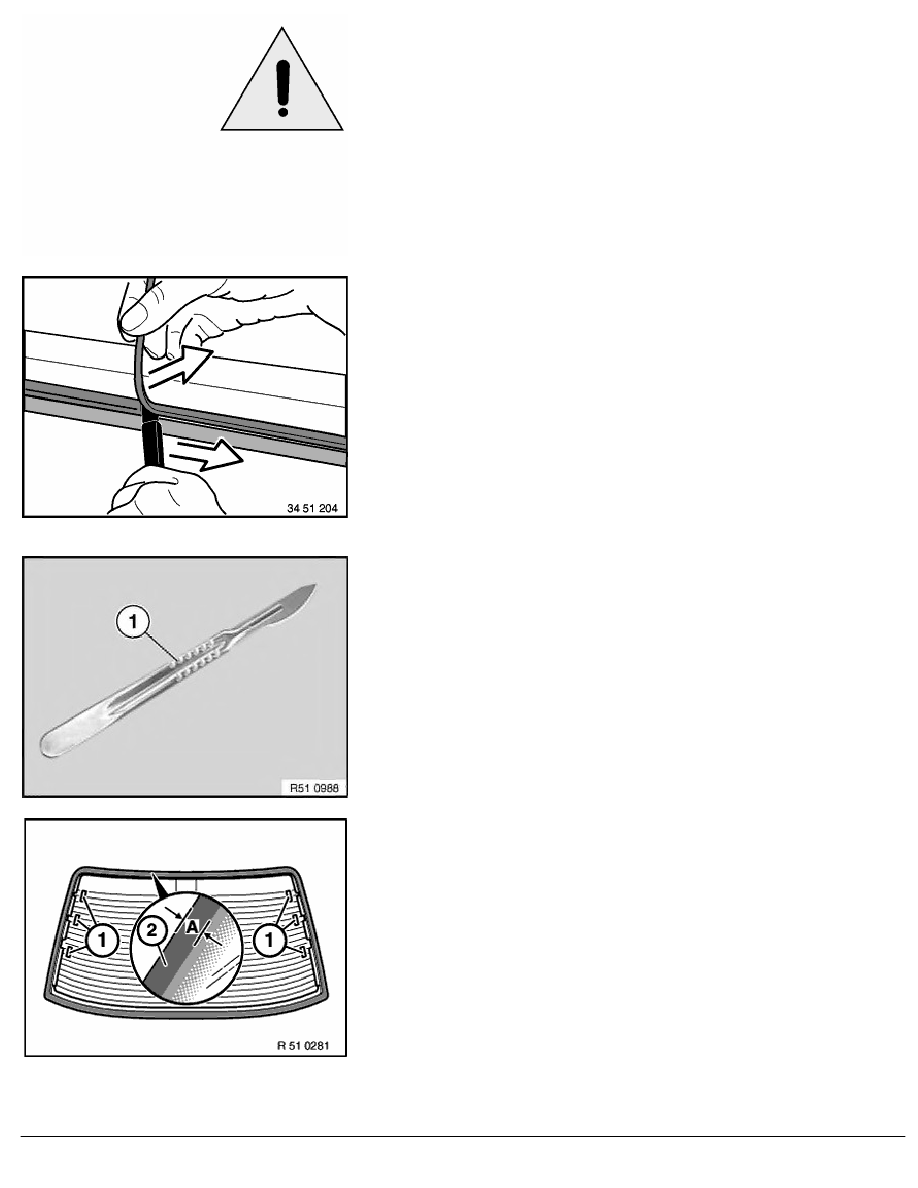
carefully remove glue residue with a scalpel.
Pull off adhesive masking tape all around.
Caution!
Clean freshly cut residual bead with spirit only,
do not, under any circumstances, use Sika bonding agent
205/5.
When reusing the rear window:
Remove glue residue on rear window
with a scalpel (1) for heavy-duty applications
to approx. 0.5 mm.
Secure cable (1) (rear window heating/antenna) with adhesive
tape.
Treat rear window in glued area (A) with BMW-approved materials
(2) (repair kit, Sourcing Reference: BMW Parts Service),
refer to 51 31 ...
(A) = 21 mm
Note:
Note specified ventilation time.
RA Removing and installing rear window
BMW AG - TIS
21.02.2013 01:51
Issue status (12/2007) Valid only until next DVD is issued
Copyright
Page - 5 -
