
7 Series E38 750iL (M73) SAL
Remove right intake filter housing.
All:
Disconnect plug connection.
Release screws. Disconnect suction and pressure lines.
Installation:
Replace sealing rings.
Observe tightening torque, 64 52 1AZ
.
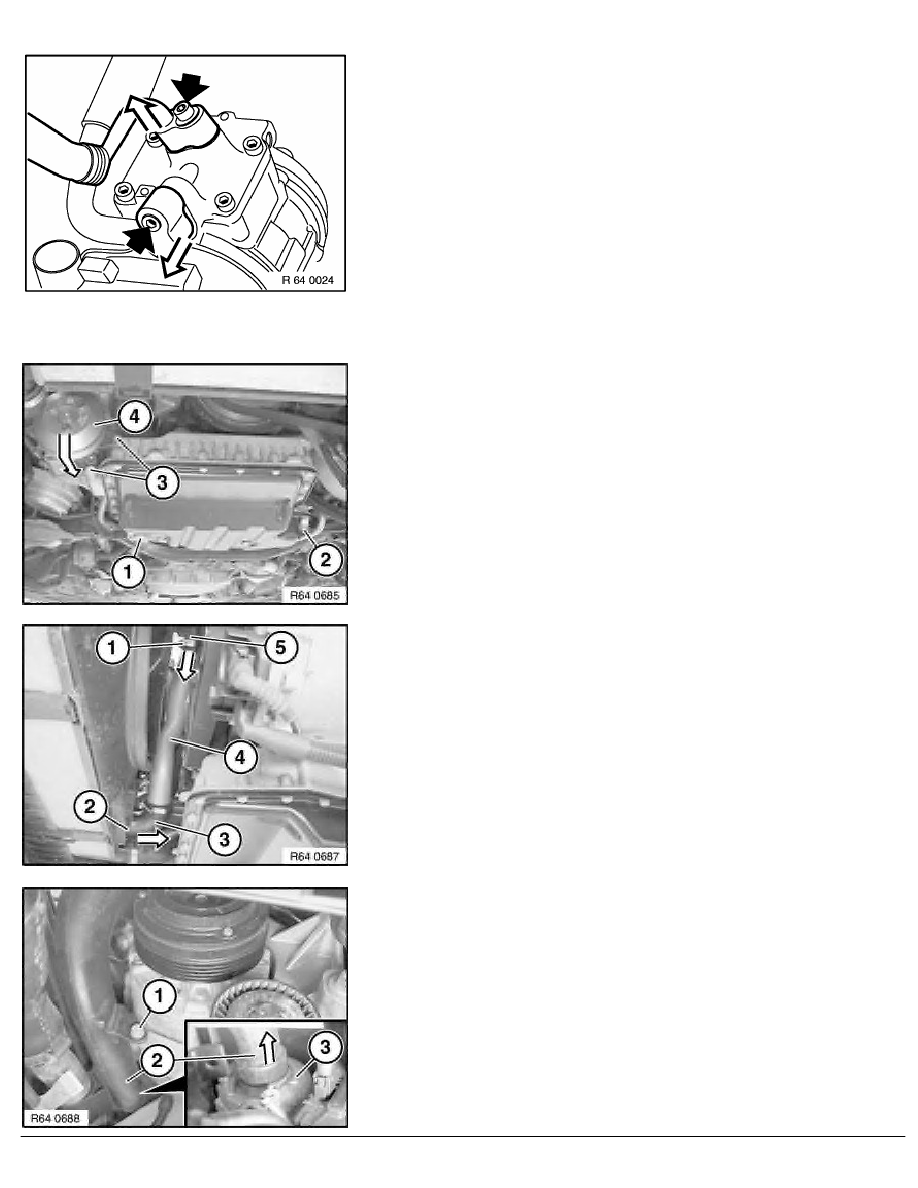
M67 only:
Disconnect plug connection (1).
Release screw (2) on oil line fixture.
Release screws (3).
Installation:
Observe tightening torque, 32 41 1AZ
.
Carefully pull vane pump (4) downwards and press to one side
without bending oil lines connected to vane pump (4).
Loosen hose clamps (1 and 2).
Installation:
Observe tightening torque, 11 65 10AZ
.
Detach lower pressure hose (3) with pressure pipe (4) in
direction of arrow from intercooler.
Detach pressure pipe (4) in direction of arrow from upper
pressure hose (5) and remove.
Release screw (1).
Detach pipe (2) in direction of arrow from turbocharger (3).
Installation:
Check innerlying sealing ring between pipe (2) and
turbocharger (3) for damage, replace if necessary.
Make sure sealing ring is correctly seated.
RA Removing and installing/replacing complete A/C compressor
BMW AG - TIS
21.02.2013 05:30
Issue status (12/2007) Valid only until next DVD is issued
Copyright
Page - 2 -