
7 Series E65 745d (M67TU) SAL
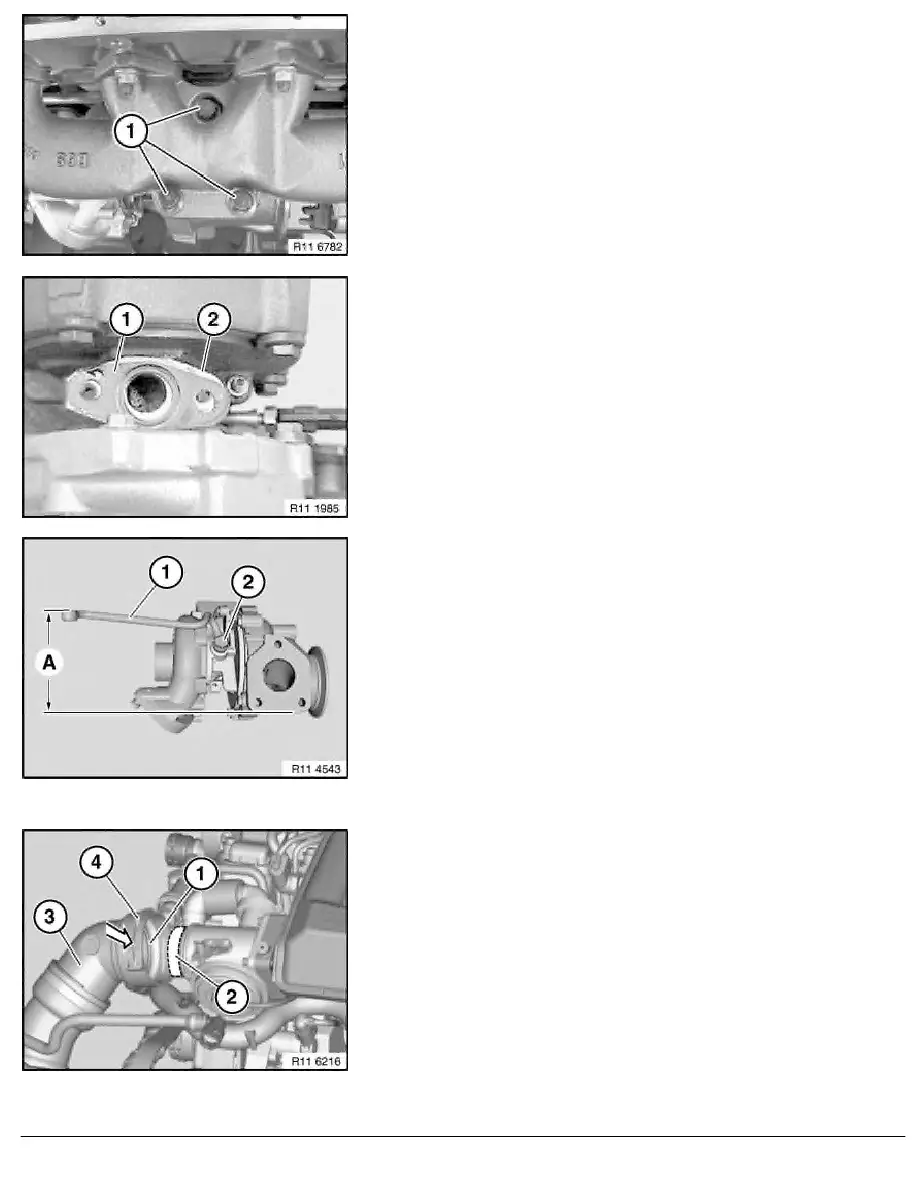
Release bolts (1) with special tool 12 2 100 .
Tightening torque 11 65 1AZ
.
Installation:
Clean sealing face and replace gasket.
Remove exhaust turbocharger.
Installation:
- Replace gasket (1).
- Clean sealing faces (2).
To convert oil pressure line:
1.
Distance (A) = 104.5 mm
2.
Unfasten banjo bolt (2).
Tightening torque 11 65 2AZ
.
3.
Replace sealing rings for banjo bolt (2).
4.
Attach oil pressure line (1) to new turbocharger with banjo
bolt (2).
5.
Adjust distance (A).
6.
Tighten down banjo bolt (2).
7.
Check distance (A).
Installation:
Visually inspect shaped sealing ring (1) for correct seating and
damage.
Coat all mounting fittings with anti-friction agent (2). Refer to
Technical Data.
Lock locking clip (4).
Attach all pressure pipes in direction of arrow.
Installation:
VDA couplings are correctly fitted when they snap into place with
an audible click.
Illustration shows M57TU.
RA Removing and installing or replacing left exhaust turbocharger (M67TU)
BMW AG - TIS
12.02.2013 13:52
Issue status (12/2007) Valid only until next DVD is issued
Copyright
Page - 3 -