
7 Series E65 760i (N73) SAL
Release screw (2) and remove sensor gear (1).
Installation:
Tightening torque 11 31 14AZ
.
Important!
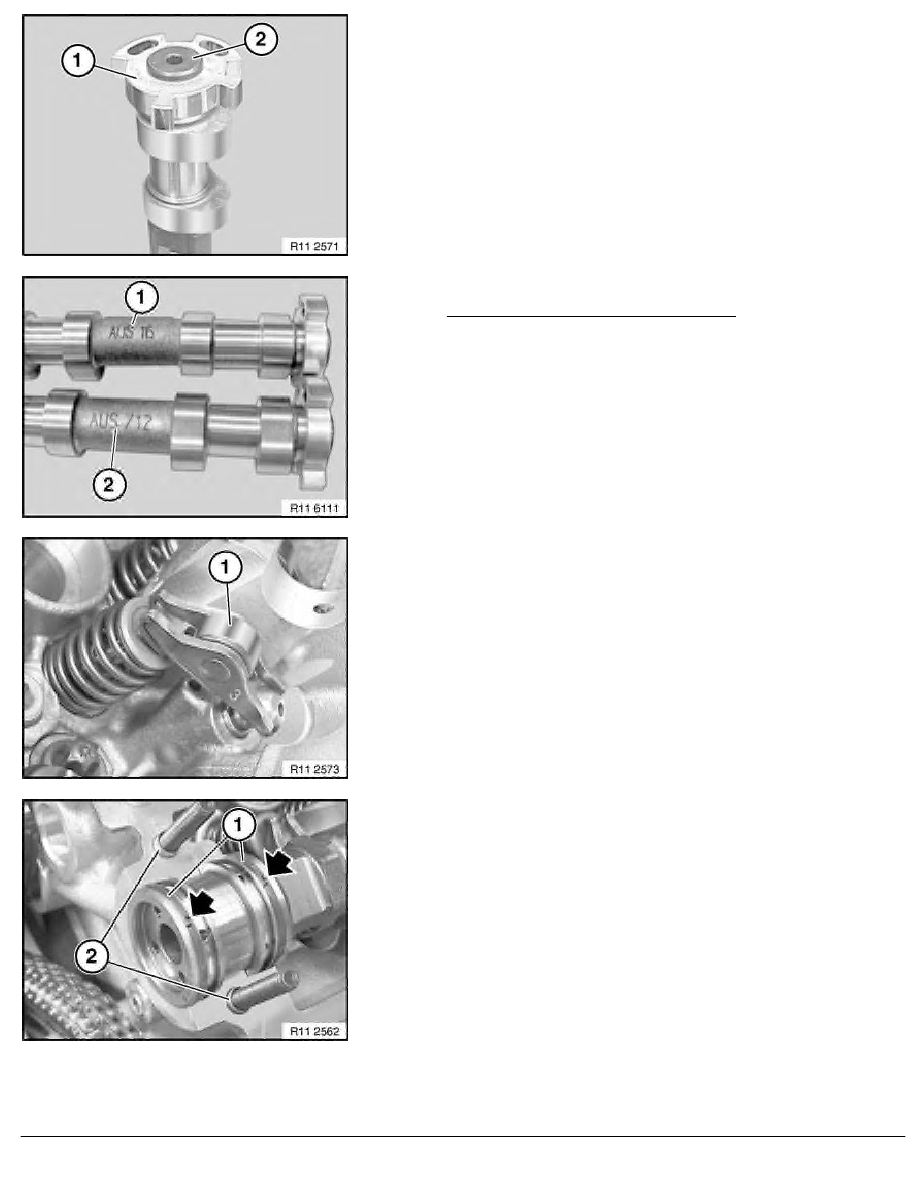
Danger of mixing up exhaust camshafts.
1
Exhaust camshaft for cylinders 1 to 6 is marked as shown in
illustration with AUS 16.
2
Exhaust camshaft for cylinders 7 to 12 is marked as shown in
illustration with AUS 712.
Important!
Make sure rocker arms (1) are secured as illustrated on
hydraulic valve clearance compensating elements and on
valves.
Used rocker arms may only be reused in the same position.
Check dowel sleeves (2) for damage and correct installation
position.
Ends of compression rings point upwards.
RA Removing and installing/replacing left exhaust camshaft (N73)
BMW AG - TIS
18.02.2013 10:38
Issue status (12/2007) Valid only until next DVD is issued
Copyright
Page - 2 -