
7 Series E66 735Li (N62) SAL
31 12 000
Removing and installing/replacing left or right
control arm
Important!
Observe safety instructions for raising the vehicle.
Note:
If the control arm is detached from the front axle carrier, it is
necessary after reinstallation to carry out a wheel/chassis
alignment check.
Necessary preliminary tasks:
•
Remove front wheel
•
If necessary, remove steering gear cover at side
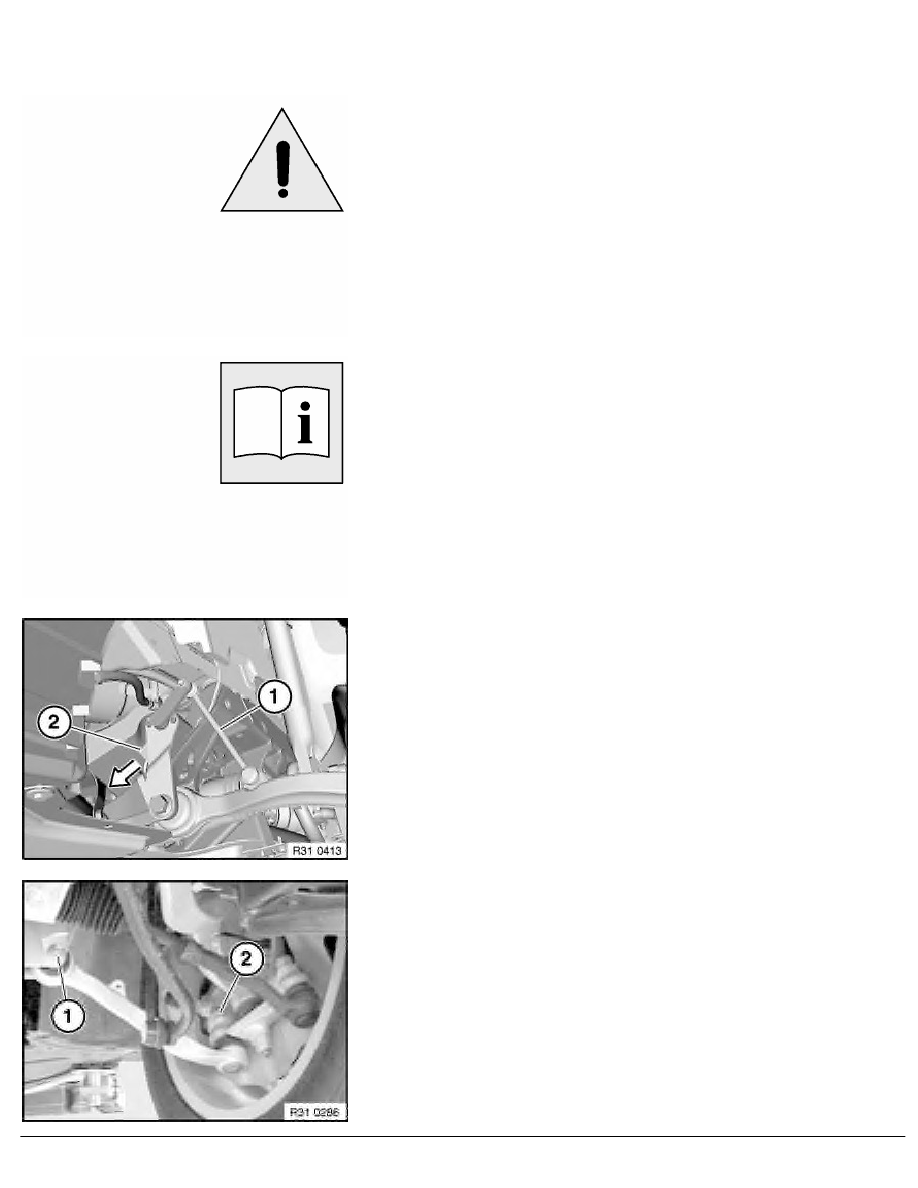
Release nut (jointed rod on control arm).
Remove jointed rod (1) from control arm.
If necessary, disconnect plug connection (2) from ride-height
sensor
Release nut (1) and remove screw towards rear.
Only on right side: Remove bracket with ride level sensor.
Installation:
Replace self-locking nut.
Tightening torque 31 12 2AZ
.
Release nut (2); if necessary, grip at Torx socket.
Take off control arm.
Installation:
RA Removing and installing/replacing left or right control arm
BMW AG - TIS
08.02.2013 19:58
Issue status (12/2007) Valid only until next DVD is issued
Copyright
Page - 1 -