
X Series E53 X5 4.8is (N62-S) OFFRD
Note:
Removal of intermediate levers is described on 4th cylinder. The
same procedure is applicable to cylinders 1 to 3.
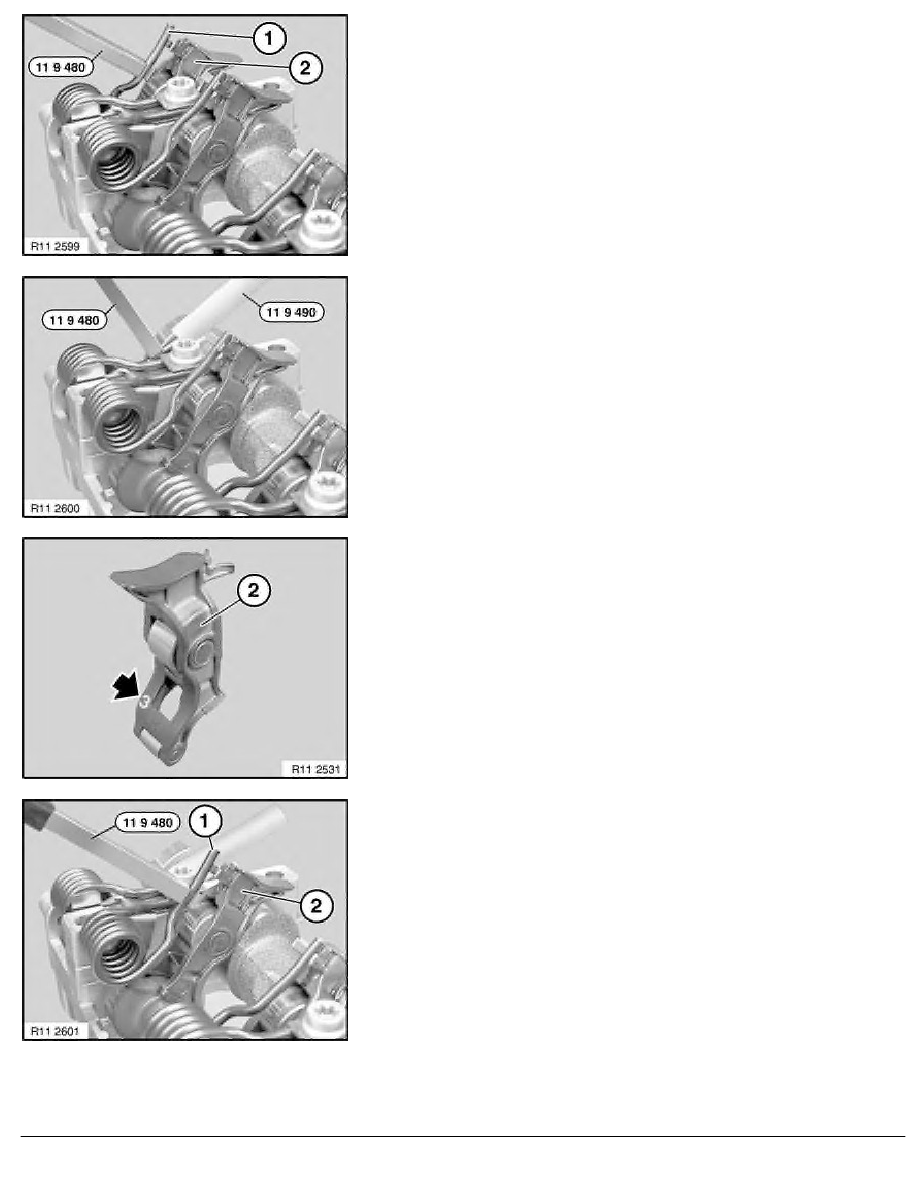
Raise one end of torsion spring (1) with special tool
11 9 480 .
Lift out intermediate lever (2) and set down in an orderly fashion.
Important!
Keep holding torsion spring (1) with special tool 11 9 480 .
Attach special tool 11 9 490 to end of torsion spring.
Support end of torsion spring protected with special tool
11 9 490 on inlet camshaft.
Important!
Intermediate levers (2) are divided into individual tolerance
classes.
Only intermediate levers of the same tolerance class may be
fitted in a single cylinder head.
The tolerance classes are designated as illustrated with the
numbers from 1 to 5.
Used intermediate levers (2) may only be reused in the same
position.
Raise second end of torsion spring (1) with special tool
11 9 480 .
Lift out intermediate lever (2) and set down in an orderly fashion.
Important!
Keep holding torsion spring (1) with special tool 11 9 480 .
RA Removing and installing/replacing right intermediate lever (N62 to 9/03)
BMW AG - TIS
12.02.2013 04:31
Issue status (12/2007) Valid only until next DVD is issued
Copyright
Page - 5 -