
X Series E70 X5 4.8i (N62TU) OFFRD
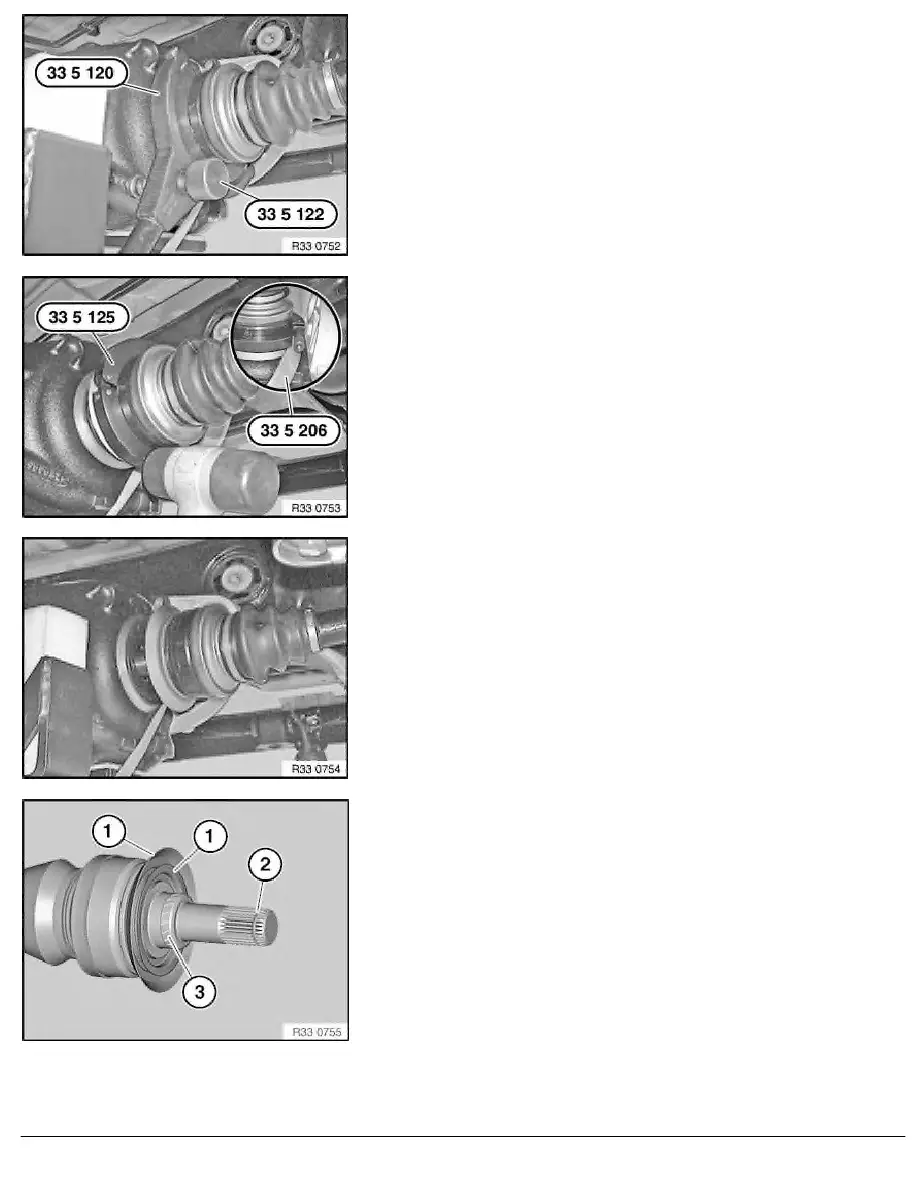
Press output shaft by jerks and jolts with special tool 33 5 120
out of rear differential. Here, thrust piece of bolt 33 5 122 must
rest on rear differential.
Important!
In order to ensure correct locking of the output shaft in the
rear differential, make sure when driving in the output shaft
that the tightening strap 33 5 206 is not located between
the rear differential and the dust plate!
Installation:
Drive output shaft with special tool 33 5 125 and a rubber
mallet into rear differential.
Feed output shaft out of rear differential and tie up.
Installation:
Replace shaft seal(s) for output shaft(s).
Important!
High installation forces indicate that the output shaft spline
teeth are damaged or deformed!
Installation:
Check spline teeth, replaced damaged parts if necessary.
Check dust plate (1) for damage, replace if necessary.
Replace retaining ring (2).
Coat highlighted contact surface (3) of output shaft with approved
rear differential oil.
RA Removing and installing/replacing rear differential
BMW AG - TIS
08.02.2013 04:17
Issue status (12/2007) Valid only until next DVD is issued
Copyright
Page - 3 -