
X Series E83 X3 3.0Sd (M57T2) OFFRD
Adjusting vacuum control unit for main control flap:
Prepare special tool 81 29 0 426 464.
Generate vacuum pressure with Red colour.
Connect diagnosis tester or GT 1.
Measurement: Select pressure sensor 25 bar.
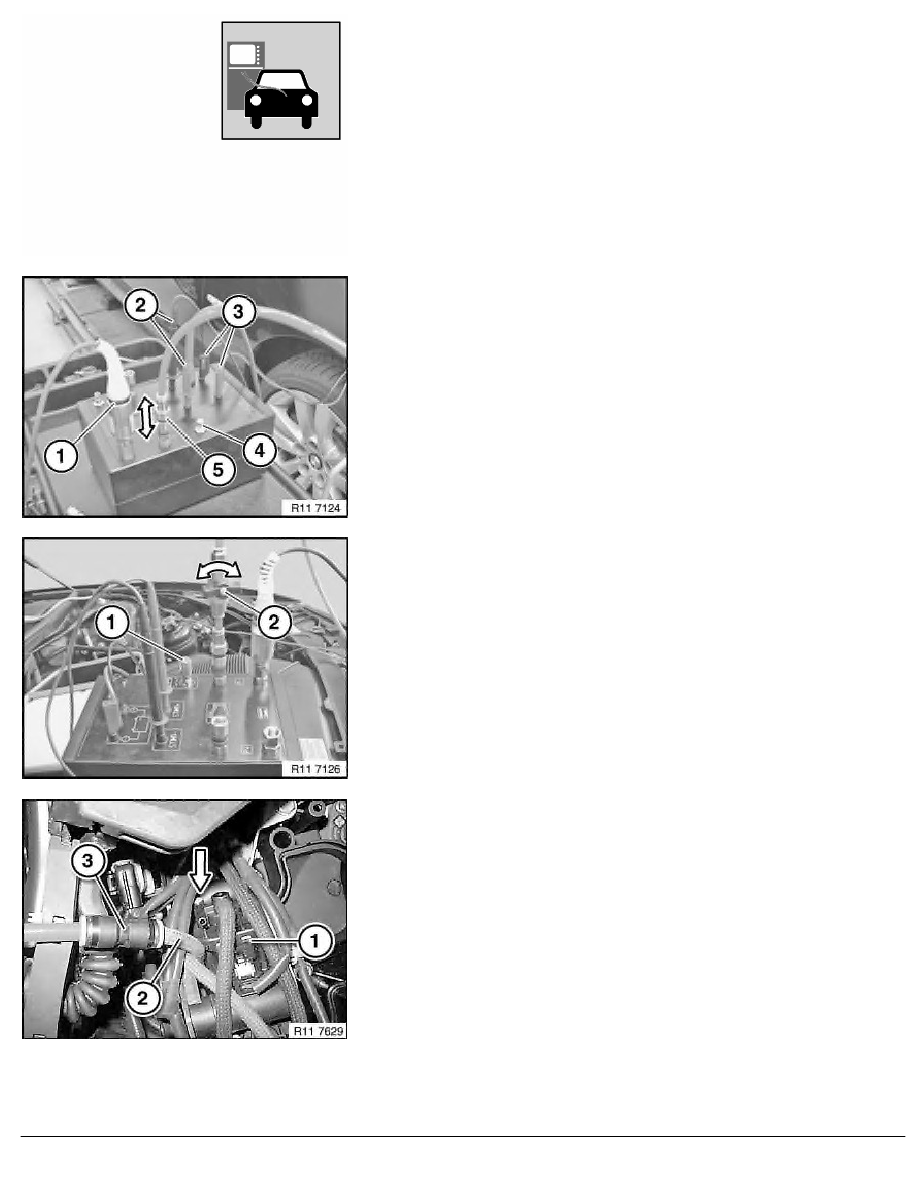
Vacuum pressure measurement:
Prepare BMW diagnosis system on vacuum diagnosis unit.
1.
Screw in pressure sensor.
2.
Connect 12V battery cables (2) to vehicle battery positive and
negative.
3.
Connect 12V battery cables (3) to vehicle battery positive
and negative (pump operation max. 3 mins.).
4.
Controller for vacuum connection.
5.
Vacuum connection (Red).
Calibration for vacuum pressure measurement:
Release lock nut on controller (1).
Press setting with measurement.
-
Determine ambient pressure.
-
Seal stop cock (2) in direction of arrow.
-
Set controller (1) to 200
±
10 mbar below ambient pressure
(e.g. 0.980 - 0.200 = 0.780 bar).
Detach vacuum line (2) - coloured Blue - from pressure
transducer (1), see arrow.
Connect vacuum line (2) - coloured Blue - to vacuum line (3) -
coloured Red.
Reopen shutoff valve (2) on special tool 82 29 0 426 464.
The linkage on the vacuum control unit is now actuated.
RA Removing and installing/replacing vacuum control unit for turbine control flap (
BMW AG - TIS
19.02.2013 18:07
Issue status (12/2007) Valid only until next DVD is issued
Copyright
Page - 3 -