
Century L4-2.2L VIN 4 (1994)
Transmission Position Switch/Sensor: Service and Repair
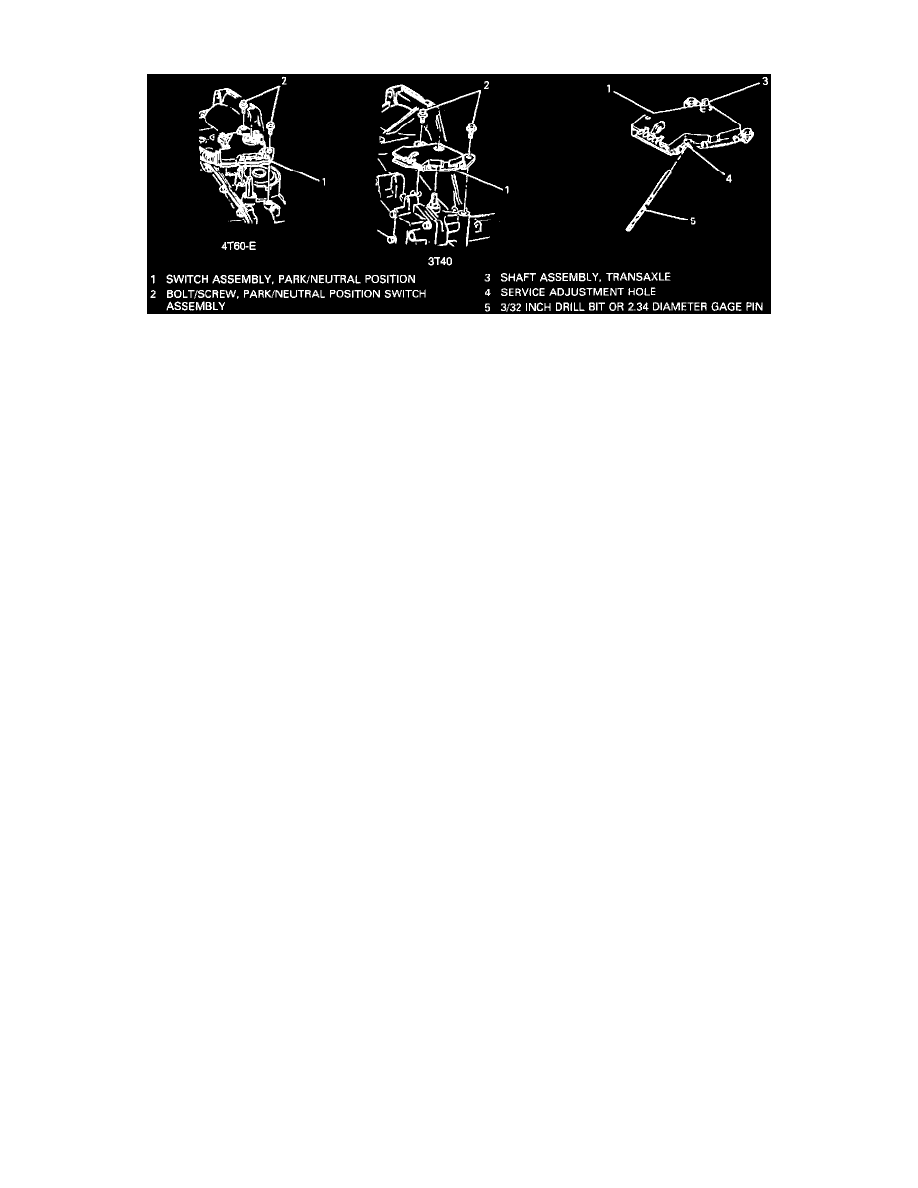
Park/Neutral Position Switch
Removal
1.
Apply parking brake and block wheels.
2.
Place vehicle in "Neutral."
3.
Disconnect shift linkage.
3.
Disconnect electrical connector.
5.
Remove switch assembly bolt/screw.
6.
Remove switch assembly.
Installation
1.
Place shift shaft in "Neutral."
2.
Align flats of shift shaft to flats in switch.
3.
Install shift assembly.
Important:
^ If bolt holes do not align with mounting boss on transaxle, verify shift shaft is in "Neutral" position. DO NOT ROTATE SWITCH. Switch is
pinned in "Neutral" position.
^ If switch has been rotated and pin broken or when using old switch, adjust as follows:
A. Switch assembly bolt/screw loosely.
B. Align slot in support with slot in back and insert 2.34 mm diameter pin (or 3/32 inch drill bit) horizontally into both pieces. Tighten
bolt/screw to 25 Nm (18 lb.ft.).
4.
Remove gage pin (if used).
5.
Reconnect electrical connector.
6.
Attach shift linkage.
Important:
^ After switch installation, verify that engine will only start in "Park" or "Neutral." If engine will start in any other position, readjust switch.
^ Adjustment
A. Place transaxle control shifter assembly in the "Neutral" notch in detent plate.
B. Loosen switch attaching screws.
C. Rotate switch on shifter assembly to align service adjustment hole with carrier tang hole. Insert 2.34 mm (3.32 inch) max. diameter gage pin
to a depth of 15 mm (5/8 inch).
D. Tighten attaching screws to specification.
E. Remove gage pin.
7.
Release parking brakes and remove wheel blocks.