
Century Estate Wagon V6-260 4.3L DSL (1984)
Steering Gear: Service and Repair
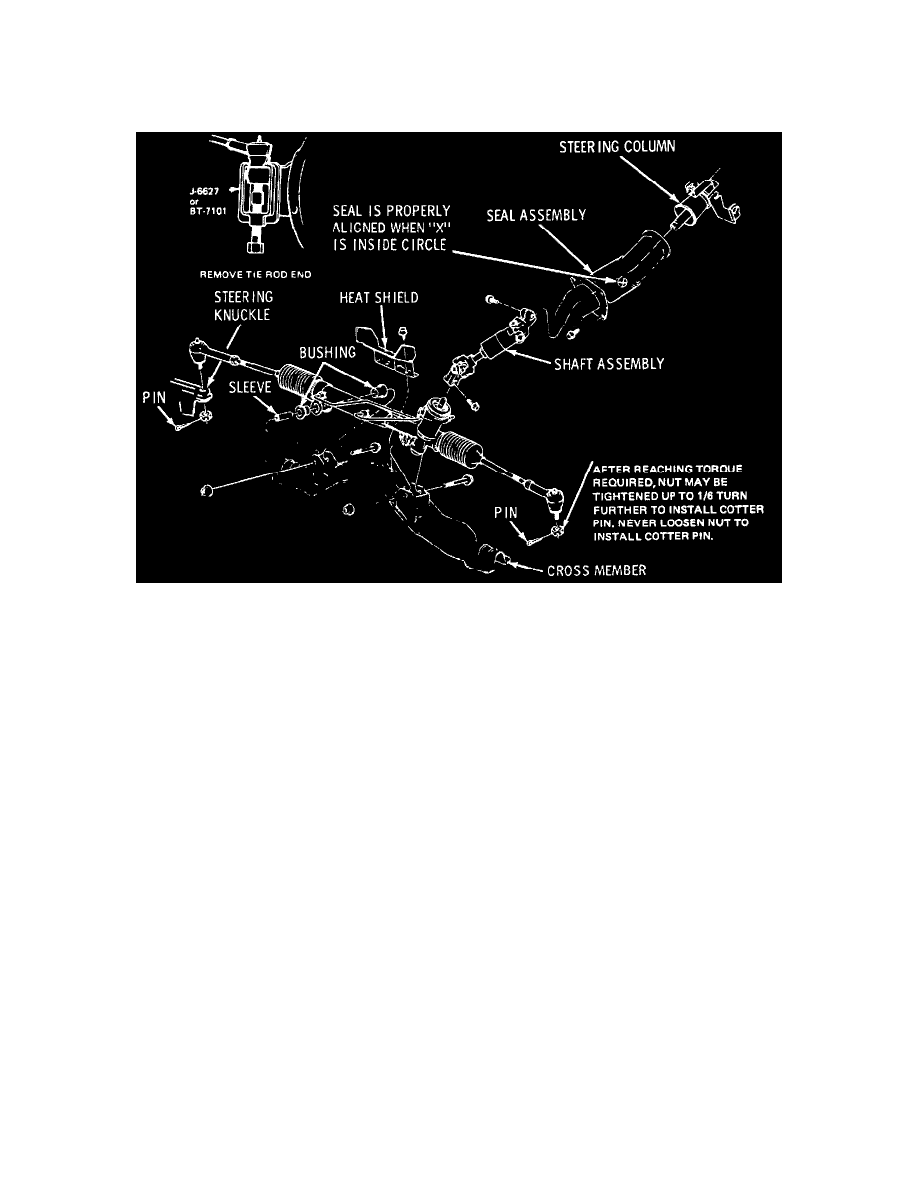
Power Rack and Pinion Assembly
REMOVE AND INSTALL POWER RACK AND PINION ASSEMBLY (TIE ROD END TAKE OFF TYPE)
Remove And Install Power Rack And Pinion
REMOVE
1. Move intermediate shaft seal upward and remove intermediate shaft to stub shaft pinch bolt.
CAUTION: Failure to disconnect the intermediate shaft from the rack and pinion stub shaft can result in damage to the steering gear and/or
intermediate shaft. This damage can cause loss of steering control which could result in personal injury.
2. Remove air cleaner assembly for clearance.
3. Disconnect power steering pipes from gear.
4. Raise car.
5. Remove both front wheel and tire assemblies.
6. Remove both tie rod end cotter pins and nuts. Disconnect tie rod ends from steering knuckles.
7. Support car body with jack stands to allow lowering of cradle.
8. Remove Air Management pipe bracket bolt from cross- member if equipped.
9. Remove 2 rear cradle mount bolts and lower rear of cradle about 4.5 inches.
NOTICE: Do not lower rear of cradle too far as damage to engine components nearest to the cowl may result.
10. Remove Rack & Pinion heat shield if equipped.
11. Remove 2 Rack & Pinion assembly mount bolts.
12. Remove Rack & Pinion gear assembly through left wheel opening.
INSTALL
1. Install Rack & Pinion gear assembly into mounts on crossmember.
2. Install mount bolts and torque to specification.
3. Install heat shield if removed.
4. Raise cradle and install cradle mount bolts. Torque bolts to 105 Nm 175 Lbs. Ft.).
5. Install Air Management pipe bracket on crossmember.
6. Install tie rod ends to steering knuckles. Torque ball stud nuts to specifications and install cotter pins.
7. Install wheel and tire assemblies.
8. Remove lack stands and lower car.