
LaCrosse V6-3.6L VIN 7 (2006)
Brake Pad: Service and Repair
Brake Pads Replacement - Front
Brake Pads Replacement - Front (RPO J65, JL9)
Removal Procedure
Caution: Refer to Brake Dust Caution in Service Precautions.
1. Inspect the fluid level in the brake master cylinder reservoir.
2. If the brake fluid level is midway between the maximum-full point and the minimum allowable level, then no brake fluid needs to be removed from
the reservoir before proceeding. If the brake fluid level is higher than midway between the maximum-full point and the minimum allowable level,
then remove brake fluid to the midway point before proceeding.
3. Raise and suitably support the vehicle. Refer to Vehicle Lifting.
4. Remove the tire and the wheel assembly.
5. Hand tighten 2 wheel lug nuts in order to retain the rotor to the hub.
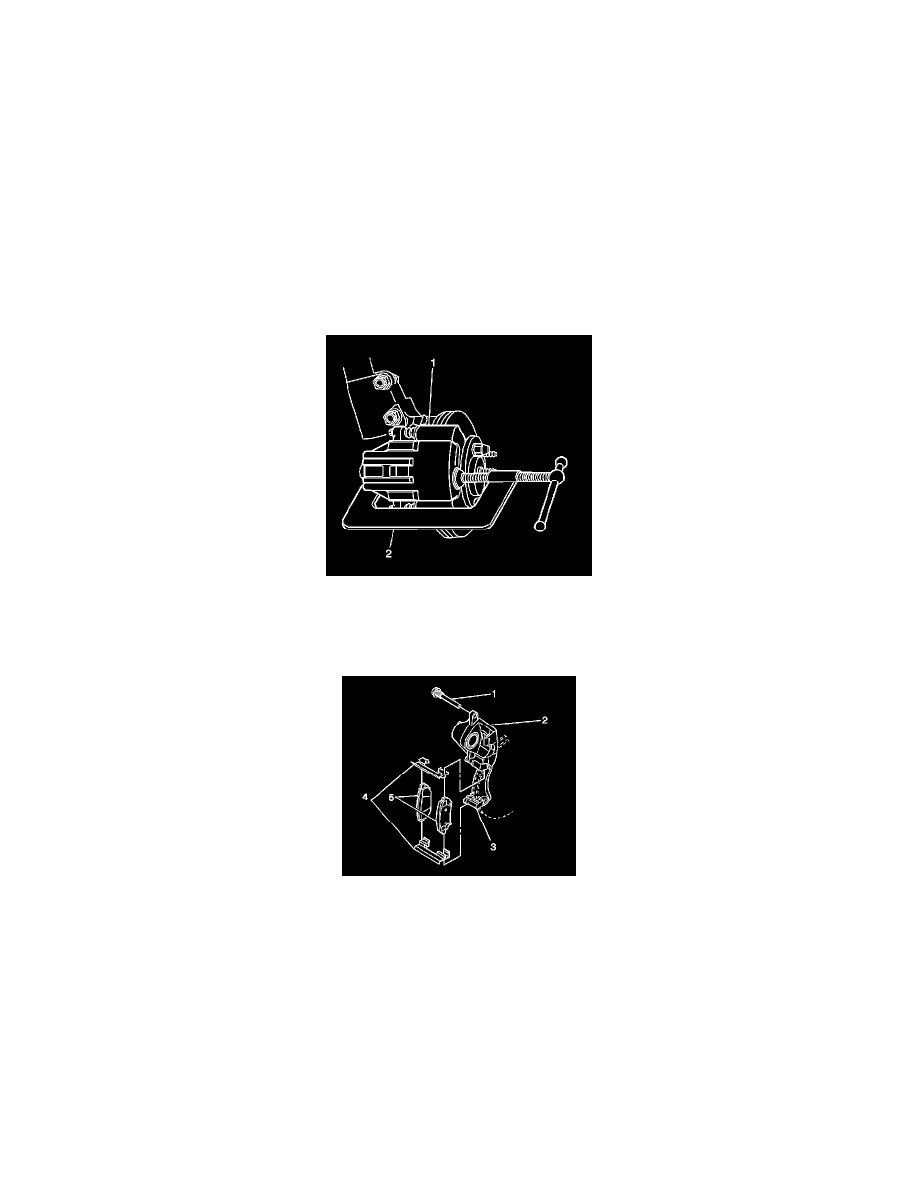
6. Compress the front caliper piston.
1. Install a large C-clamp (2) over the top of the caliper housing (1) and against the back of the outboard pad.
2. Slowly tighten the C-clamp (2) until the piston pushes into the caliper bore enough to slide the caliper (1) off the rotor.
3. Remove the C-clamp from the caliper.
7. Remove the lower caliper bolt (1).
8. In order to access the pads, rotate the caliper upward and suitably support it.
Notice: Use care to avoid damaging pin boot when rotating caliper.
9. Remove the pads (5) from the caliper bracket (3).
10. Remove the 2 retainer slides (4) from the caliper bracket (3).
11. Inspect the following parts for cuts, tears, or deterioration. Replace any damaged parts:
^
The disc brake mounting and hardware.
^
The caliper dust boot.
12. Inspect the caliper bolts (1) for corrosion or damage. If corrosion is found, use new caliper bolts when installing the caliper.
Installation Procedure