
Lucerne V6-3.8L VIN 2 (2006)
1.
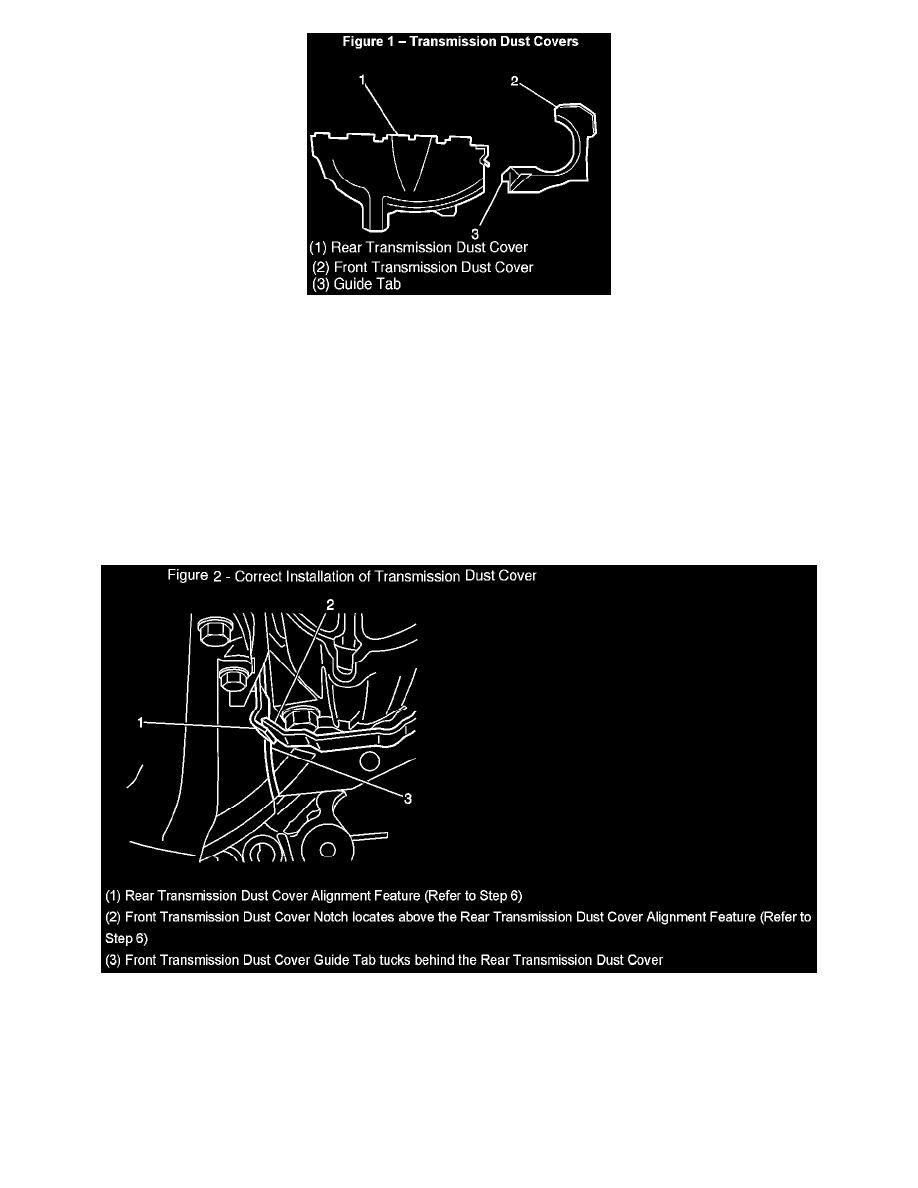
Remove the front and rear transmission dust covers. Refer to Figure 1.
2.
Start the engine.
^
If the noise is present, it is not being caused by the transmission dust covers. Continue diagnosis until the source of the noise is found. Then
proceed to Step 5 for correct installation of the covers.
^
If the noise is not present, continue to the next step.
3.
Inspect the rear cover in the area shown (1) for signs of it having contacted the flexplate. Refer to Figure 3.
4.
If there are signs of contact (refer to Figure 3), use a sharp knife to cut away some of the plastic as shown by the dotted line (2).
5.
Install the front dust cover (2). Refer to Figure 1.
6.
After the front dust cover is installed (refer to Figure 2), position the rear cover so that the tab (3) on the front cover is behind the rear cover, as
shown. When properly positioned, the alignment features (1 and 2) will be positioned as shown with the tab (3) hidden from view.
Warranty Information