
Rainier AWD V8-5.3L VIN P (2004)
Expansion Valve: Service and Repair
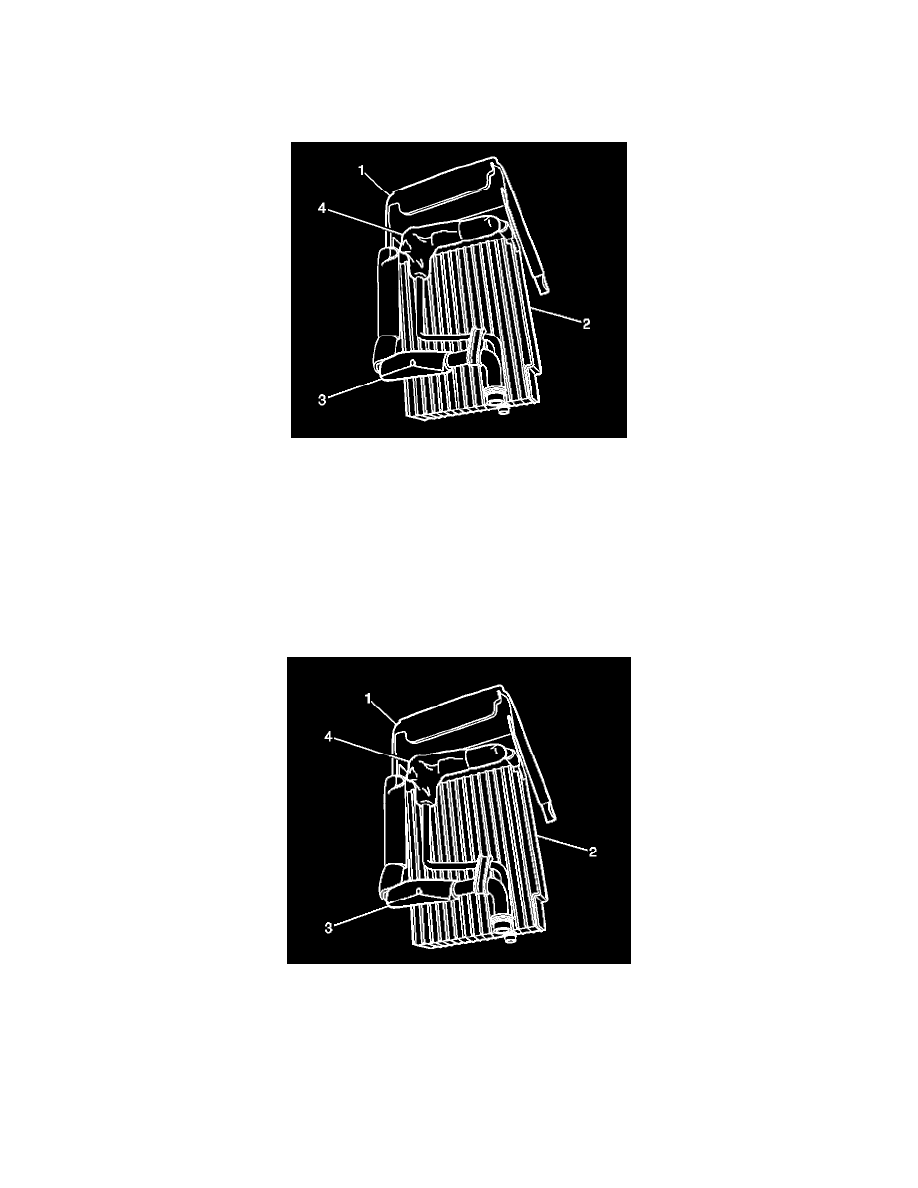
THERMAL EXPANSION VALVE REPLACEMENT - AUXILIARY
REMOVAL PROCEDURE
1. Remove the evaporator core-auxiliary.
2. Remove the foam insulators (3) from the evaporator core-auxiliary lines.
3. Remove the foam insulators from the thermal expansion valve-auxiliary (4).
4. Using a back up wrench loosen the flare nuts from the thermal expansion valve-auxiliary.
5. Remove the auxiliary thermal expansion valve sensing bulb and retaining clip from the evaporator core-auxiliary lines.
6. Remove the thermal expansion valve-auxiliary from the evaporator core-auxiliary.
7. Remove and discard the O-ring seals from the evaporator core-auxiliary. Cap or tape the lines to prevent contamination of the evaporator
core-auxiliary.
IMPORTANT:Cap or tape the open A/C refrigerant lines immediately.
INSTALLATION PROCEDURE
1. Remove the cap or tape from the evaporator core-auxiliary lines.
2. Install the new O-ring.
3. Install the thermal expansion valve-auxiliary onto the evaporator core-auxiliary lines.
4. Using a back up wrench, install the flare nuts from the evaporator core-auxiliary lines to the thermal expansion valve-auxiliary.
NOTE: Refer to Fastener Notice in Service Precautions.
See: Service Precautions/Vehicle Damage Warnings
Tighten
Tighten the nuts to .5 N.m (44 lb in).