
Regal V6-231 3.8L VIN L SFI (1990)
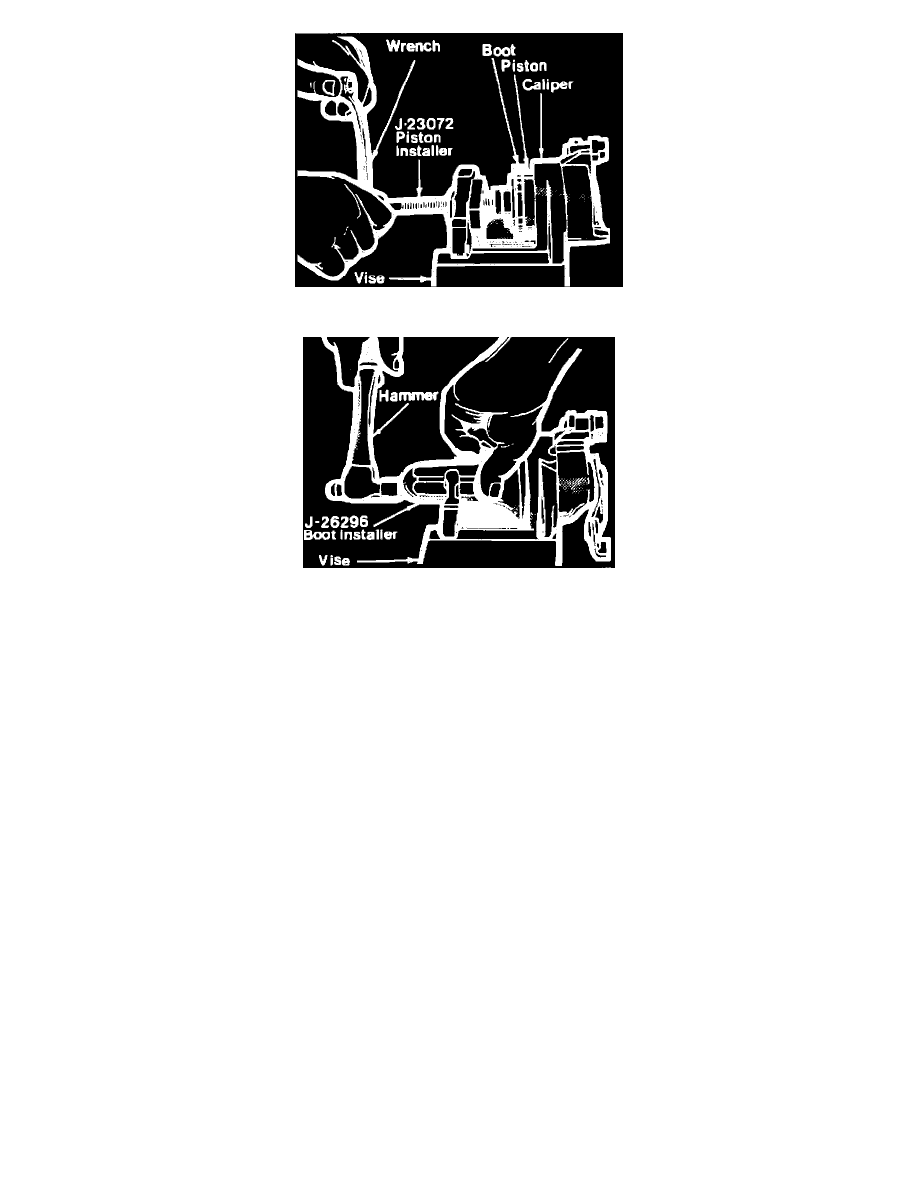
Fig. 5 Installing Piston Into Caliper
Fig. 6 Driving Boot Into Caliper
1.
Install bleeder screw and torque to 116 inch lbs., then install bracket, if removed, and torque to 31 ft. lbs.
2.
Install fitting and bolt, if equipped, using new copper washer and torque to 24 ft. lbs.
3.
Lubricate and install new piston seal. Make sure is not twisted.
4.
Install new boot onto piston assembly with lip of boot located in piston groove and boot fold toward end of piston that contact inboard brake shoe.
5.
Install new thrust washer on actuator screw, with copper side of washer towards the piston assembly.
6.
Install lubricated shaft seal on actuator screw, then install actuator screw in piston.
7.
Coat piston seal with clean brake fluid. Install balance spring into piston and install assembly into caliper housing, Fig. 4.
8.
With piston installer tool No. J-23072 or equivalent push piston fully into caliper housing, Fig. 5. The piston must be pushed straight into
caliper to prevent damage to the actuator screw seal as it passes through hole in rear of piston bore.
9.
Before removing piston installer tool No. J-23072, install lubricated anti-friction washer, new lever seal, lever and locknut. Position lever away
from stop, rotate forward and hold lever in position, then torque nut to 35 ft. lbs.
10.
Remove piston installer tool No. J-23072, rotate lever back to stop and install return spring.
11.
With dust boot installer tool No. J-26296 or equivalent, drive boot until seal bottoms in caliper housing, Fig. 6.
12.
Install dampening spring in groove in end of piston.