
Regal V6-231 3.8L VIN L SFI (1990)
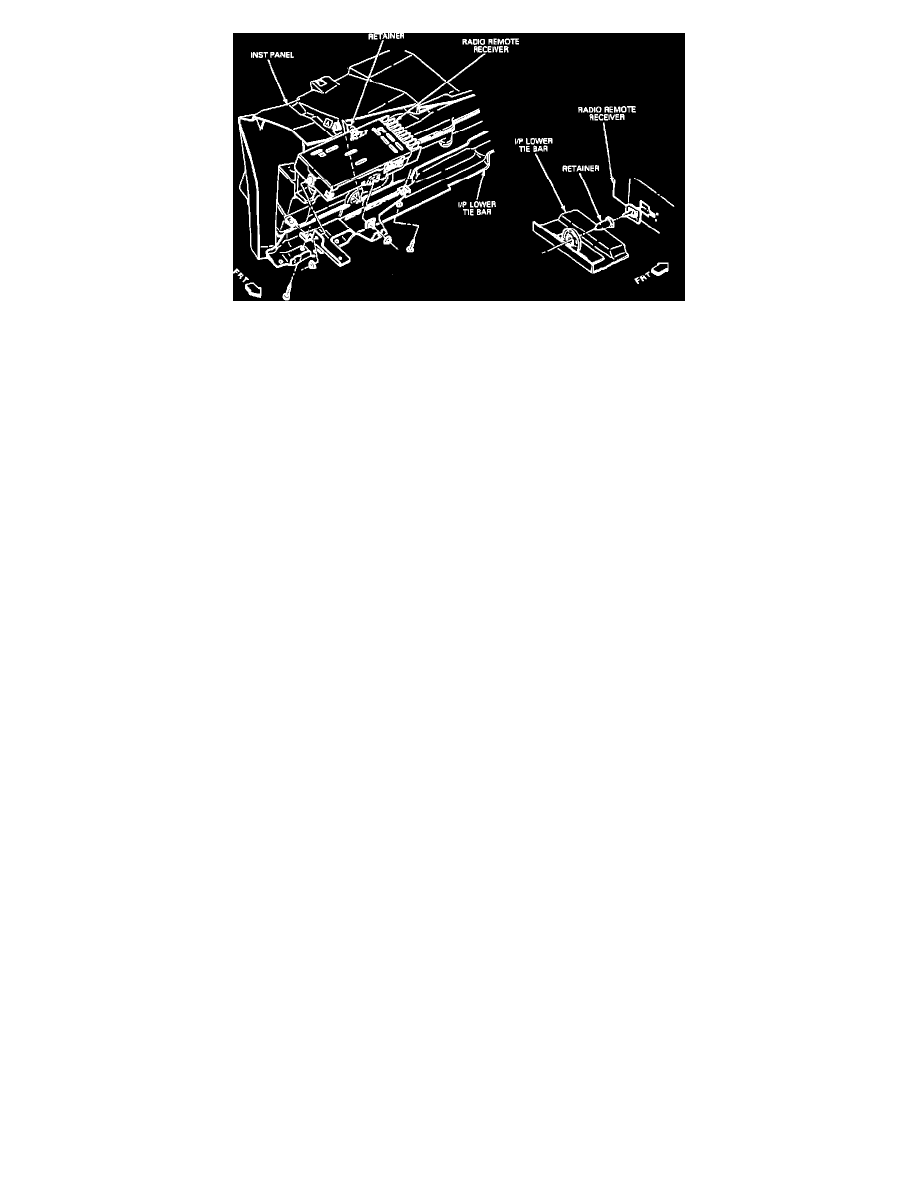
Fig. 172 Radio Remote Receiver Removal
16.
Remove bolts securing radio, then the radio and connectors, Fig. 170.
17.
Remove bolts securing English/Metric switch, then the switch.
18.
Remove bolts securing headlight switch, then the switch.
19.
Remove four cassette player retaining bolts, then pulling unit rearward, disconnect electrical connectors, Fig. 171.
20.
Remove ashtray and bracket.
21.
Remove two ALDL connector retaining bolts, then lower ALDL connector.
22.
Remove two parking brake retaining bolts, then lower lever and pull to the right.
23.
Remove bolt holding right side courtesy light, then disconnect electrical connector.
24.
Remove two radio receiver retaining bolts, then the receiver, electrical and antenna connectors, Fig. 172.
25.
Remove one nut and two screws holding left side sound insulator.
26.
Remove four steering column trim cover retaining screws, then the cover.
27.
Remove four steering column retaining bolts, lower steering column.
28.
Remove seven instrument panel carrier assembly retaining bolts, five at top and two at bottom.
29.
Remove two carrier assembly retaining bolts, located above steering column.
30.
Remove five carrier assembly to air duct attaching bolts.
31.
Remove three conduit retaining nuts, two above glove compartment and one through cassette compartment opening.
32.
Remove nine clips holding wiring harness.
33.
Remove instrument panel by pulling top out, then lifting panel up and out.
34.
Reverse procedure to install.