
Regal V6-3100 3.1L VIN M SFI (1996)
5. Booster pushrod (29) from brake pedal.
6. Booster (32).
^
Take care not to damage insulator boot mounted on the front of dash when pulling pushrod eye through hole.
INSTALL OR CONNECT
1. Attach J 22805-01 to booster (32) with nuts (33).
TIGHTEN
^
Nuts (33) to 27 Nm (20 lb. ft.).
2. Position booster (32) on cowl, slightly counterclockwise from final installation position, so that locking flanges on booster and mounting plate
engage.
^
Take care not to damage or dislodge insulation boot when passing pushrod eye through hole.
3. Booster pushrod (29) to brake pedal.
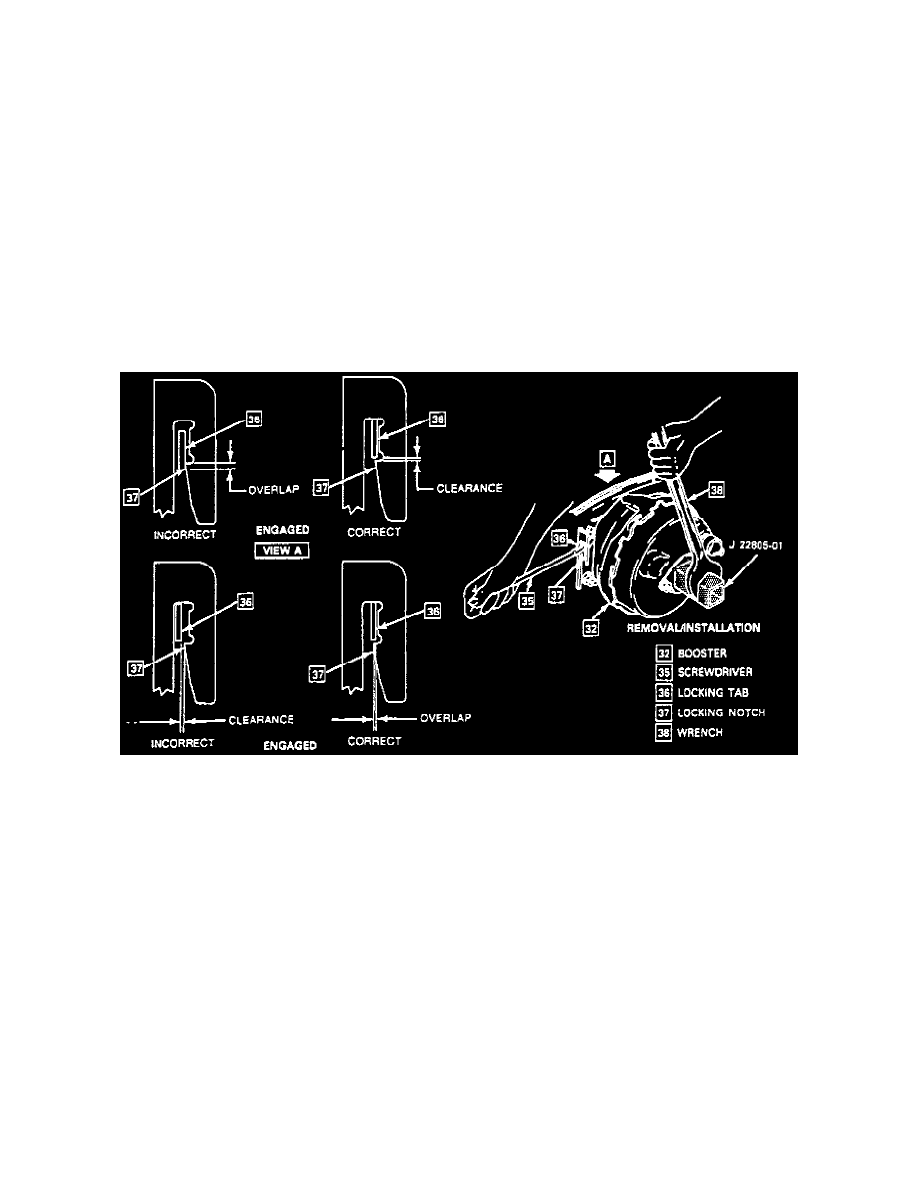
4. Turn booster (32) clockwise with wrench (38) on J 22805-O1.
^
It is not necessary to use screwdriver (35) on locking tab (36) as shown in Figure 6 to install booster. When correctly installed, locking tab (36)
will slide up flange and snap in locking notch (37).
Removing And Installing Cam-lock Booster
IMPORTANT: Make sure locking tab (36) is fully engaged in locking notch (37).
5. Master cylinder (31) to booster (32) with attaching nuts (33).
TIGHTEN
^
Nuts (33) to 25 Nm (18 lb. ft).
ADJUST
^
Stoplamp switch.