
Riviera V6-231 3.8L Turbo VIN 9 FI (1984)
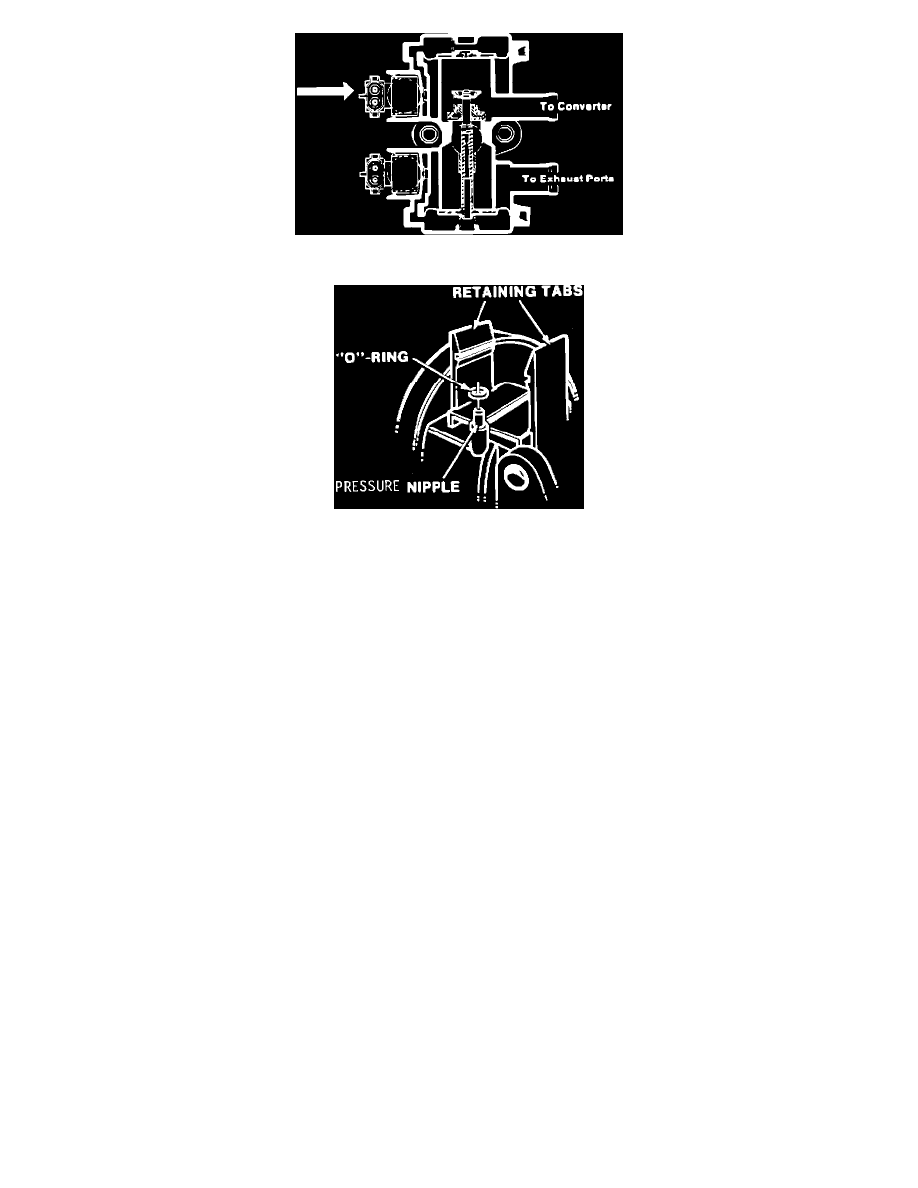
FIGURE 2
FIGURE 3
A.
Disconnect electrical connector from black solenoid, see figure 2.
B.
Release both retaining tabs from solenoid, using a suitable screwdriver, see figure 3.
C.
Remove solenoid and O-ring.
D.
Lightly lubricate and install the new O-ring over nipple of pressure tube. (New solenoid is supplied with two (2) O-rings, only one of which is
required at this time.)
E.
Install new solenoid using care to align opening in solenoid with pressure nipple on valve, and snap into both retaining tabs firmly.
F.
Connect solenoid electrical connection.
G.
Inspect and verify proper operation of PEDES valve. See Section 6-E "Driveability and Emissions - Carbureted" in the Chassis Service Manual.
DIAGNOSTIC NOTE
If the O-ring is missing or leaking on the gray connector solenoid, air will be diverted to the exhaust manifolds which will cause lean exhaust, low
oxygen sensor voltages, fixed 10~ dwell (duty cycle) and possibly a code 44 to be set.
Warranty Claim Information
Operation Number
T-5069
Labor Time Allowance for one Solenoid
.2
Labor Time Allowance for both Solenoid
.3
Failure Code
92