
Riviera V6-3.8L SC VIN 1 (1995)
Intake Manifold: Service and Repair
Intake Manifold
COMPLETE INTAKE REMOVAL
Remove or Disconnect
1. Negative battery cable.
2. Fuel injector sight shield and air intake duct.
3. Spark plug wires on right side of engine and set aside.
4. Manifold vacuum source.
5. Depressurize fuel lines.
6. Drain cooling system.
7. Fuel feed and return lines.
8. Upper radiator hose and bypass hose.
9. Electrical connectors from:
^
EGR Valve
^
Throttle Position (TP) Sensor
^
Idle Air Control (IAC) Solenoid
^
Fuel Injectors
^
Manifold Air Pressure (MAP) Sensor
10. EGR outlet pipe.
11. Throttle and cruise cables.
12. Throttle bracket with steering reservoir and set aside.
13. Inner accessory drive belt.
14. Heater hose pipe from intake.
15. Tensioner bracket to supercharger retaining stud using the standard double nut procedure.
16. Intake manifold bolts and manifold.
Important
To complete the installation, observe the following assembly tips:
^
Clean the cylinder block, heads and intake manifold sealing surface of all oil with a suitable solvent.
^
Apply GM approved sealer to the ends of the manifold seals.
^
Clean the intake manifold bolts and bolt holes of adhesive compound.
^
Apply GM approved thread locking compound to the intake manifold bolts.
Install or Connect
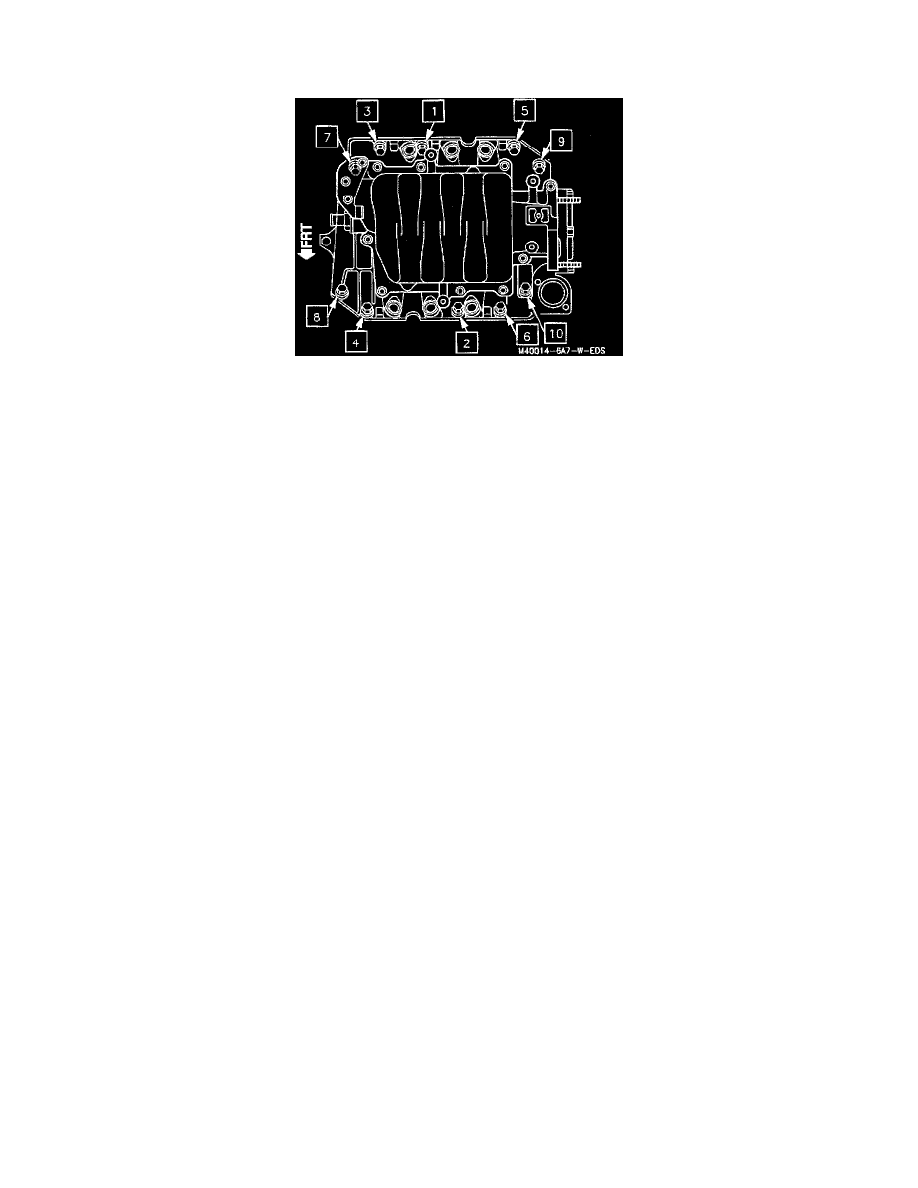
1. Intake manifold.
Tighten
^
Bolts to 15 N.m (11 lb. ft.).
2. Tensioner bracket.
3. Heater hose pipe to intake.
4. Inner accessory drive belt.
5. Throttle bracket with steering reservoir.
6. Throttle and cruise cables.
7. EGR outlet pipe.
8. Electrical connectors to:
^
Manifold Air Pressure (MAP) Sensor
^
Fuel Injectors