
Riviera V6-3.8L SC VIN 1 (1995)
7.
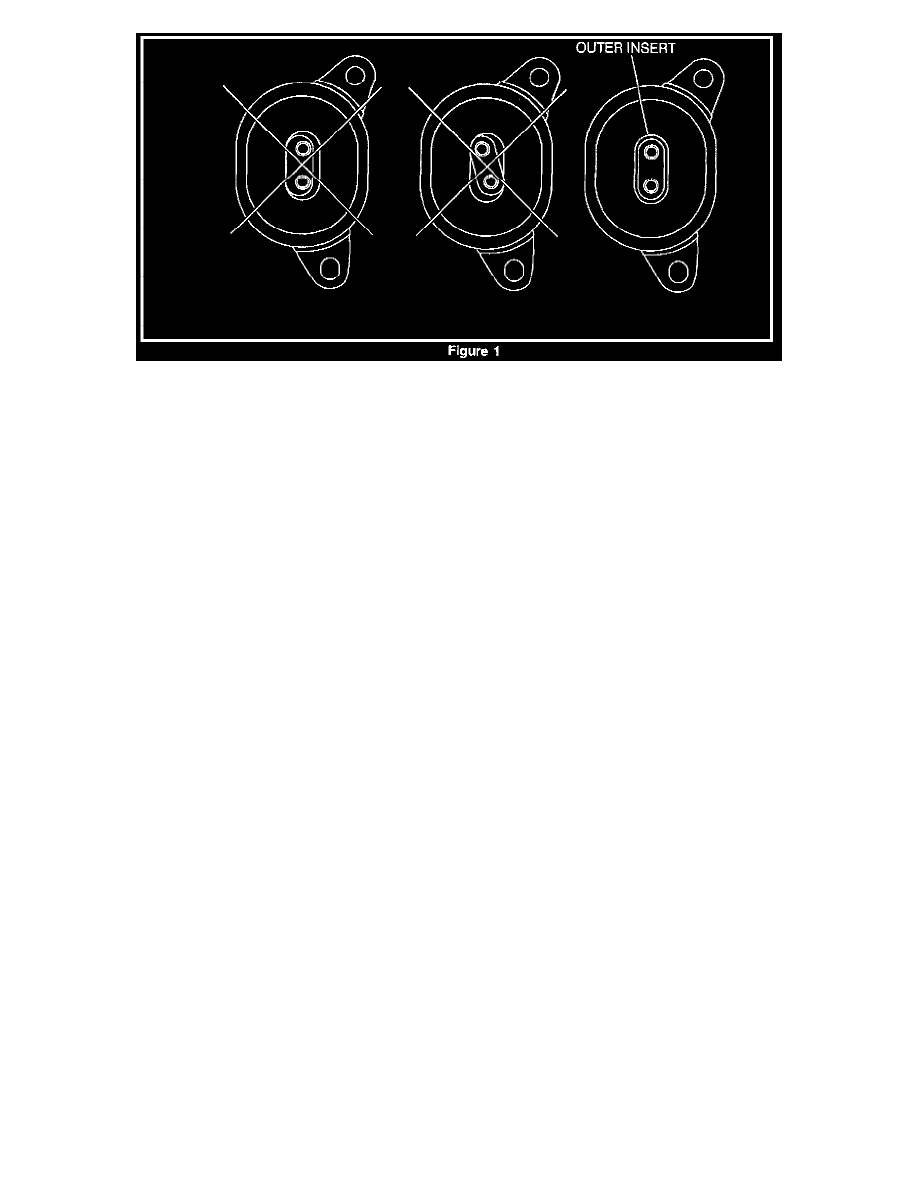
Raise the transaxle with the screwjack until the transaxle bracket contacts the mount. Check mount alignment and reposition the mount as
necessary to center the mount studs within the mount itself. See Figure 1.
Important:
The mount studs will not always be centered in the mount bracket. This is a normal condition. The mount bracket is slotted to allow for cross car
build variation and should riot be used to determine if the mount is positioned correctly.
8.
Raise the transaxle with the screwjack to fully load the mount.
Important:
Loading the mount is important because the mount studs could potentially twist in the bracket while tightening the mount nuts, creating a twisted or
binding condition within the mount.
Tighten
9.
Tighten the mount nuts to 45 N.m (33 lb ft).
10.
Remove the screwjack and verify mount alignment.
1997-98 C/G Cars
1.
Raise the vehicle.
2.
Support the transaxle with a screwjack.
3.
Loosen the rear transaxle mount nuts. Do not fully remove the nuts.
4.
Using the screwjack, unload the mount by lowering the transaxle.
5.
Adjust or reposition the mount to eliminate any bind or twist.
6.
Using the screwjack, raise the transaxle until the transaxle bracket contacts the mount. Check mount alignment and reposition the mount as
necessary to center the mount studs within the mount itself. See Figure 1.
Important:
The mount studs will not always be centered in the mount bracket. This is a normal condition. The mount bracket is slotted to allow for cross car
build variation and should not be used to determine if the mount is positioned correctly.
7.
Raise the transaxle with the screwjack to fully load the mount.
Important:
Loading the mount is important because the mount studs could potentially twist in the bracket while tightening the mount nuts, creating a twisted or
binding condition within the mount.
Tighten