
Skylark L4-138 2.3L DOHC VIN D MFI (1988)
Brake Drum: Service and Repair
Removal
For additional information see Notes, Warnings, and Hints. See: Fundamentals and Basics
-
Mark relationship of wheel to axle flange to insure proper wheel balance upon assembly.
-
Mark relationship of brake drum to axle flange to insure proper wheel balance upon assembly.
-
Remove tire and wheel assembly.
-
Remove brake drum.
NOTE: If difficulty is encountered in removing the brake drum, the following steps may be of assistance:
-
Make sure parking brake is released.
-
Back off parking brake cable adjustment.
Adjusting Brakes
-
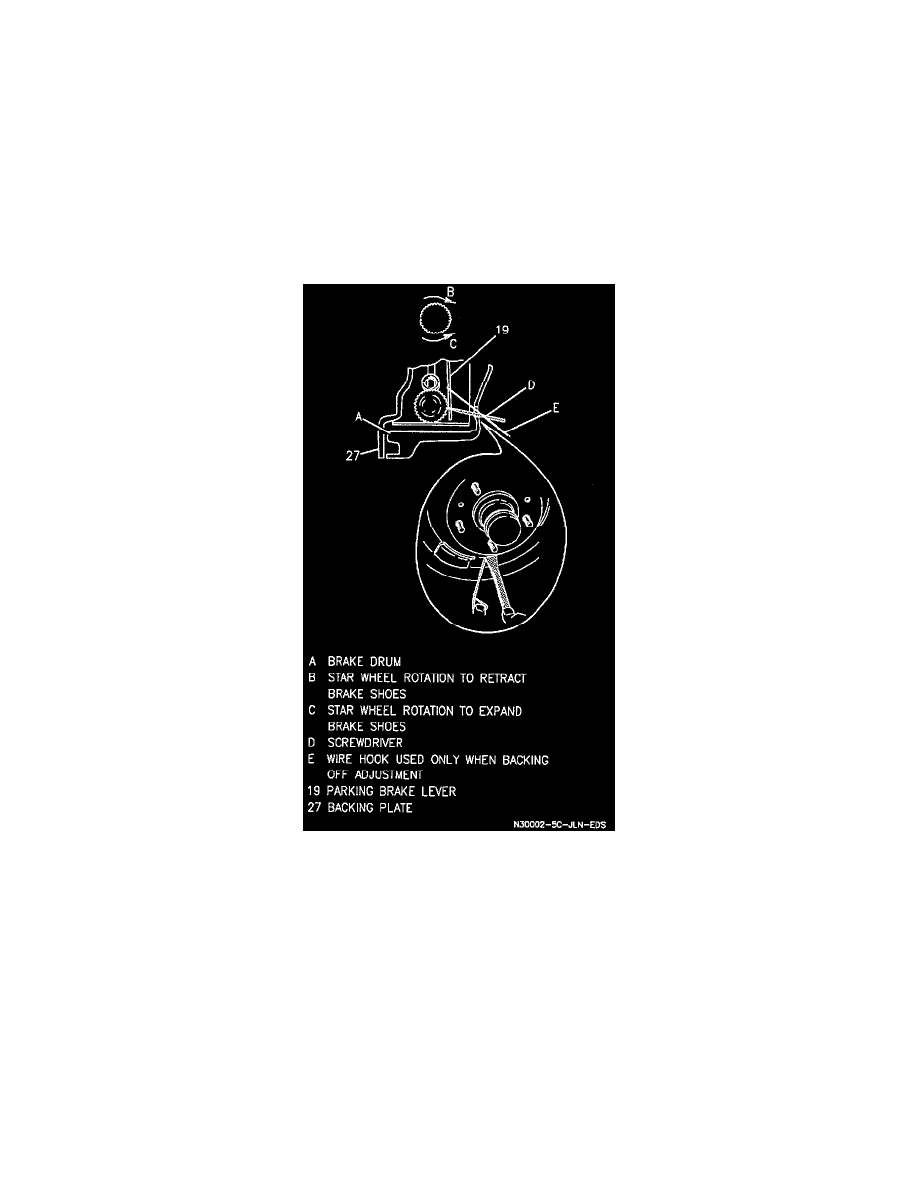
Remove adjusting hole knockout plate from brake drum and back off adjusting screw using screwdriver and adjusting tool.
A lanced ``knock out'' area is provided in the web of the brake drum for servicing purposes on some models. When adjustment is required on
models that do not have a lanced area on the brake drum, perform the following procedure:
1.
Reinstall two lug nuts backwards to hold drum in place against rear wheel bearing.
2.
Locate an accessible adjusting hole plug (select a plug not covered with a balance weight).
3.
Position the adjuster hole plug on the left hand drum at 10:00 or on the right hand drum at 3:00 and set the park brake.
4.
Prick punch four spots within the hole plug outline.
5.
Drill four 6 mm (1/4 inch) diameter holes within the plug outline.
6.
File the hole opening as necessary to insert a brake adjusting tool.
7.
Using a suitable tool to hold actuator from adjuster, back off adjusting screw.
NOTE: Brakes should be free of drag when adjuster has been backed off approximately 12 notches. Heavy drag at this point indicates tight
parking brake cables.