
Skylark L4-144 2.4L DOHC VIN T SFI (1997)
9. Remove the exhaust camshaft housing to the cylinder head bolts.
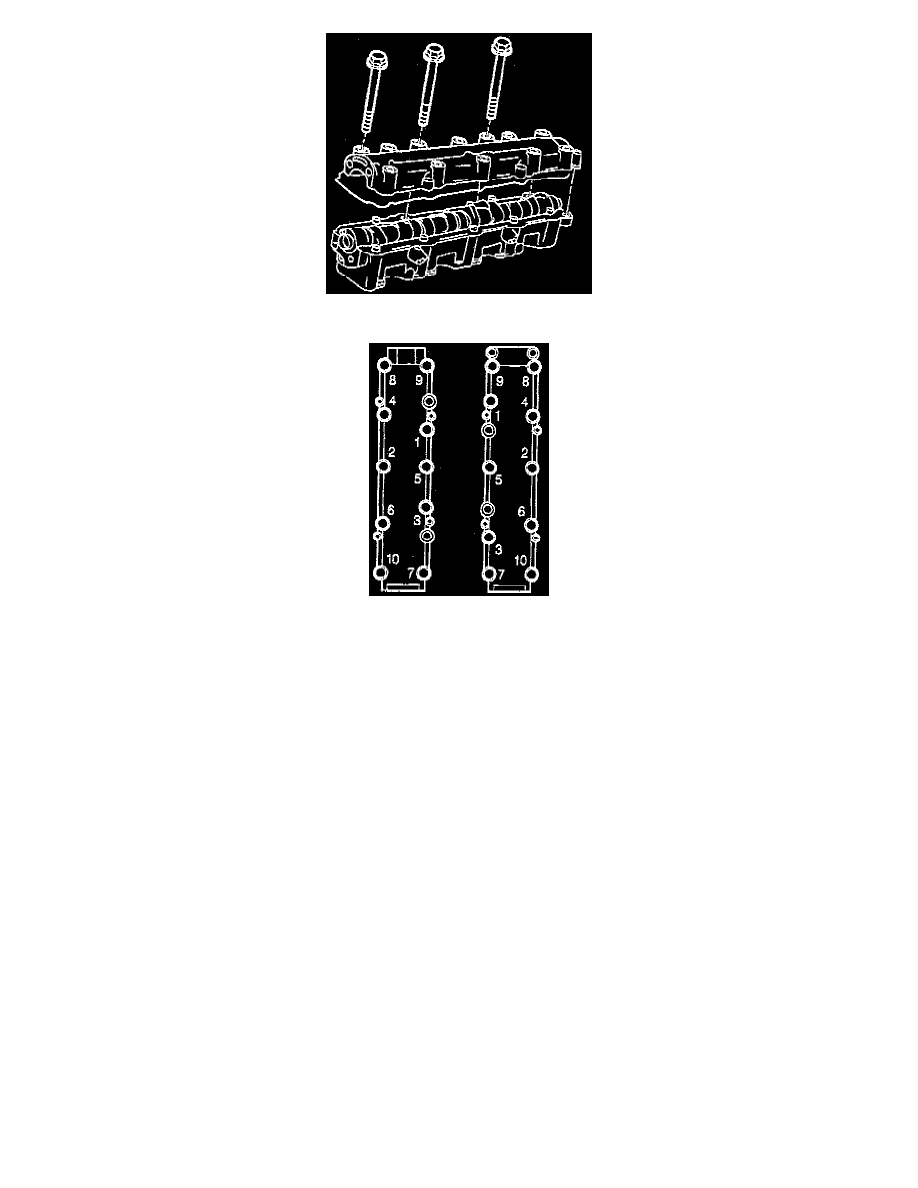
10. Use the reverse of the tightening procedure when loosening the camshaft housing to the cylinder head retaining bolts.
11. Leave two bolts loosely in place in order to hold the camshaft housing while separating the camshaft cover from the housing.
CAUTION: Tighten the bolts in evenly in order to prevent the cover from binding on the dowel pins.
12. Push the cover off the housing by threading the four of the housing to head retaining bolts into the tapped holes in the camshaft cover.
13. Remove the two loosely installed camshaft housing to head bolts.
14. Remove the cover.
15. Discard the gaskets.
16. Loosely reinstall the one camshaft housing to the cylinder head bolt in order to retain the housing during the camshaft and the lifter removal.
17. Notice the position of the chain sprocket dowel pin for reassembly. Remove the camshaft carefully in order to prevent damage to the camshaft or
the journals.
18. Remove the valve lifters. Keep the lifters in order so that the lifters can be reinstalled in the original location.
NOTE: These lifters are not serviceable. Replace any faulty lifters. Coat the lifter with Camshaft and Lifter Prelube GM P/N 12345501 or the
equivalent. If new lifters are installed, add the Engine Oil Supplement GM P/N 1052367 or the equivalent to the engine oil.
19. In order to minimize lifter bleed down, use the following procedure:
^
Store lifters upside down (the camshaft contact surface down) on a level surface.
^
Store the lifters submerged in clean engine oil.
NOTE: Ensure that the camshaft housing alignment dowel pins are in the cylinder head prior to installing the housing.