
Skylark V6-173 2.8L VIN W FI (1985)
Crankshaft Main Bearing Seal: Service and Repair
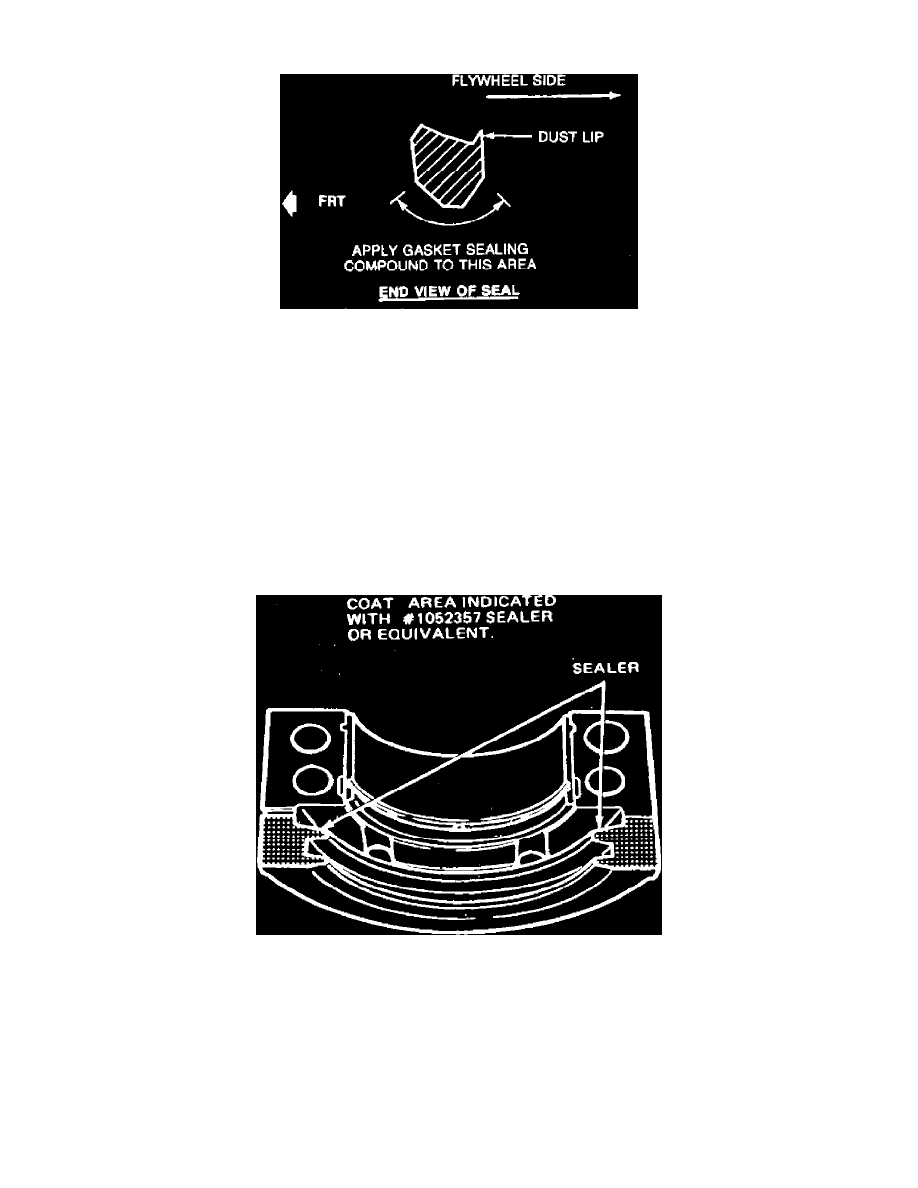
Fig. 7 Rear main seal installation. V6-173
V6-173
When replacement of the rear main seal is necessary, the rope type seal used during engine assembly should be replace with rubber split seal
No. 14069889, or equivalent using the following procedure. Disregard instructions furnished with the replacement seal that refer to Cavalier
models.
1.
Remove oil pan and oil pump.
2.
Remove rear main bearing cap.
3.
Remove upper and lower rope seals, taking care not to damage crankshaft, then clean seal remnants and oil from seal channels. It may be
necessary to loosen No. 2 and 4 bearing cap bolts to allow removal of the rope type seal and installation of the upper split seal.
4.
Apply a thin coating of gasket sealing compound 1050026 or equivalent to outer circumference of replacement seal, Fig. 7, keeping sealer off seal
lips.
5.
Use a piece of shim stock to guide seal into block channel and roll seal into block by turning crankshaft. Ensure that large seal lip is toward
front of engine and that smaller dust lip faces the flywheel.
6.
Apply sealer to lower half of seal as in step 4, then install seal into bearing cap.
Fig. 8 Rear main bearing cap sealing areas. V6-173
7.
Apply a thin bead of anaerobic sealant to bearing cap surface as shown in Fig. 8. Keep sealant off ends of seal, main bearing, and out of drain slot.
8.
Apply a thin film of motor oil to seal lip, install bearing cap and torque cap bolts to specifications. If other main bearing cap bolts were
loosened, retorque as needed.
9.
Reinstall oil pump and pan as outlined.
10.
Fill crankcase, start engine and check for leaks.