
Astro Van 2WD V6-4.3L VIN W (2001)
Rear Door Striker: Service and Repair
Door Striker Replacement - Left Rear
Door Striker Replacement - Left Rear
Removal Procedure
1. Remove the trim panel. Refer to Rear Door Trim Panel Replacement (Cargo Doors) (See: Rear Door Panel/Service and Repair/Panel
Replacement/Rear Door Trim Panel Replacement (Cargo Doors))Rear Door Trim Panel Replacement (E54) (See: Rear Door Panel/Service and
Repair/Panel Replacement/Rear Door Trim Panel Replacement (E54)).
2. Separate the water deflector at the perforations. Use a sharp-bladed tool if needed. Refer to Water Deflector Replacement (See: Rear Door
Panel/Service and Repair).
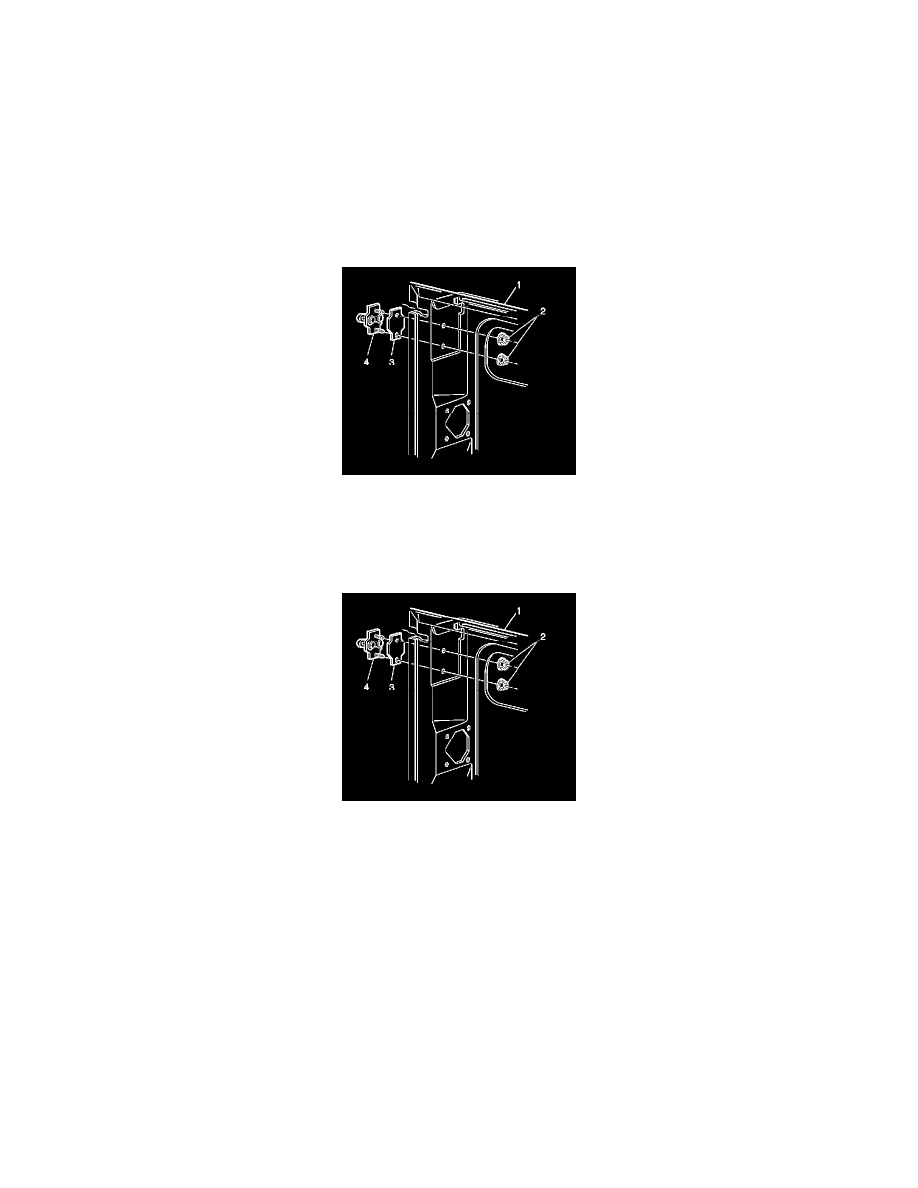
3. Remove the nuts from the striker(2).
4. Remove the insulator(3).
5. Remove the striker(4).
Installation Procedure
1. Install the striker to the door(4).
The narrow part on the wedge plate of the striker should point toward the rear of the vehicle.
2. Install the insulator(3).
Notice: Refer to Fastener Notice in Cautions and Notices.
3. Install the nuts to the striker(2).
Tighten the nuts to the striker to 30 Nm (22 lb.ft.).
4. Install the water deflector. Refer to Water Deflector Replacement (See: Rear Door Panel/Service and Repair).
5. Install the trim panel. Refer to Rear Door Trim Panel Replacement (Cargo Doors) (See: Rear Door Panel/Service and Repair/Panel
Replacement/Rear Door Trim Panel Replacement (Cargo Doors))Rear Door Trim Panel Replacement (E54) (See: Rear Door Panel/Service and
Repair/Panel Replacement/Rear Door Trim Panel Replacement (E54)).