
Astro Van 2WD V6-4.3L VIN W (2001)
Lower Sliding Door Roller: Service and Repair
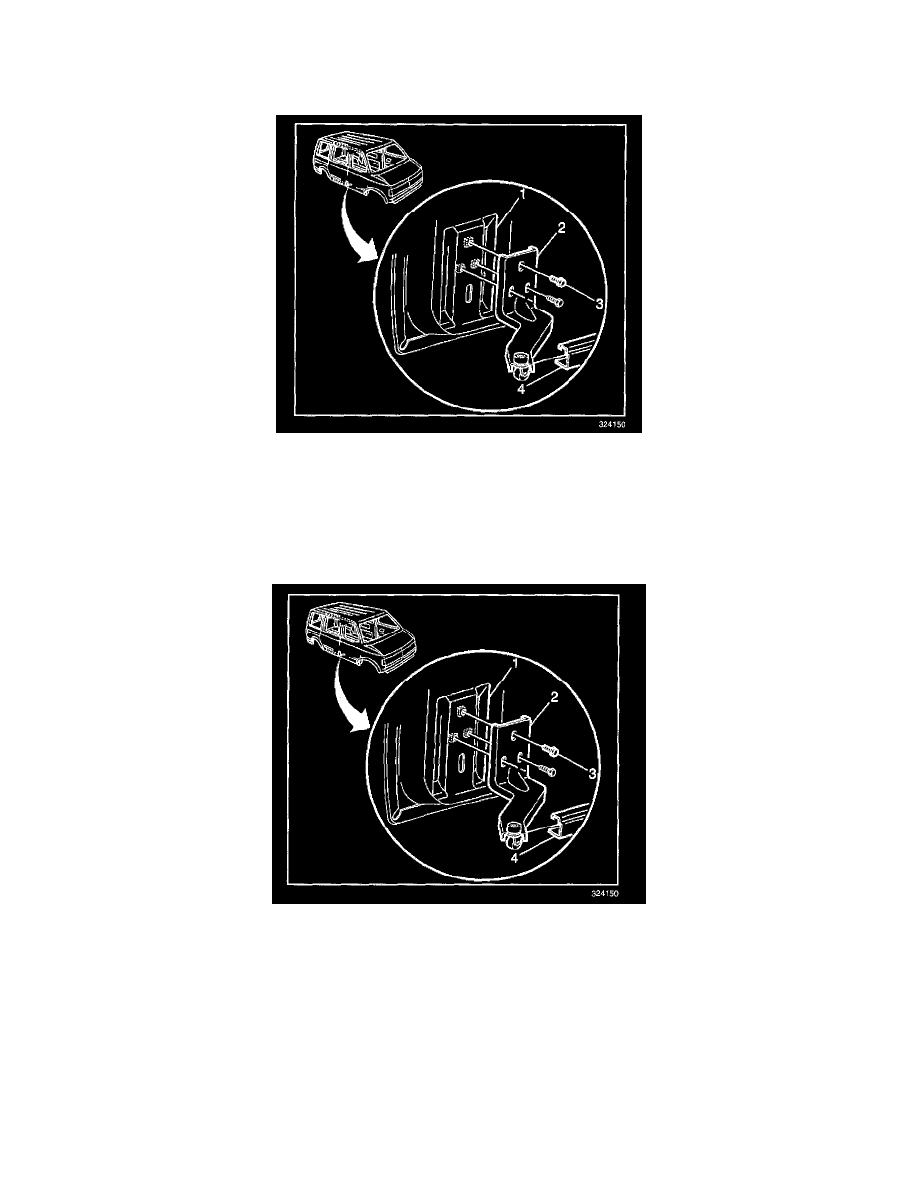
Roller Bracket Replacement - Lower
REMOVAL PROCEDURE
1. Use a grease pencil in order to mark the position of the bracket on the door.
2. Disconnect the lower corner of the door trim panel to expose the bracket (2) to door bolts.
3. Support the bottom of the door.
4. Remove the bracket (2) to door bolts.
5. Slide the bracket (2) out of the rear of the track in order to remove the bracket from the body.
INSTALLATION PROCEDURE
1. Slide the bracket rollers (2) into the rear of the track in order to install the bracket to the body.
2. Align the bracket with the marks made during removal in order to install the bracket to the door.
NOTE: Refer to Fastener Notice in Service Precautions.
3. Install the bolts that retain the bracket to the door.
Tighten
Tighten the bracket retaining bolts to 25 N.m (18 lb ft).
4. Remove the support from the bottom of the door.
5. Install the lower corner of the door trim panel by pressing into place until fully seated.