
Astro Van 2WD V6-4.3L VIN W (2001)
Front Door Weatherstrip: Service and Repair
Weatherstrip Replacement - Front Door Opening
REMOVAL PROCEDURE
1. Remove the interior garnish moldings.
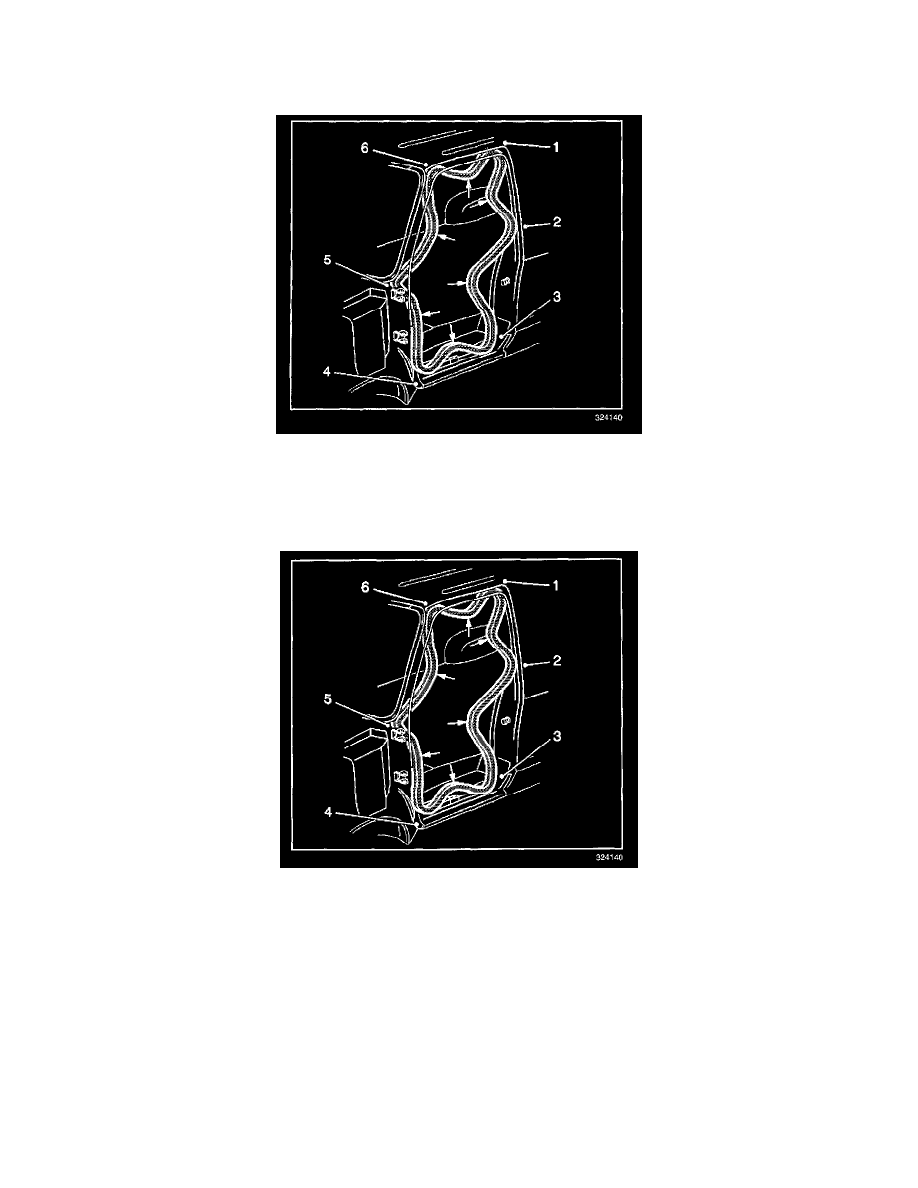
2. Pull the door weatherstrip using the Door Trim Pad and Garnish Clip Remover from the body flange, starting at the upper right corner
(6,5,4,3,2,1).
INSTALLATION PROCEDURE
1. Partially attach the weatherstrip to the body flange in six areas (1,2,3,4,5,6):
The weatherstrip length is equally distributed around the door opening.
1.1.
Seat the weatherstrip onto the body flange to approximately 154 mm (6 in) on each side of the corner in order to install the weatherstrip at
the corner.
1.2.
Fit the weatherstrip to the opening by hand.
IMPORTANT: When using the rubber mallet, it is critical that the weatherstrip be hit square to the flange. Otherwise, an undesirable spreading of
the carrier will occur and result in reduced retention.
1.3.
Use a rubber mallet in order to install the thick flange areas of the hinge and the windshield pillars, and in each corner.
2. Ensure that the following conditions are met:
^
The weatherstrip fits into the corner and matches the radius of the body flange.
^
The weatherstrip is seated completely onto the flange in all areas, resulting in a smooth vinyl trim around the entire door opening.
^
There is no distortion or excessive spreading of the carrier as a result of hitting the carrier improperly with the rubber mallet.
^
The weatherstrip is not kinked or distorted after installation.