
Astro Van 2WD V6-4.3L VIN W (2001)
Tighten
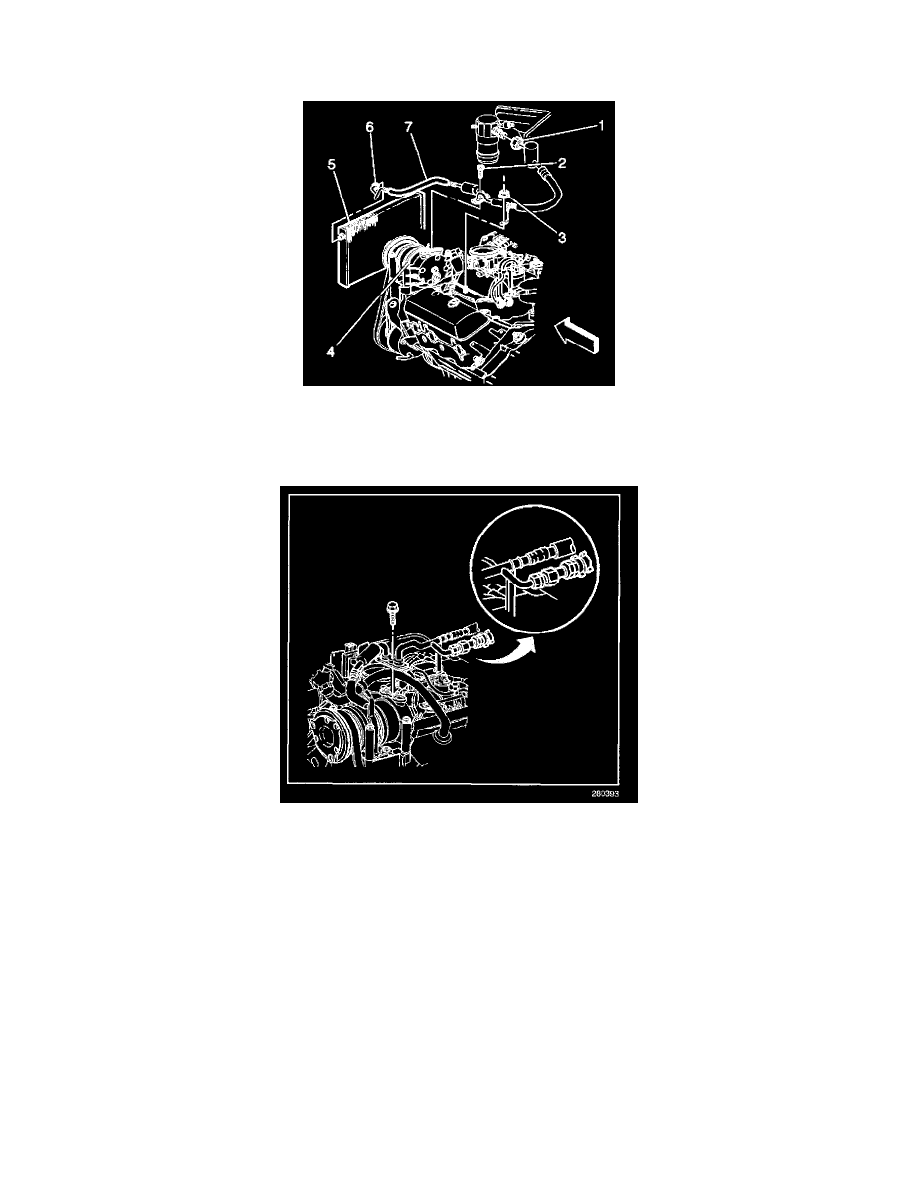
Tighten the compressor hose assembly nut (6) to the condenser to 28 N.m (21 lb ft).
7. Install the hose clamp bracket nut (3) to the engine stud.
Tighten
Tighten the hose clamp bracket nut (3) to the engine stud to 5 N.m (44 lb in).
8. Install the compressor hose assembly seals.
8.1.
Coat the new sealing washers and O-rings with a coat of 525 viscosity refrigerant oil.
8.2.
Install new O-ring seals to the compressor hose assembly ends.
8.3.
Install new seal washers to the compressor.
8.4.
Install the sealing washers.
9. Install the compressor hose assembly bolt to the compressor.
Tighten
Tighten the compressor hose assembly bolt to the compressor to 34 N.m (25 lb ft).
10. Install the engine cover.
11. Install the grille.
12. Evacuate and recharge the system. Refer to Refrigerant Recovery and Recharging.
13. Leak test the fittings of the component using the J 39400-A.
14. Install the air cleaner.
15. Connect the IAT sensor.
16. Connect the MAF sensor.
Evaporator Tube Replacement
TOOLS REQUIRED