
Astro Van 2WD V6-4.3L VIN W (2001)
Suspension Strut / Shock Absorber: Service and Repair
Front Suspension
Shock Absorber Replacement
Shock Absorber Replacement
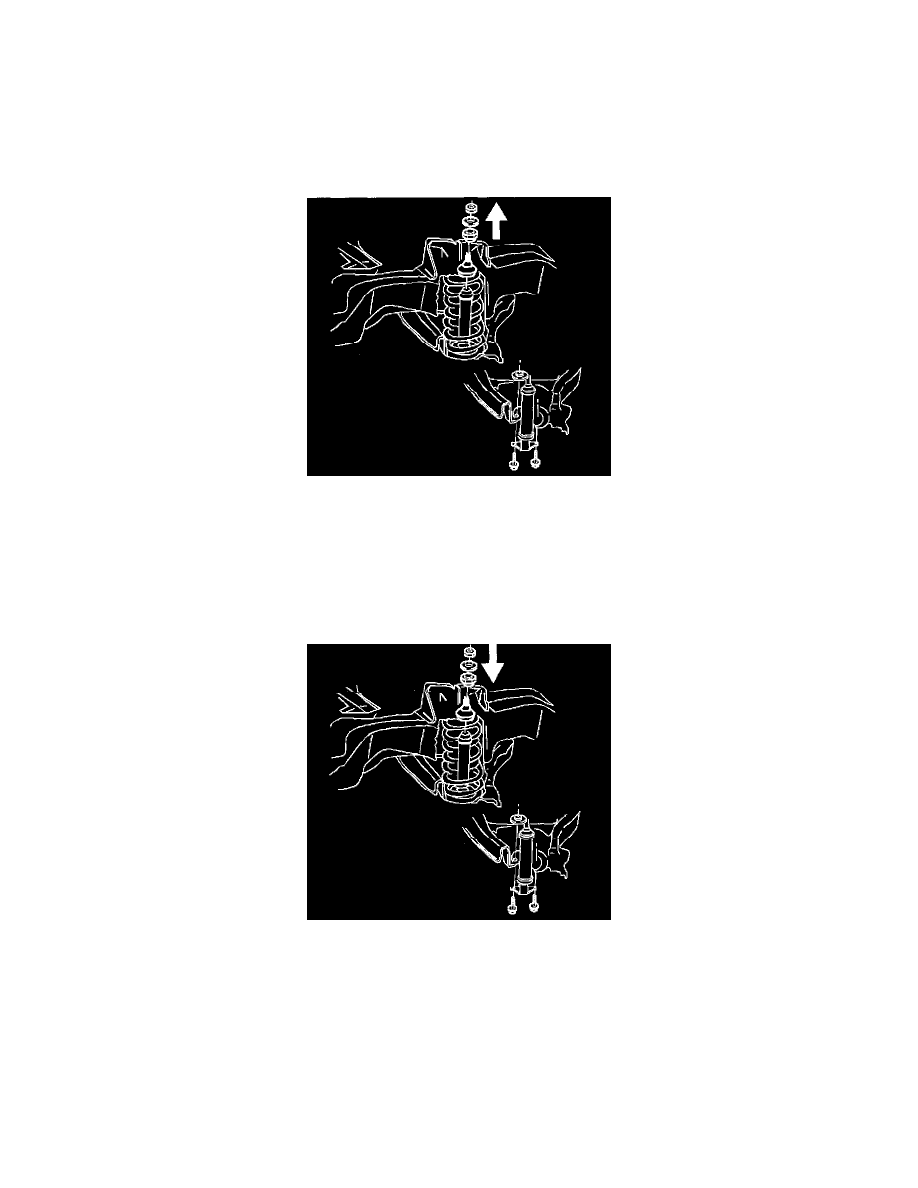
Removal Procedure
1. Raise the vehicle. Refer to Vehicle Lifting.
2. Remove the tire and wheel. Refer to Tire and Wheel Removal and Installation.
3. Remove the shock absorber mounting nut, the retainer, and the insulator. Hold the shock absorber upper stem in order to keep the stem from
turning. A hex is provided on the end of the stem for this purpose.
4. Remove the shock absorber mounting screws. The nuts will remain attached to the lower control arm.
5. Pull the shock absorber out through the hole in the lower control arm.
Installation Procedure
1. Install the shock absorber, fully extended, up through the hole in the lower control arm.
-
The lower retainer and the insulator must be attached to the shock absorber upper stem before positioning the shock absorber.
-
The shock absorber upper stem will pass through the mounting hole in the upper control arm frame bracket.
2. Install the upper insulator, the retainer, and the shock absorber mounting nut over the shock absorber upper stem.
Notice: Refer to Fastener Notice in Service Precautions.
3. Install the shock absorber mounting screws through the holes in the lower control arm.
3.1.
Make sure the nuts are aligned properly.
3.2.
Tighten the shock absorber mounting nut to 20 Nm (15 ft. lbs.), while holding the upper stem of the shock absorber.
3.3.
Tighten the shock absorber mounting screws to 25 Nm (18 ft. lbs.).
4. Install the tire and wheel. Refer to Tire and Wheel Removal and Installation.