Astro Van L AWD V6-262 4.3L VIN W CPI (1992)

1)
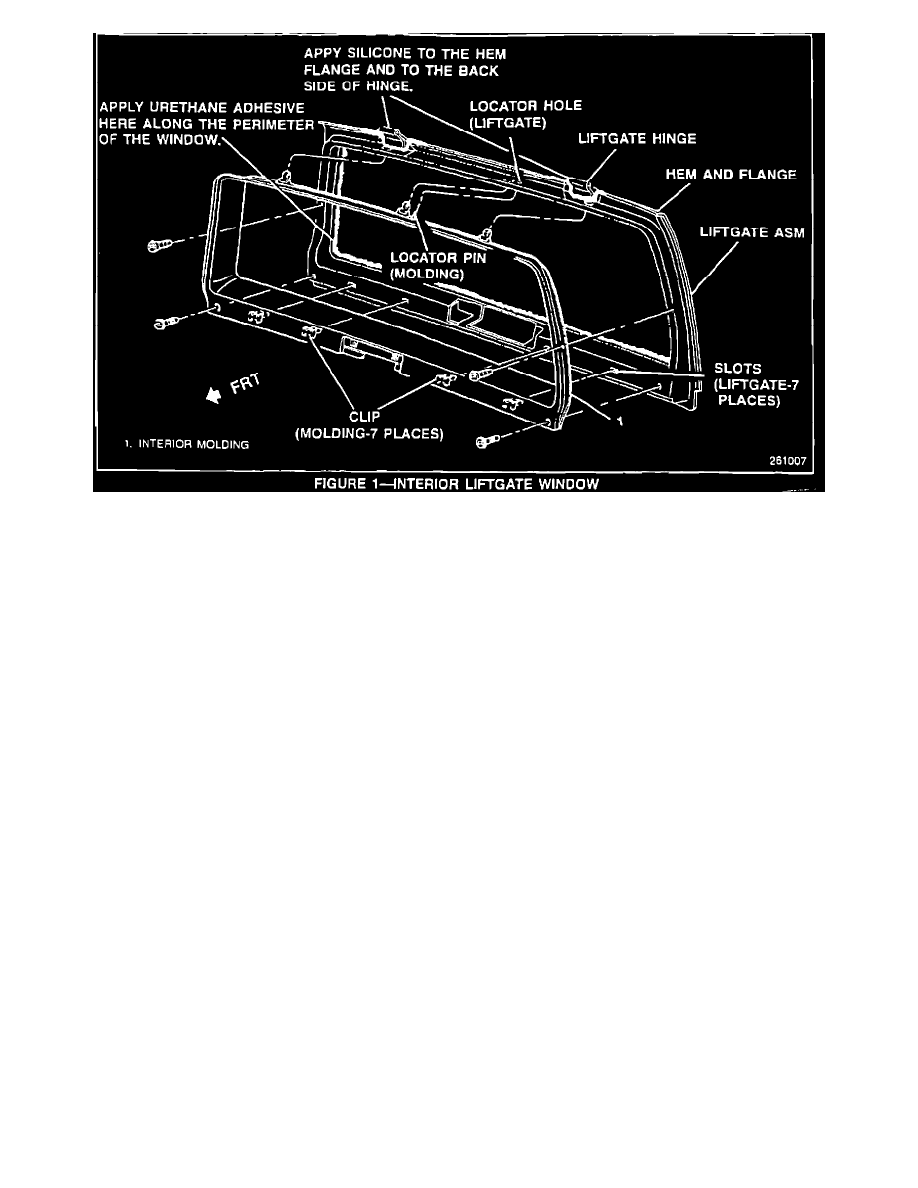
To repair this condition it will be necessary to apply a clear flexible silicone (P/N 1052915 or equivalent) to the surrounding hinge area and to the
upper liftgate hem-flange (Figure 1) and/or black urethane adhesive (P/N 12345097 or equivalent) along the perimeter of the interior of the rear
liftgate window (It will be necessary to remove the liftgate interior molding - Figure 1).
Important:
Before closing the liftgate or water testing the vehicle, allow the sealant(s) to properly cure per the manufacturer's recommendations.
Compression Leaks
Water enters the vehicle on the left or right side of the liftgate or at the top of the liftgate at roof level.
1.
Remove the rear air conditioning duct if equipped.
2.
Remove the interior roof molding.
3.
Remove the screws from the quarter panel side moldings in order to gain access to the weatherstrip flange.
4.
Remove the lower carpet sill plate.
5.
Remove the weatherstrip from the flange.
6.
Bend the flange approximately 1/8" (in a uniform manner) rearward (towards you) approximately 3-4 inches to the left and to the right of leak
area.
Important:
Use caution when bending the flange or you may distort the metal and direct the leak to some other entry point. Use sheet metal bending pliers or
equivalent to bend the flange.
