
Astro Van L AWD V6-262 4.3L VIN Z (1994)
Installation Procedure (Figures 1, 2, and 3)
Tool Required
Kent Moore J 35910 Clamp Installer
1.
Install loose boot clamp on the CV joint boot prior to inserting the end of the old shaft into the new CV joint kit.
2.
Forcibly push the shaft in the new CV joint in order to engage the snap ring on the shaft. An audible sound should be heard when engagement of
snap ring occurs on the shaft. Verify engagement of the snap ring to the shaft by attempting to separate both components.
3.
Locate the boot clamp in the groove of the boot seal groove for the clamp.
4.
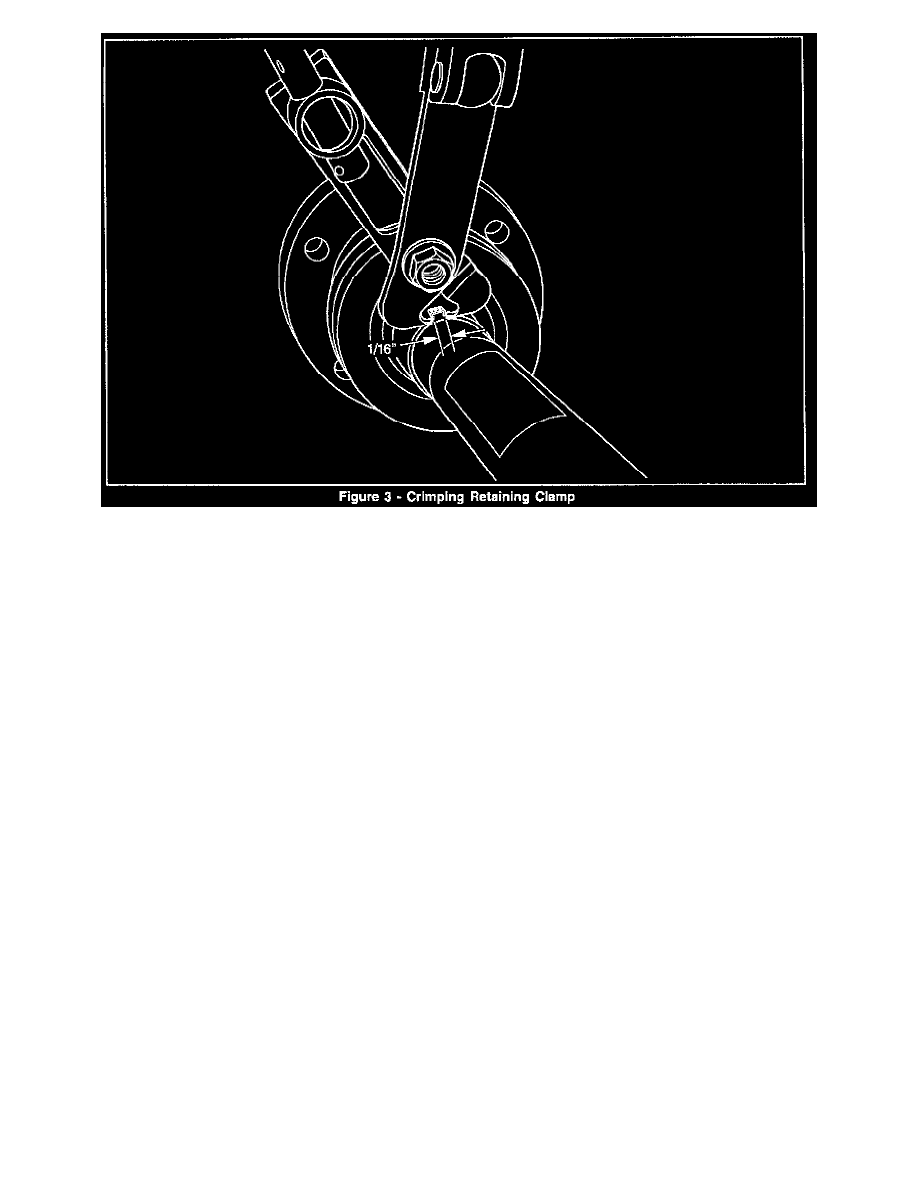
Using the clamp installer tool with a breaker bar and torque wrench, crimp the boot clamp into position on the CV joint boot (Figure 3). Leave
approximately 1/16 inch of a gap in the boot clamp (Figure 3).
5.
Re-install the front propeller shaft into the vehicle. There are no "alignment" marks on the new joint for a balance reference.
Tighten:
^
Bolts to transfer case to 125 N.m (92 lb ft) (Figure 1, Item 2).
^
Bolts to front axle flange to 72 N.m (53 lb ft) (Figure 1, Item 3).
6.
Road test the vehicle for driveline disturbances. If the road test reveals a disturbance, re-index the front propeller shaft on the axle flange. If after 3
attempts at re-indexing the propeller shaft still does not achieve an acceptable balance, use the Electronic Vibration Analyzer (EVA) to system
balance the front propeller shaft. Refer to Section 0C of the appropriate Service for further details).
Parts Information
P/N
Description
Qty
26047645
Kit (Cross-Groove and Boot)
1
Parts are currently available from GMSPO.
Warranty Information