
Astro Van L AWD V6-262 4.3L VIN Z (1994)
Turn Signal Switch: Service and Repair
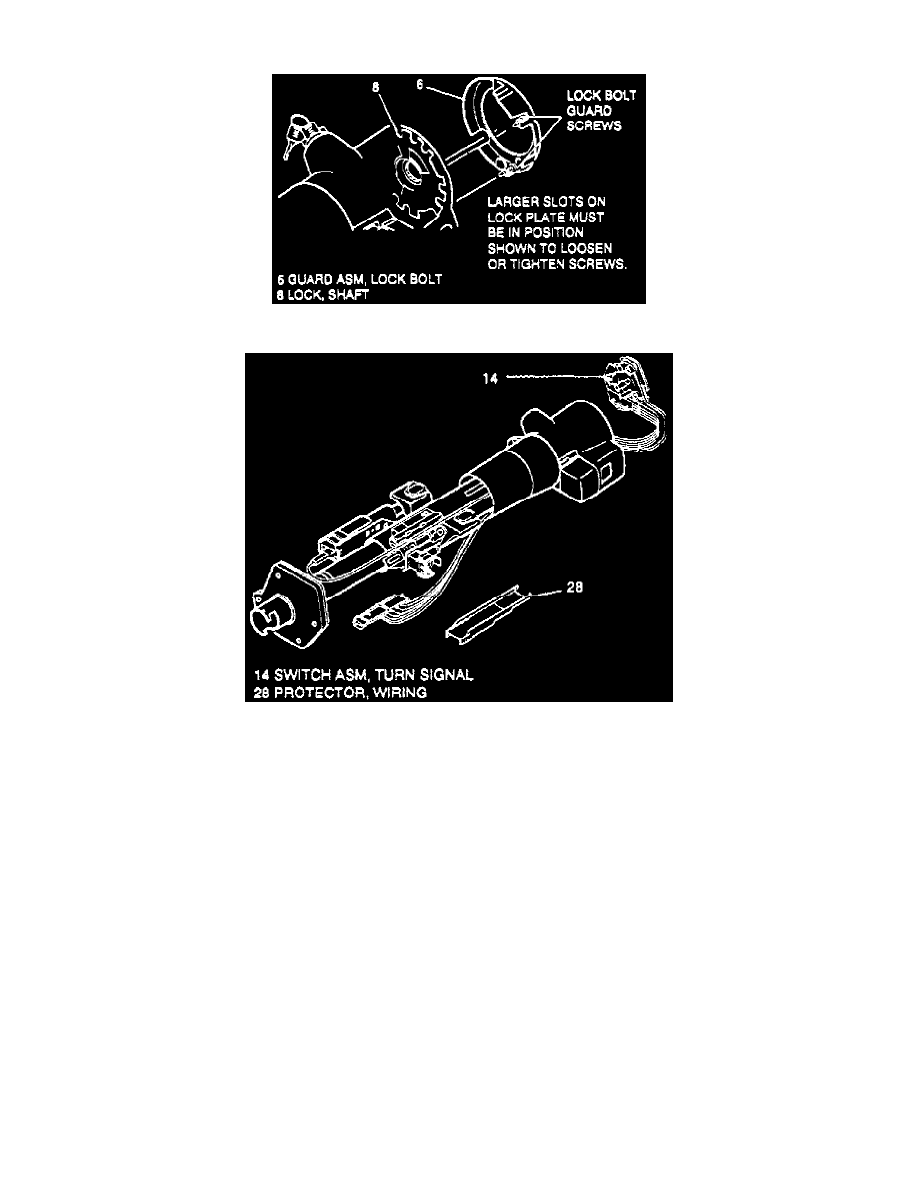
Fig. 8 Lock Bolt Guard Removal.
Fig. 17 Turn Signal Switch Replacement.
1. Place ignition switch in Lock position to prevent coil assembly from moving off center.
2. Disconnect battery ground cable.
3. Remove steering wheel.
WARNING: Refer to Air Bags and Seat Belts/ Air Bags (Supplemental Restraint Systems)/ Service and Repair/ Air Bag System Disarming &
Arming.
4. Remove coil assembly retaining ring from upper steering column.
5. Remove SIR coil assembly. Let coil assembly hang freely.
6. Remove wave washer.
7. On models with tilt steering column, remove lock bolt guard assembly, Fig. 8, as follows:
a. Place ignition switch in Run position.
b. Rotate steering shaft assembly until block tooth is at seven o'clock position and bolt guard screws are accessible through wide slots in shaft
lock.
c. Loosen screws on lock bolt guard until guard can be removed.
d. Place ignition switch to Lock position.
8. Remove shaft lock retaining ring using tool No. J-23653-SIR, or equivalent, to push down shaft lock. Discard ring.
9. Remove shaft lock, Fig. 8.
10. Remove turn signal canceling cam assembly.
11. Remove upper bearing spring.
12. Remove upper bearing inner race and inner race seat.
13. Position turn signal to right turn position.
14. Remove multi-function lever and hazard knob assembly.