
Astro Van M L4-151 2.5L (1985)
Hydraulic Brake Booster: Service and Repair
Assembly
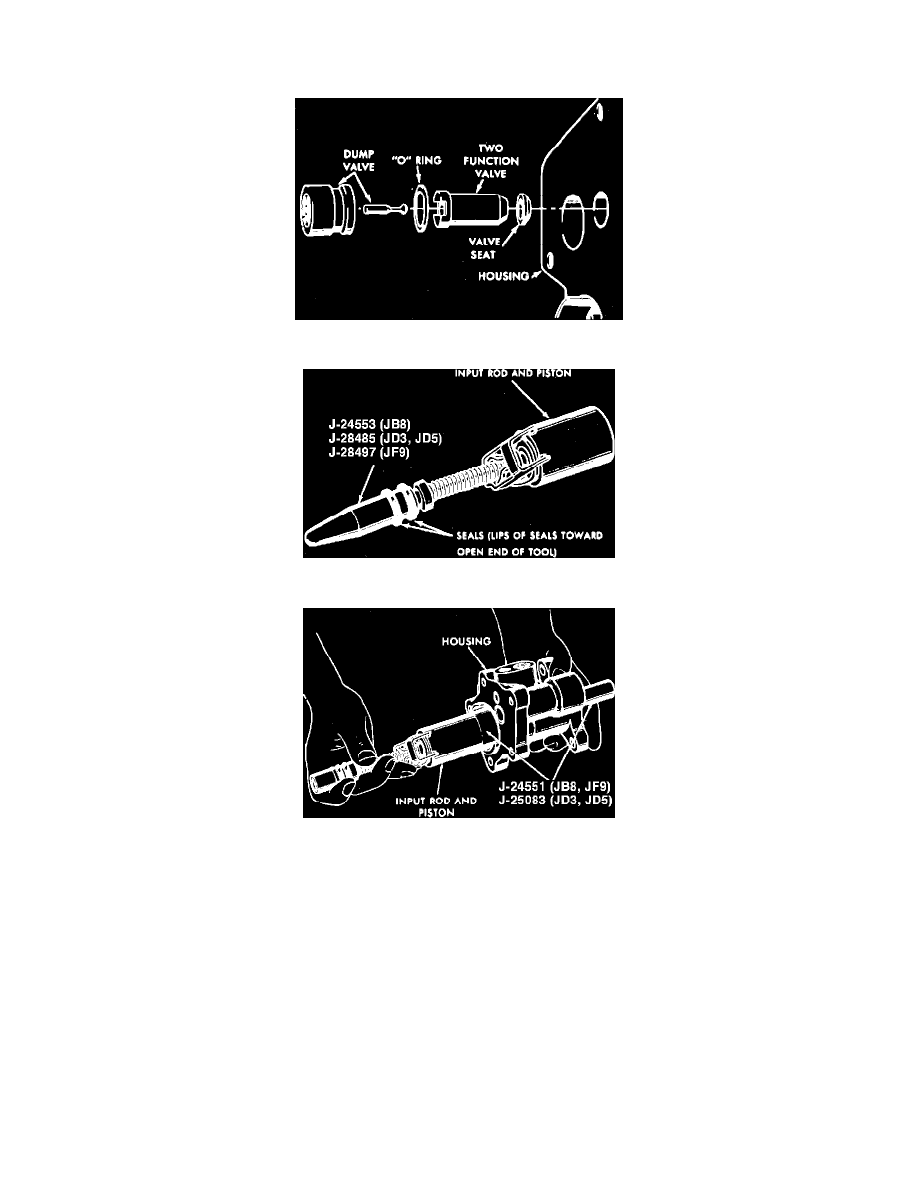
Fig. 7 Accumulator valves
Fig. 8 Installing input rod seals. 1980---84
Fig. 9 Installing input rod & piston assembly into booster
1.
Install O-ring onto spool plug, then push spool plug into housing and install retaining ring.
2.
Coat piston bore and piston seal with clean power steering fluid, then install seal into bore. Lip of seal must face away from the master cylinder
mounting flange. Also, ensure seal is fully seated in the housing.
3.
On 1980---84 models, proceed as follows:
a. Lubricate input rod end, input rod seals and seal installer with clean power steering fluid.
b. Slide seals on tool with the lip of the cups toward open end of tool, Fig. 8.
c. Slide tool over input rod end and down to the second groove, then slide the forward seal off tool into the groove.
d. Install remaining seal in first groove. Ensure seals are fully seated. On JD3 and JD5 models, only one seal is used.
4.
On all models, lubricate piston and piston installing tool, then hold large end of tool against the piston, Fig. 9.
5.
Slide the piston installing tool and piston into piston bore and through piston seal, then remove piston installing tool.
6.
Install hose fitting O-ring, if removed.
7.
If accumulator valve was removed, install new valve seat into valve bore. The seat can be forced to the bottom by installing the check valve
assembly, Fig. 7.
8.
Install new dump valve over check valve assembly. Ensure dump valve plunger is held in position until installation is complete.