
Aveo L4-1.6L (2008)
3. Locate the 2-wire dress cover locking tabs that are opposite the wire end of the connector. Use a small flat-bladed tool to unlock the dress cover.
4. Once the front 2 locks are unlocked, lift the back 2 locks that are on the wire side of the connector.
5. If the connector has a nose piece, use a small flat-bladed tool to remove the nose piece by inserting the blade into the slot on the front of the
connector and prying up on the nose piece.
Important: Always use care when removing a TPA in order to avoid damaging it.
6. Remove the TPA by inserting a small flat-blade tool into the small slot on the TPA and pushing down until the TPA comes out of the connector.
Gently pry the TPA out of the connector.
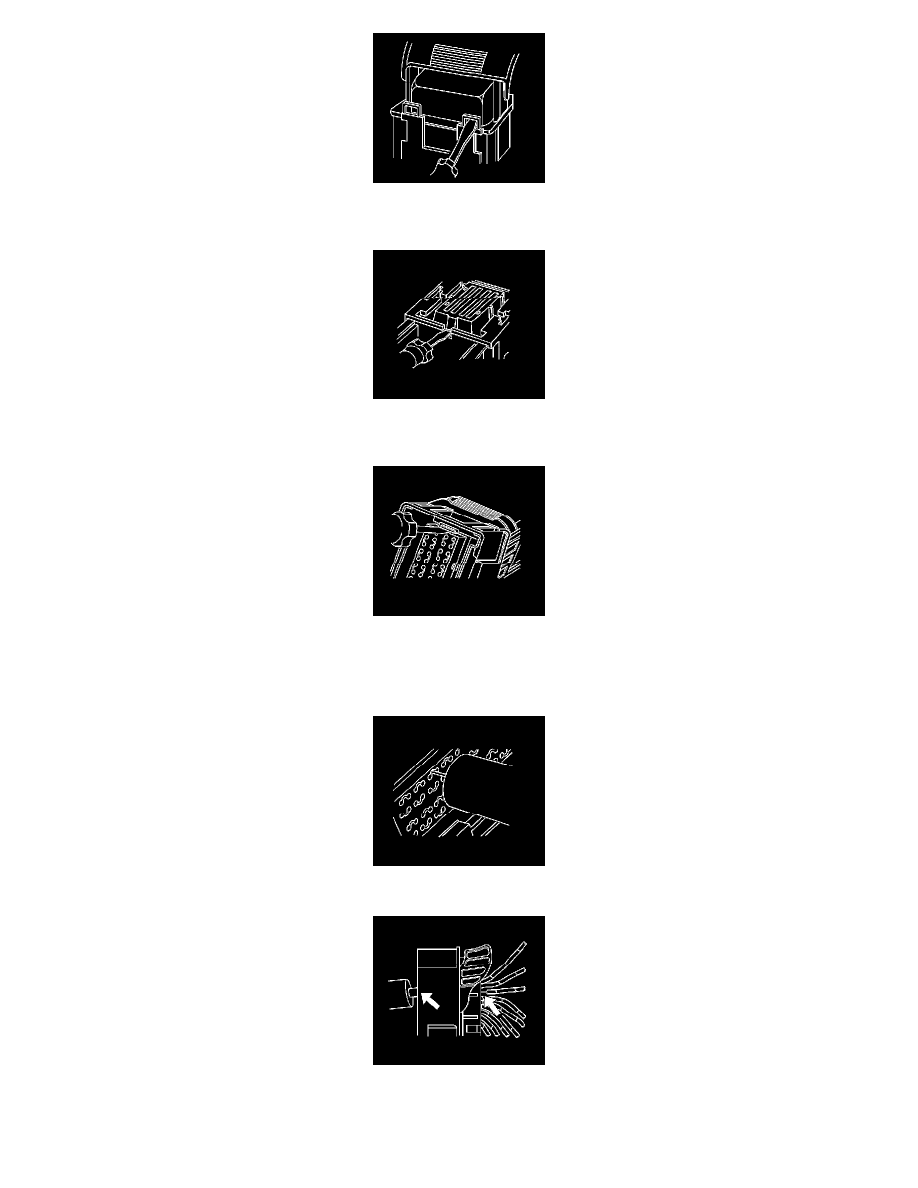
7. Insert J 44020 -4 (GM P/N 15314260) into the 2 triangular cavities on each side of the terminal at the front of the connector.
8. While holding the removal tool in place, gently pull the wire out of the back of the connector. Always remember never use force when pulling a
terminal out of a connector.
Terminal Repair Procedure