
Aveo L4-1.6L (2008)
the ABS test connector and attach it to the coolant return hose at the side of the coolant surge tank (2).
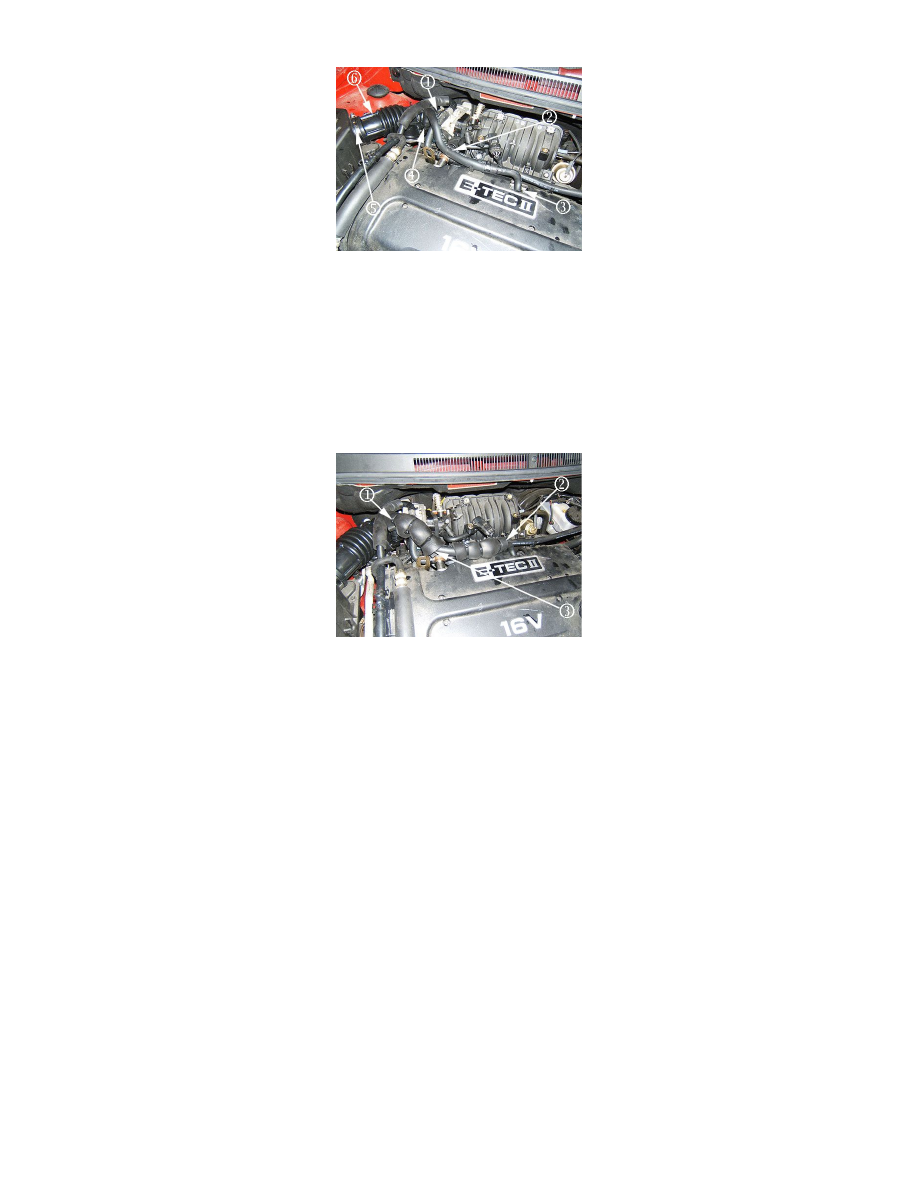
24. Install the new air outlet duct assembly (6) to the throttle body (1). Install the other end to the air cleaner assembly (5).
1. Tighten both clamps.
Tighten
Tighten the air outlet duct assembly clamps to 3 Nm (27 lb in).
2. Install the IAT sensor connector to the new air outlet duct assembly (6).
3. Install the new crankcase vent hose assembly (2) to the cam cover (3) and the other end to the new air outlet duct assembly (4).
4. Ensure that the new spring clamps are not in contact with any other hose or engine component.
Important
It may be necessary to provide additional slack, by re-routing MAP sensor engine wiring harness so crankcase breather insulation will
not pull on and cause damage to the wiring harness.
25. Wrap the breather hose and coolant outlet return hose together at the right side of the PCV valve with foam insulator (2), size 80 mm x 130 mm
(3.1 in x 5.1 in) provided in the kit. Secure the insulator with three tie straps also provided in the kit.
Important
A third tie strap may be needed to secure the insulator as shown above (1). Use one tie-strap if necessary.
Important
It may be necessary to re-route the crankcase breather hose and insulation, so it is not in contact with the engine lift hook bracket.
Wrap the breather hose and coolant outlet return hose together at the left side of the PCV valve with foam insulator (3), P/N 96942681, size 130 mm x
145 mm (5.1 in x 5.7 in) provided in the kit. Secure the insulator with two tie straps also provided in the kit.
Important
Be sure to add the correct coolant to the vehicle's cooling system.
26. Top off the coolant and install the surge tank cap. Refer to the Cooling System Draining and Filling Procedure in SI.
27. Connect the negative battery cable.
Tighten
Tighten the battery negative cable bolt to 4.5 Nm (40 lb in).
28. Reset the radio stations and the clock.
29. Perform the following idle relearn procedure:
1. Turn the ignition ON.