
Beretta L4-121 2.0L (1987)
Compressor Clutch: Service and Repair
Installation
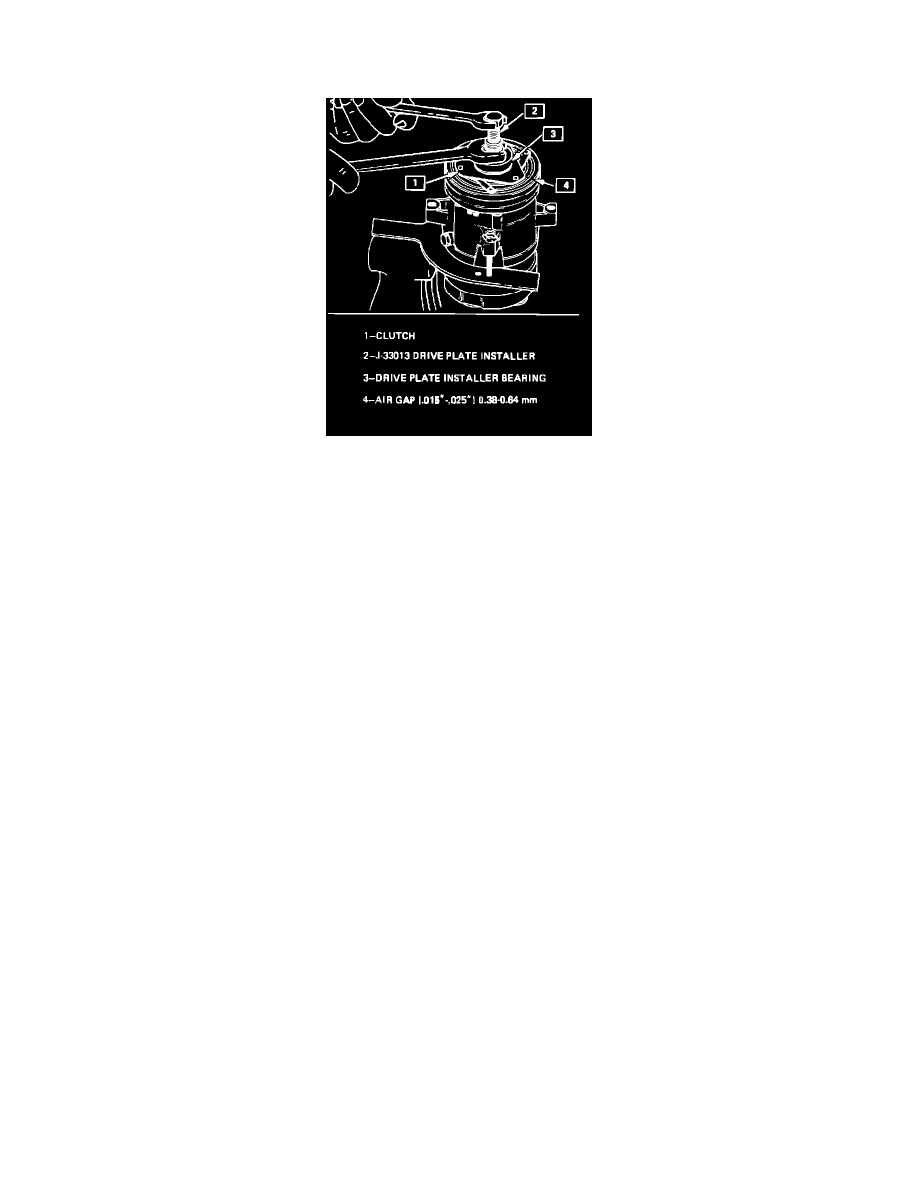
Fig. 3 Clutch plate & hub installation
1.
Install drive key into hub key groove, allowing key to protrude 1/8 inch from keyway in hub.
2.
Align drive key with keyway in shaft, then mount clutch and hub assembly on compressor shaft. Ensure that friction surfaces of clutch plate
and hub are clean prior to installation. Do not force assembly onto shaft, as compressor will be damaged.
3.
Reverse body section of J-33013 on center screw and thread tool onto compressor shaft as shown in Fig. 3.
4.
Hold center screw of tool with suitable wrench. Turn body of tool clockwise several turns, then remove tool and ensure that drive key is properly
positioned.
5.
Reinstall tool and complete clutch installation, holding center screw and turning body clockwise to press clutch plate and hub assembly onto shaft.
If center screw of clutch plate tool is bottomed on compressor shaft, or if center screw is rotated while body is held secure, drive key will
be improperly positioned and the clutch hub will be damaged.
6.
With clutch hub seated on compressor shaft, ensure that air gap between clutch plate and hub is within specifications.
7.
Remove service tool and ensure that drive key is even with or protruding slightly above surface of hub.
8.
Install shaft nut, hold clutch hub with J-33027 or equivalent and torque shaft nut to 8-16 ft. lbs. using suitable socket.