
C 1500 Truck 2WD V8-350 5.7L VIN K TBI (1995)
Proper Taping
Step 5: Tape the Cable
Tape over the entire cable using a winding motion. This tape will replace the section of the jacket you removed to make the repair.
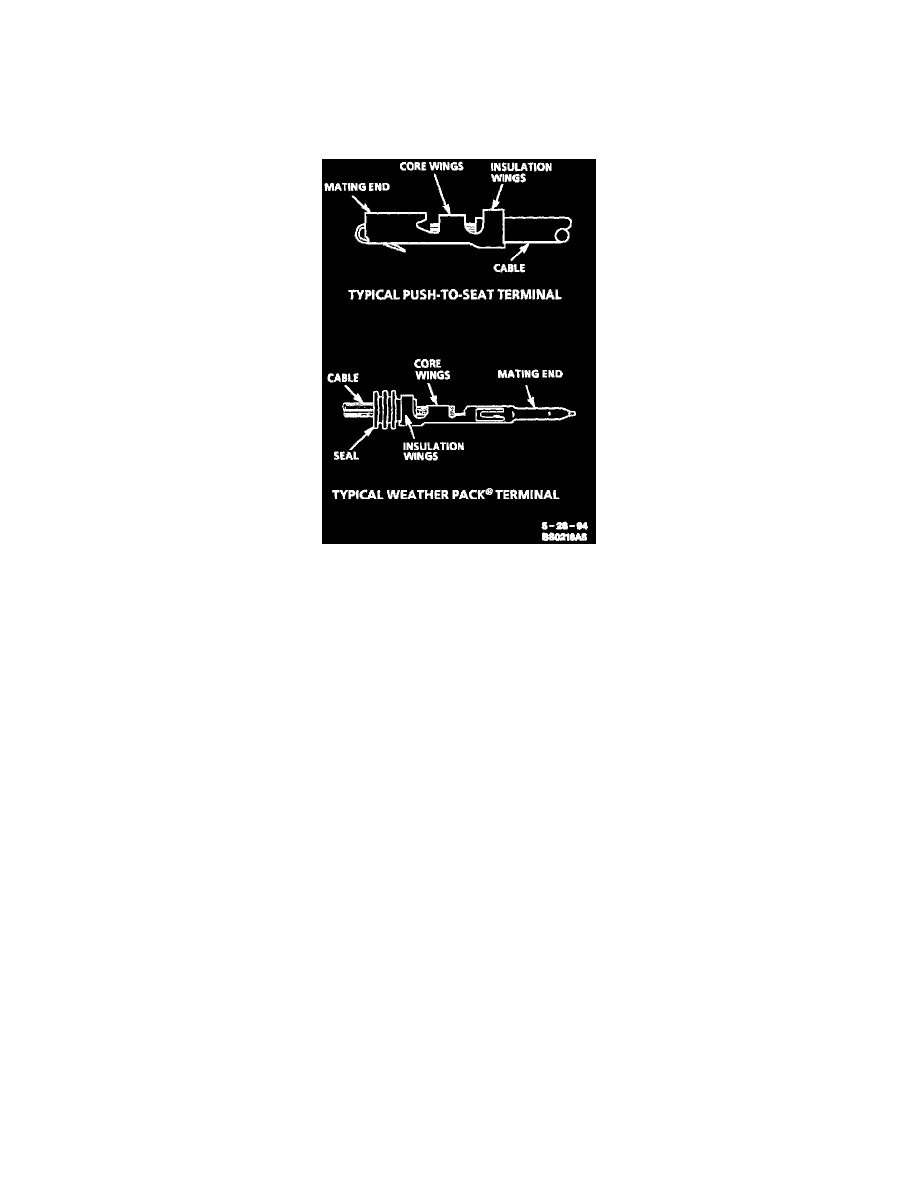
Terminal Repairs
Terminal Repair
The following repair procedures can be used to repair Push-to-Seat, Pull-to-Seat or Weather Pack(R) terminals. Some terminals do not require all steps
shown. Skip those that don't apply. The Terminal Repair Kit (J 38125-A) contains further information.
Step 1:
Cut off terminal between core and insulation crimp (minimize wire loss) and remove seal for Weather Pack(R) terminals.
Step 2:
Apply correct seal per gauge size of wire and slide back along wire to enable insulation removal (Weather Pack(R) terminals only).
Step 3:
Remove insulation.
Step 4:
Align seal with end of cable insulation (Weather Pack(R) terminals only).
Step 5:
Position strip (and seal for Weather Pack(R)) in terminal.
Step 6:
Hand crimp core wings.
Step 7:
Hand crimp insulation wings (non-Weather Pack(R)). Hand crimp insulation wings around seal and cable (Weather Pack(R)).
Step 8:
Solder all hand crimped terminals.