
C 1500 Truck 2WD V8-6.5L DSL Turbo VIN F (1998)
-
Turn the steering wheel so that the vehicle's wheels are pointing straight ahead.
-
Turn the ignition switch to "LOCK" and remove key.
1. "AIR BAG" fuse from I/P fuse block.
2. Steering column filler panel.
3. Connector position assurance (CPA) retainer and yellow 2-way SIR connector at base of steering column.
Important
-
With the "AIR BAG" fuse removed and ignition switch "ON", the "AIR BAG" warning lamp will be "ON ". This is normal operation and does
not indicate an SIR system malfunction.
W/Dual Air Bags
Description
1. Remove the key from the ignition switch.
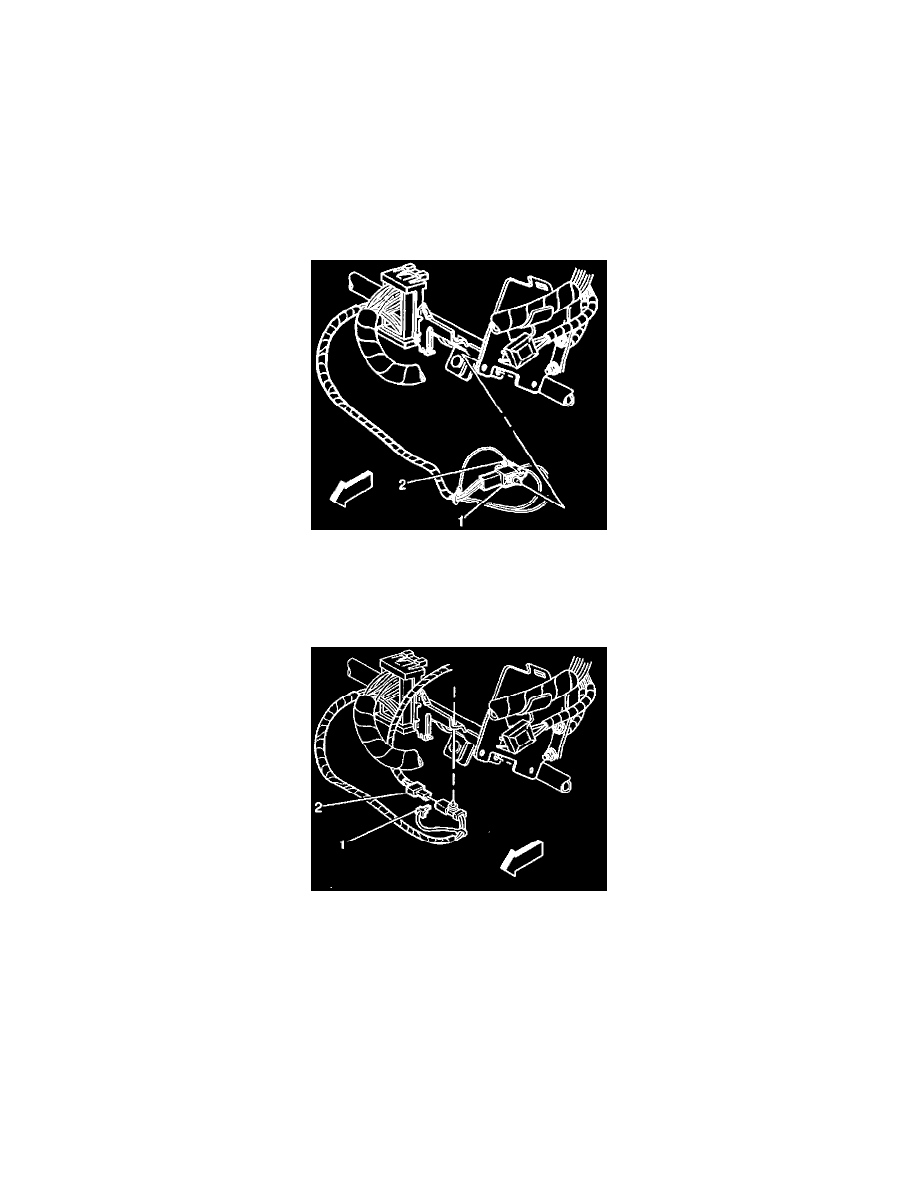
2. Connect the passenger yellow 2-way connector (1) located near the base of the steering column.
3. Install the Connector Position Assurance (CPA) (2) to the passenger yellow 2-way connector located near the base of the steering column.
Description
4. Connect the driver yellow 2-way connector (2) located at the base of the steering column.
5. Install the Connector Position Assurance (CPA) (1) to the driver yellow 2-way connector located at the base of the steering column.
6. Install the sound insulator-LH. Refer to Instrument Panel Sound Insulator Replacement in Interior Trim.
7. Install the AIR BAG Fuse to the IP fuse block.
8. Staying well away from both air bags, turn the ignition switch to the RUN position.
8.1.The AIR BAG warning lamp will flash seven times.
8.2.The AIR BAG warning lamp will then turn OFF.
9. Perform the SIR Diagnostic System Check if the AIR BAG warning lamp does not operate as described.
W/O Dual Air Bags
INSTALL OR CONNECT