
C 20 3/4 Ton Pickup 2WD V8-379 6.2L DSL VIN J FI (1982)
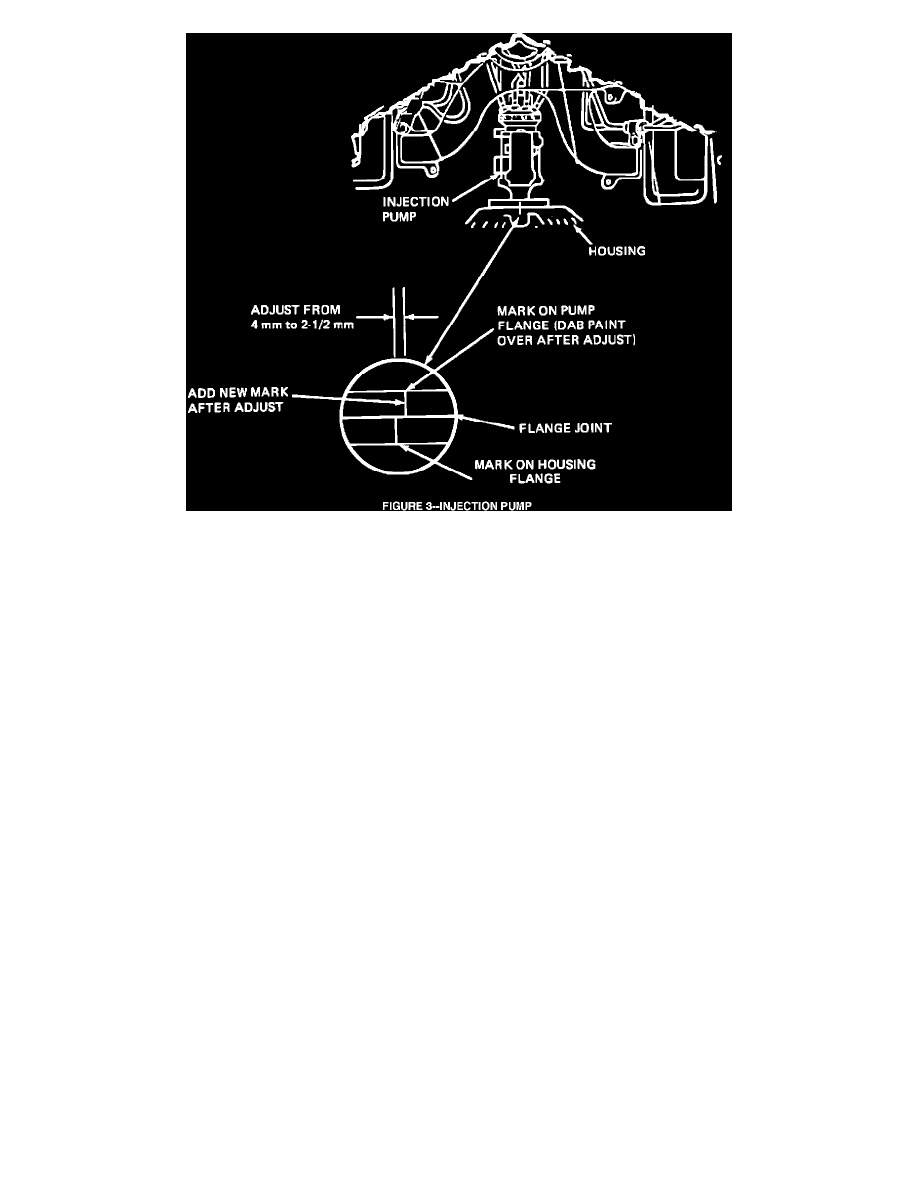
FIGURE 3 - Injection Pump
3.
Observe the stamped marks under the tape. The marks stamped into the pump and front housing should be offset 4 mm. Consider the mark in
the front housing as the zero point. The pump timing mark was set 4 mm toward the left side (driver's side) from the zero point. (This is the
advance direction). Refer to Figure 3.
4.
Loosen the three pump attaching nuts.
5.
Rotate the pump in the retard direction 1-1/2 mm so that the timing marks will be offset by 2-1/2 mm or .098 inches.
SERVICE PROCEDURE (CONT'D)
B.
6. Retighten the three pump attaching nuts to a torque of 25-37 ft.lbs.
7.
Reinspect the timing marks. The mark on the pump should be 2-1/2 mm (.098 inch) in the advance direction from the mark in the front
housing.
8.
Inscribe a mark onto the pump flange in line with the zero point mark in the front housing.
9.
Put a dab of paint over the old mark on the pump.
10.
The pump and housing marks should now show only two marks which are lined up.
11.
DO NOT MAKE TIMING ADJUSTMENT WITH ENGINE RUNNING. DO NOT START ENGINE UNTIL PUMP ATTACHING NUTS
ARE TORQUED SECURELY.
12.
Install campaign completion label and close hood.
CLAIM INFORMATION
Submit a Product Campaign Claim with the information indicated below:
Failure
Labor
Labor
*Other
Code
Operation
Hours
Hours
00
V1880
.2
.1
Description:
Inspect engine number according to step (1) or the service procedure, If engine number is not within the engine parameters,