
C 2500 Truck 2WD V8-379 6.2L DSL (1990)
4.
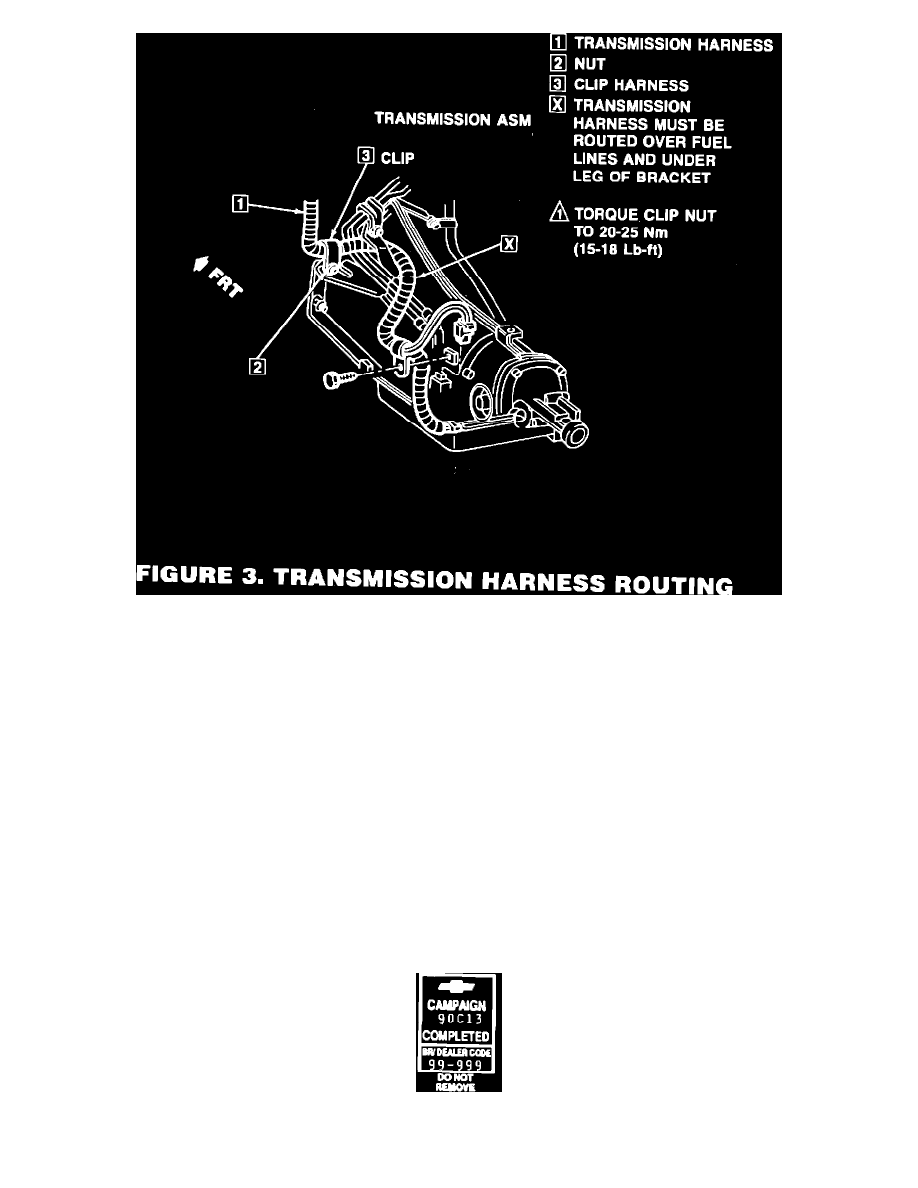
Remove nut (2, Fig. 3). Holding existing transmission harness clip (3, Fig. 3) to transmission housing. Retain clip and nut.
5.
Install new routing bracket (5, Fig. 2) onto transmission housing routing wiring harness (1, Fig. 3) through bracket at point marked "X" on
Figure 3. Harness must be routed over fuel lines and under upper leg of bracket.
BRACKET (5, Fig. 2) MUST BE INSTALLED ON STUDS BEFORE NEW CLIPS ARE INSTALLED.
6.
Install new metal clip (6, Fig. 2) on fuel lines. Install new plastic fuel line clip (4, Fig. 2) on lower portion of fuel lines.
7.
Press rosebuds of lower plastic clip (4, Fig. 2) into holes provided in routing bracket (5, Fig. 2).
8.
Fasten new metal fuel line clip (6) onto upper stud of transmission housing (at bracket) with nut (2, Fig. 2). Torque nut to 20-25 N-m (15-18
lb.ft.)
9.
Install transmission wiring harness clip (3, Fig. 3) on lower stud of transmission housing and fasten with nut. Torque nut to 20-25 N-m (15-18
lb.ft.).
10.
Install Campaign Identification Label.
Campaign Identification Label
Each vehicle corrected in accordance with the instructions outlined In this Product Campaign Bulletin will require a "Campaign Identification Label."
Each label provides a space to include the five (5) digit dealer code of the dealer performing the campaign service. This information may be inserted