
C 2500 Truck 2WD V8-5.7L VIN R (1997)
Brake Rotor/Disc: Service and Repair
Surface Refinishing
You do not need to refinish brake rotors when doing routine brake maintenance such as replacing worn brake shoe and lining assemblies. Refinish
rotors only under the following circumstances:
1. There is a complaint of brake pulsation.
2. There are heat spots or excessive scoring.
Brake rotors have a minimum thickness dimension cast into them. This dimension is the minimum wear dimension and not a refinish dimension. Do
not use a brake rotor that will not meet the dimensions shown in the specifications chart after refinishing. A rotor that is too thin will not have the
proper heat transfer capabilities. Replace it with a new rotor. Refinishing composite rotors requires using a rotor adapter tool as a holding fixture for
the brake lathe.
Accurate control of rotor tolerances is necessary for the proper performance of disc brakes. Machining should be done only with precision equipment.
Service the machining equipment on a regular basis following the manufacturer's recommended maintenance procedures.
When refinishing rotors, make sure the attaching adapters, tool holders, vibration dampeners and tool bits are in good condition. Always use sharp
cutting tools or bits and use only replacement cutting bits recommended by the equipment manufacturer. Dull or worn tools leave a poor surface finish
that will affect initial brake performance. Always use vibration dampening attachments when refinishing braking surfaces. These attachments eliminate
tool chatter to allow for a better surface finish. Make sure these adapters are clean and free of nicks.
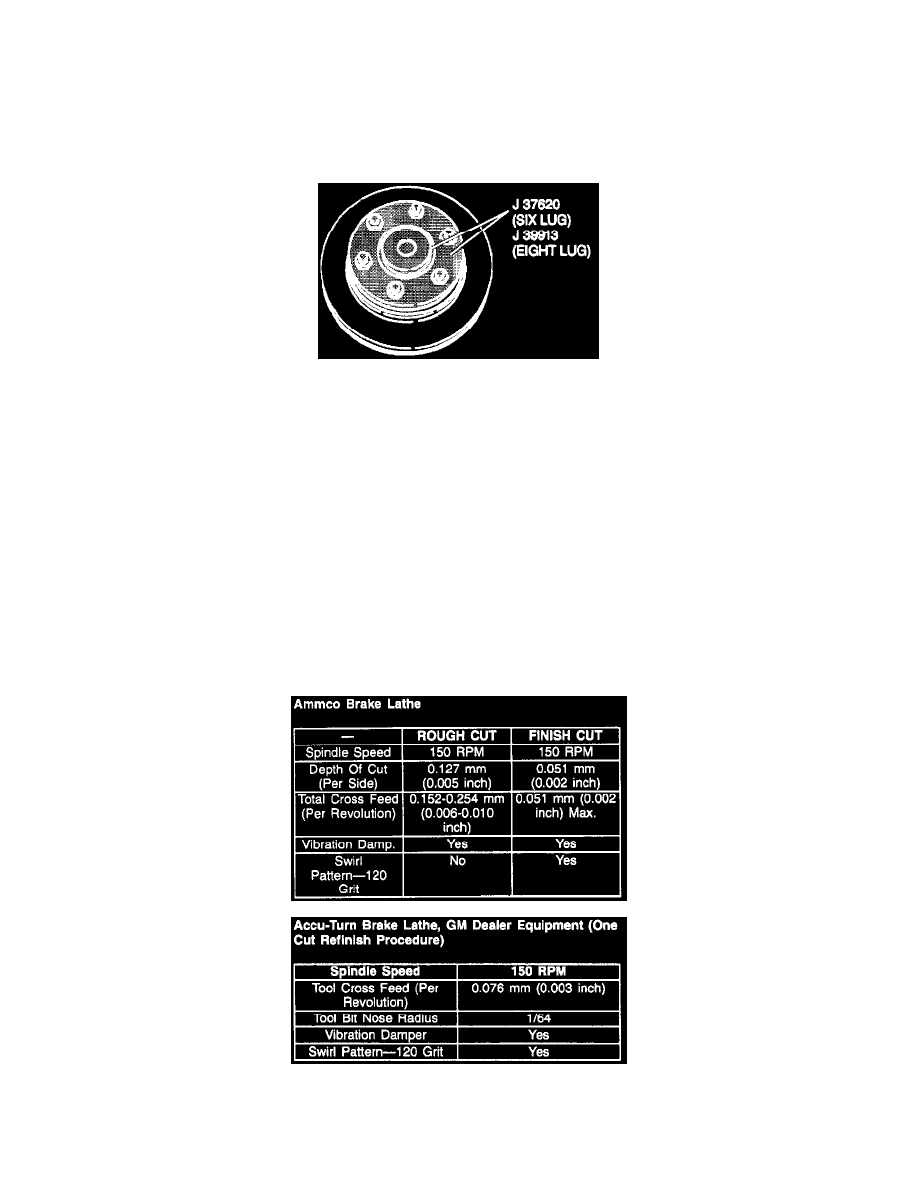
Following are two recommended procedures that achieve adequate results using two different off vehicle drum/disc brake lathes. If any other lathe is
used, follow that manufacturer's instructions and recommendations.
Locate the deepest score and turn the rotor micrometer knobs until the tool bit bottoms out at the deepest point of the score. Zero the scale and back
out the tool bits. Advance the cutter hand wheel until the bits have cleared the inner edge of the rotor face. Adjust the micrometer knobs for
approximately 0.0127 mm (0.005 inch) more than the first reading. This will ensure clearing the rotor in one cut.
It is very important that you make the rotor surface nondirectional by dressing the rotor surfaces with a sanding disc power tool, such as the Ammco
8350 Safe Swirl Disc Rotor Grinder, using 120 grit aluminum oxide sandpaper. Sand each rotor surface using moderate pressure for a minimum of 60
seconds. An alternate method is to use a sanding block with 150 grit aluminum oxide sandpaper. With the rotor turning at approximately 150 rpm,
sand each rotor surface using moderate pressure for a minimum of 60 seconds. After sanding the rotor, clean each surface with denatured alcohol or a