
C 2500 Truck 2WD V8-5.7L VIN R (1997)
2. Align the keyway of the crankshaft sprocket with the crankshaft balancer woodruff key.
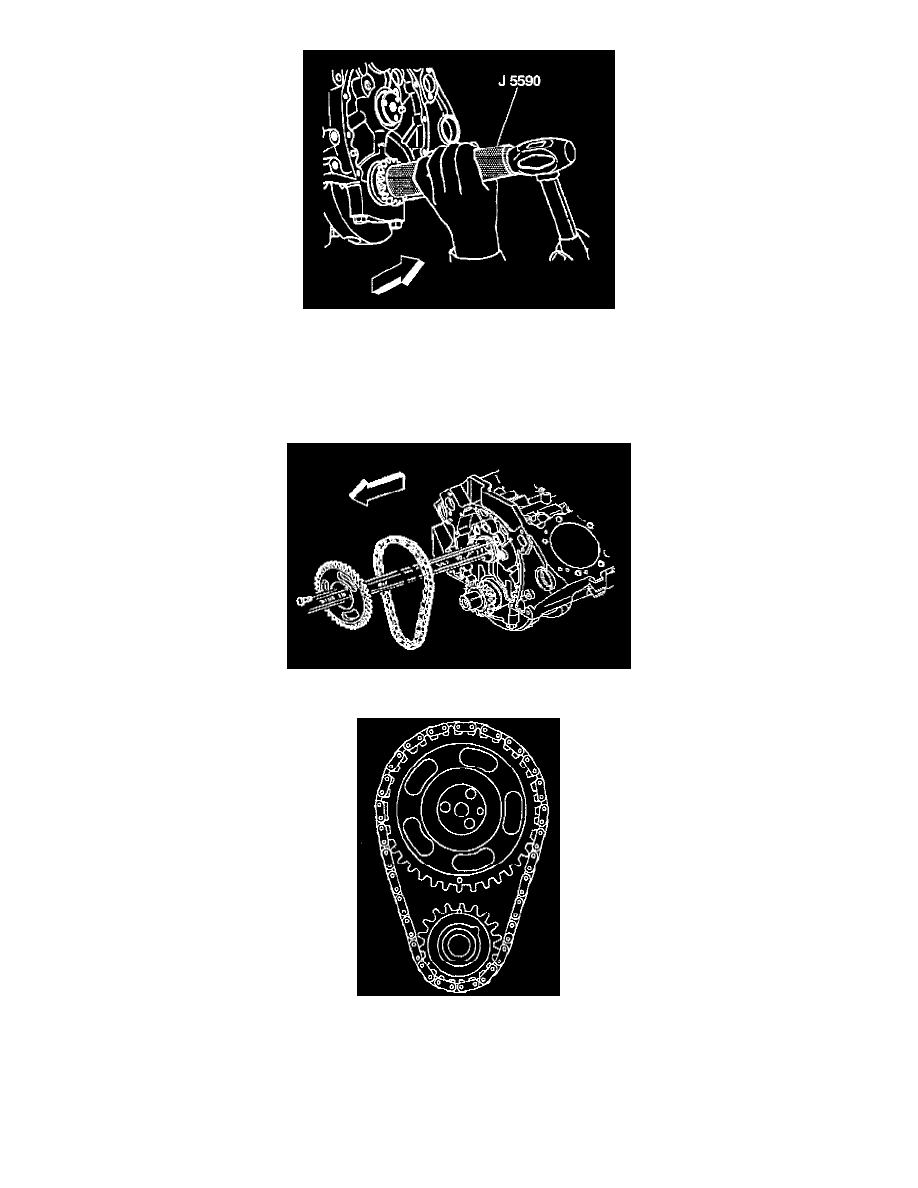
Caution: Wear safety glasses in order to avoid eye damage.
3. Use the J 5590 in order to install the crankshaft sprocket.
4. Rotate the crankshaft until the crankshaft sprocket alignment mark is in the 12 o'clock position.
5. Install the camshaft sprocket and the camshaft timing chain. Install the camshaft sprocket with the alignment mark in the 6 o'clock position.
Notice: Do not use tools to force the camshaft sprocket onto the camshaft. The camshaft sprocket is a slip fit onto the camshaft and does not require
tools to install. Using force against the camshaft can cause component damage and cause the expansion plug at the rear of the clock to move out of
position. The expansion plug out of position can leak engine oil or fall out. A missing or leaking expansion plug at the rear of the camshaft bearings can
cause a loss of oil and oil pressure leaking to extensive engine damage.
6. Rotate the camshaft until the camshaft and crankshaft sprocket alignment marks are in the proper position.
Notice: Use the correct fastener in the correct location. Replacement fasteners must be the correct part number for that application. Fasteners requiring