
C 2500 Truck 2WD V8-5.7L VIN R (1997)
Wheels: Initial Inspection and Diagnostic Overview
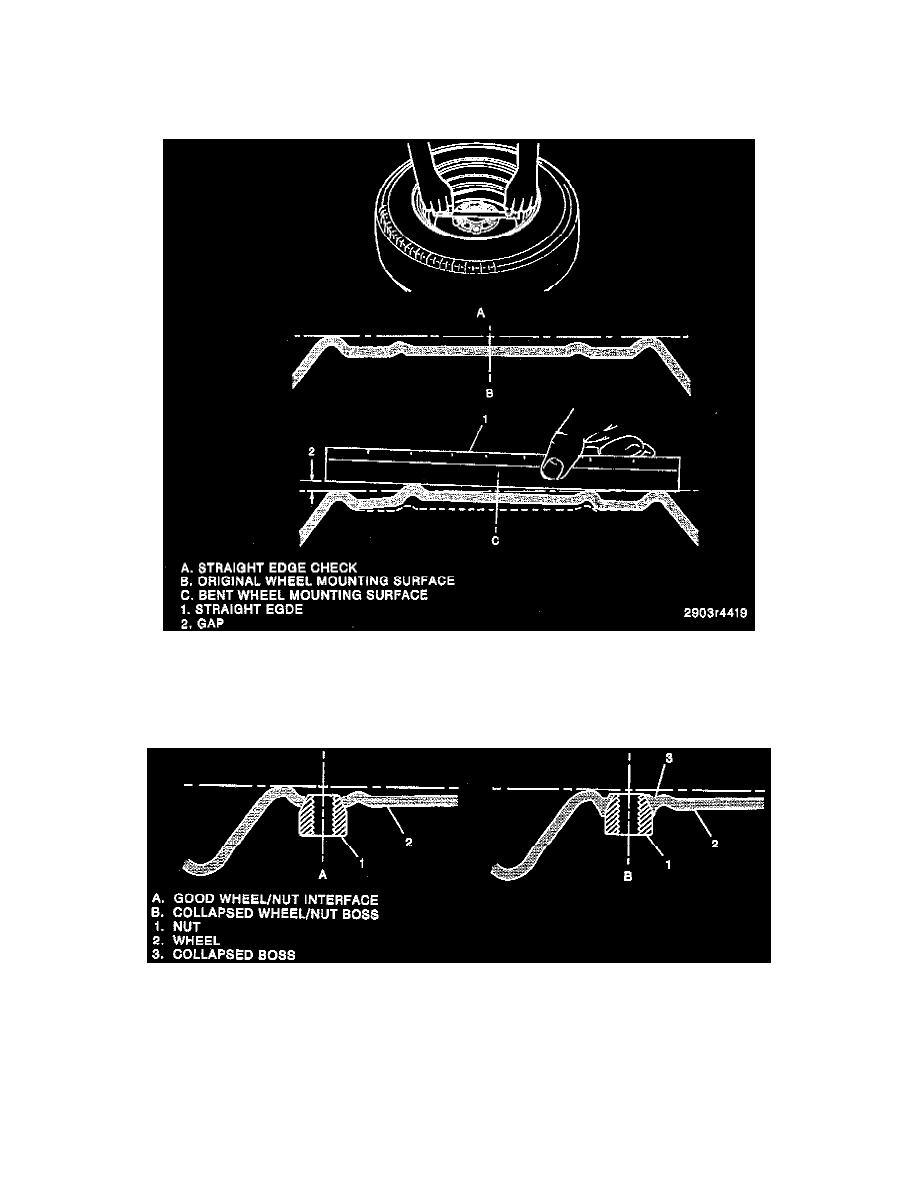
Checking Wheel Mounting Surface
Inspect for the following:
a. Use a straight edge 203 to 229 mm (8 to 9 inches) long. Place it on the inboard mounting surface of the wheel and try to rock it up and down.
b. Repeat the above procedure on at least three or four different positions on the inboard mounting surface.
c. The outer ring of the mounting surface is normally raised above everything inside it. If the wheel mounting surface has been bent on a tire changer,
it will be raised above the outer ring.
d. Check mounting wheel/nut holes for damage that can be caused from over torquing the lug nuts. Look for collapsed wheel/nut bosses or cracked
bosses.
e. If the wheel is bent or the wheel/nut boss area is cracked, replace the wheel.
NOTE: Replacement wheels must be equivalent to the original equipment wheels in load capacity, diameter, rim width, offset, and mounting
configuration. A wheel of incorrect size or type may affect wheel and hub bearing life, brake cooling, speedometer/odometer calibration, vehicle
ground clearance, and tire clearance to the body and chassis.
f.
Steel wheels can be identified by a two or three-letter code stamped into the front side rim near the valve stem. Aluminum wheels have the code,
part number, and manufacturer's ID cast into the backside.