
C 2500 Truck 2WD V8-5.7L VIN R (1997)
8. Bleed the system. Refer to Bleeding.
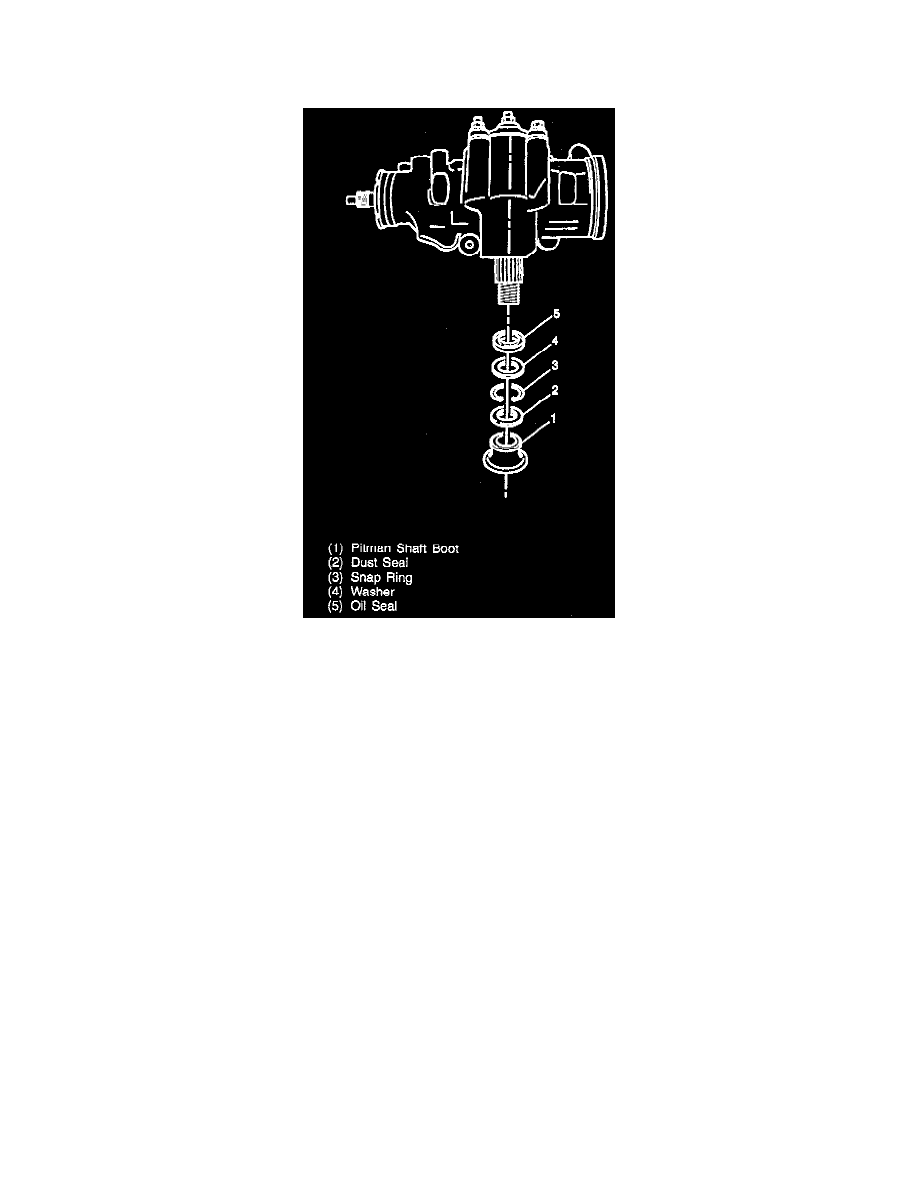
Pitman Shaft Seal Replacement
^
Tool Required:
-
J 4245 Internal Snap Ring Pliers
-
J 6219 Seal Installer
-
Or Equivalents
REMOVAL
NOTE: Mark the position of the pitman arm to the Pitman shaft.
Remove or disconnect the following:
1. Pitman arm from pitman shaft.
2. Pitman shaft boot (1).
3. Dust seal (2).
4. Snap ring (3) using J 4245.
-
Loosely install Pitman arm and nut on shaft. This is required to remove seal.
-
Position a drain pan under the steering gear.
-
Start the engine.
-
Turn the steering wheel from stop to stop bouncing the wheel off the stops.
-
Stop the engine.
5. Remove nut and pitman arm.
6. Washer (4) and seal (5).
7. Inspect the following:
-
Pitman shaft seal surfaces for roughness or pitting. If pitted, replace the shaft.
-
Housing for burrs. Remove the burrs before installing the new seals.
8. Clean the pitman shaft and seal areas using a crocus cloth.
INSTALLATION
CAUTION: Always use the correct fastener in the proper location. When you replace a fastener, use ONLY the exact part number for that
application. The manufacturer will call out those fasteners that require a replacement after removal. The manufacturer will also call out the fasteners