
C 3500 HD Truck 2WD V8-6.5L DSL Turbo VIN F (2001)
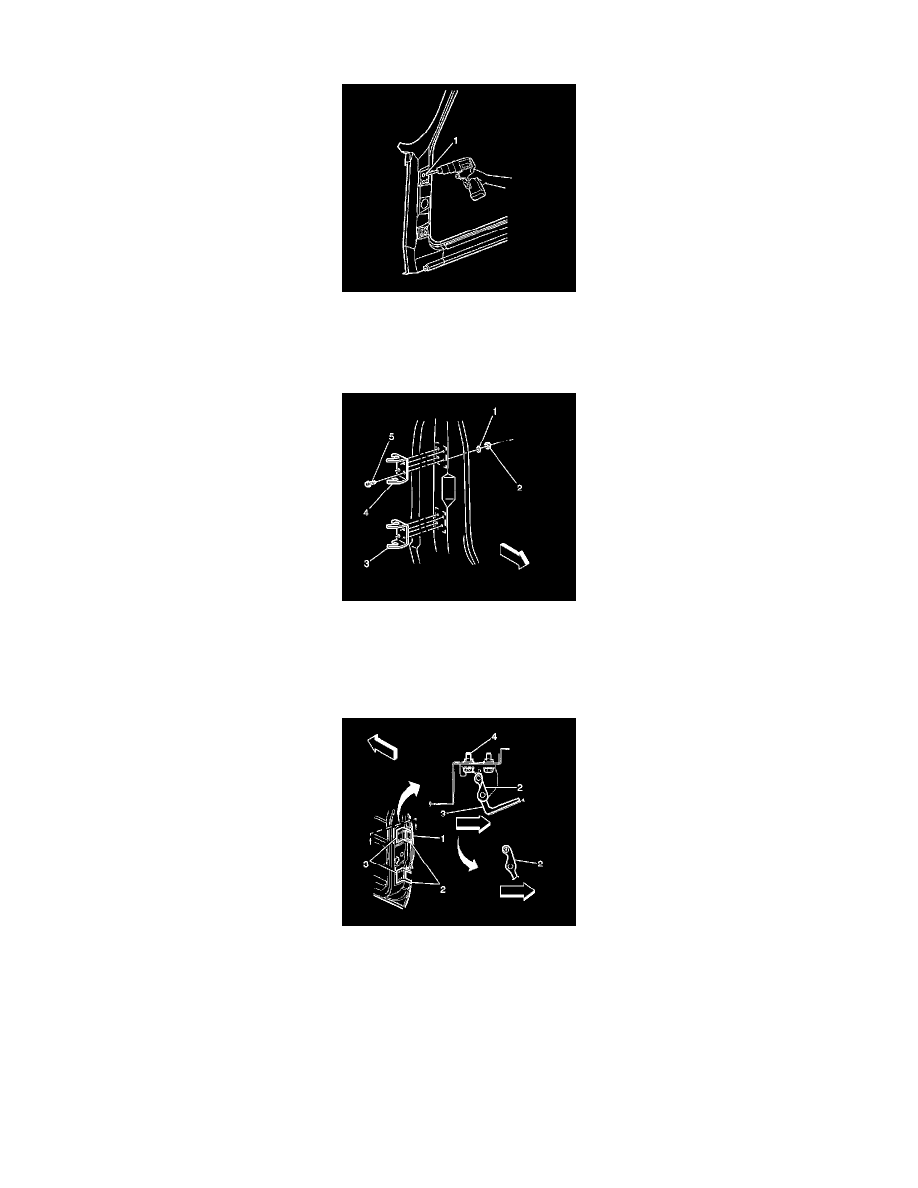
2. Position the service hinge within the scribe marks on the hinge pillar.
3. Center punch each bolt hole location.
4. Drill a 3 mm (1/8 in) pilot hole (1) at each center punch location.
5. Using the pilot hole as a guide, drill 10 mm (7/16 in) hinge bolt attaching holes.
6. Apply an approved anti-corrosion primer to all bare metal surfaces.
7. Apply full-bodied caulk to the entire hinge mounting surface to ensure proper seal.
Notice: Refer to Fastener Notice in Service Precautions.
8. Align the hinge (3,4) and install using the fasteners supplied (1-5).
Torque hinge bolts to 35 N.m(26 ft lb).
9. Before installing the access door (1), modify the door side of the hinge upper and lower extensions (2).
The replacement hinge must maintain a gap of 2 mm between the door side of the hinge and body side hinge bolts.
Important: Maintain a wall thickness of 2 mm around hole at end of extension.
10. Clean, prepare and refinish all surfaces as necessary.
11. Install and align all related panels and components.